Creating new objects
You can create products and classifications one at a time within the Browse perspective.
Why single products? As an example, a new product may be needed for the internal record-handling workflow, which does not originate from external record imports (PDX). This becomes necessary for planning purposes in the case for products that do not exist yet (a placeholder is required), which will be enriched by a vendor at a later time. Such products are often referred to as “white label” products, which are sold by retailers with their own branding and logo, but the products themselves are manufactured by a third party.
You can also create classifications using the same methods described below. Classifications can be used to build hierarchies and objects that bundle other objects into organized groupings, or product objects can be linked into classifications to provide alternative categorizations of objects that vary from the product hierarchy structure.
Choosing a node
The examples below mainly show the product creation process. The process for creating classifications within a classification hierarchy will be the same or similar.
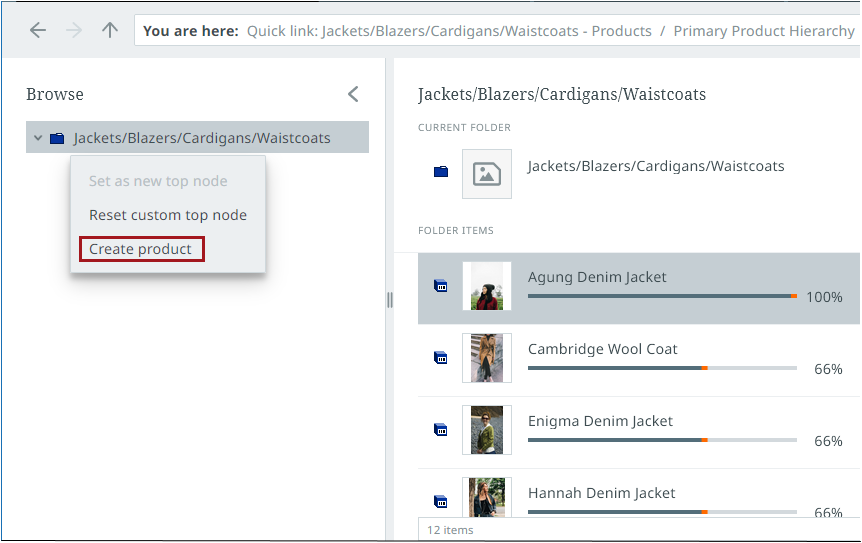
Where in the hierarchy the product or classification is created is derived from the currently selected location in the Browse perspective. Right-click on the Browse perspective menu at the point where you want to add the object.

Valid options are enabled as shown in the example above:
Set as new top node: Resets the top node of the browse tree.
Reset custom top node: Returns the top node to the default node set for the Browse perspective.
Create product / Create classification: Creates a new object.
Any invalid options for the node that you are on will be grayed out.
Creating a new object:
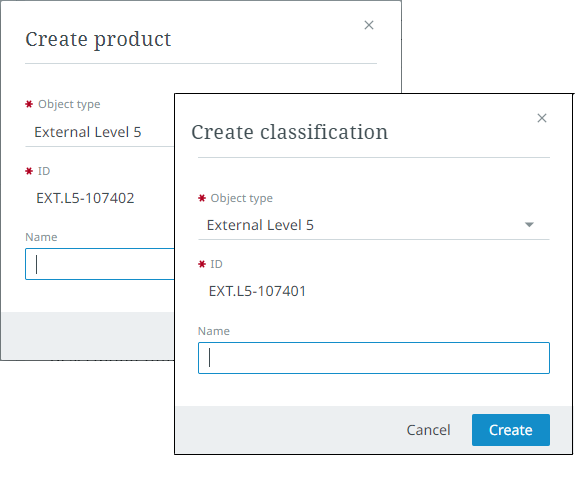
The "Create product" or the "Create classification" dialog appears, depending on the type of new object you are creating:
-
Enter the Name: A name suggestion is given, if configured to do so.
-
Select the Object type: Only valid object types are shown.
-
Enter the ID: If auto-ID is configured to be used for the selected object type, then this field will populate for you.

Select Create to finish (or Cancel to start over).
Enriching objects
Upon creation, you will be taken to a details screen where you can enrich the newly created object and, if desired, initiate it to a workflow (Toolbar / Menu).

If the newly created object cannot be viewed in the current perspective, then a notification displays. For example, if the Browse perspective data set is filtered and the filtering is not applicable to the new product or classification, the screen will not automatically navigate to the new object but will provide information on why a detailed view cannot be shown.

You can access these objects by navigating to them via normal means.