Users browsing through data using the Tree navigator sometimes want to focus in on a small subset of the data in order to perform the same action to all of the selected objects. A mapping condition called Multi Node Selection Condition allows for multi-view and/or multi-editing. When multiple objects are selected from the Tree, the appropriate list view will be shown to the user, as defined by the configuration of the Web UI screen.
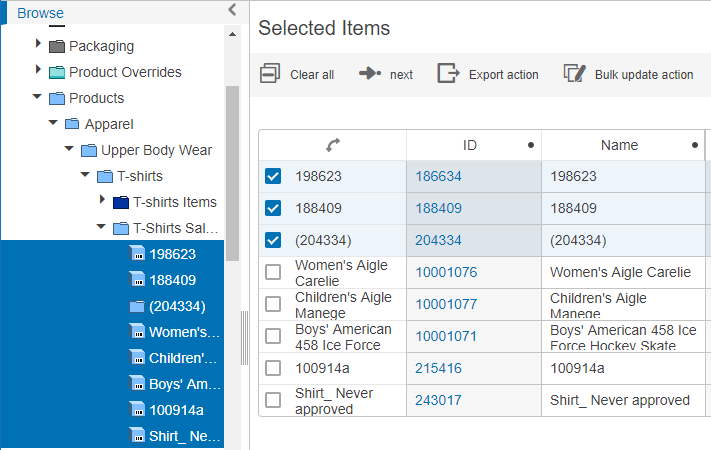
Setting up the Multi-Select from Tree Navigator
To set up the Multi-Select from Tree Navigator function a new screen of the type Multi Selection Screen must be configured.
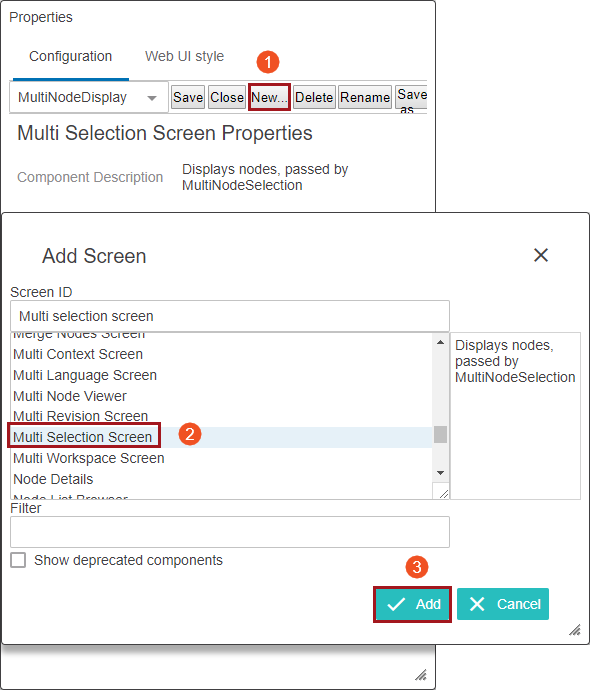
- This screen is added by selecting "New" in the Portal Designer and then scroll down the list to find the Multi Selection Screen. For more information on configuring screens, refer to the Design Mode Basics topic in the Web User Interface Documentation here.
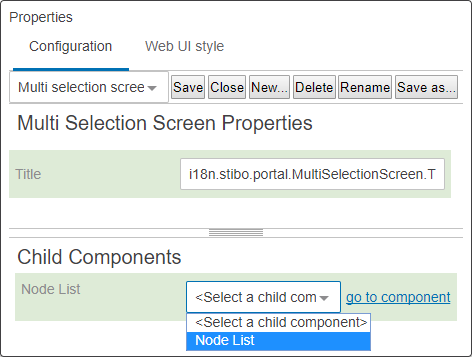
- Next configure the screen with a Node List (child component) and set it up with the desired Display Modes.
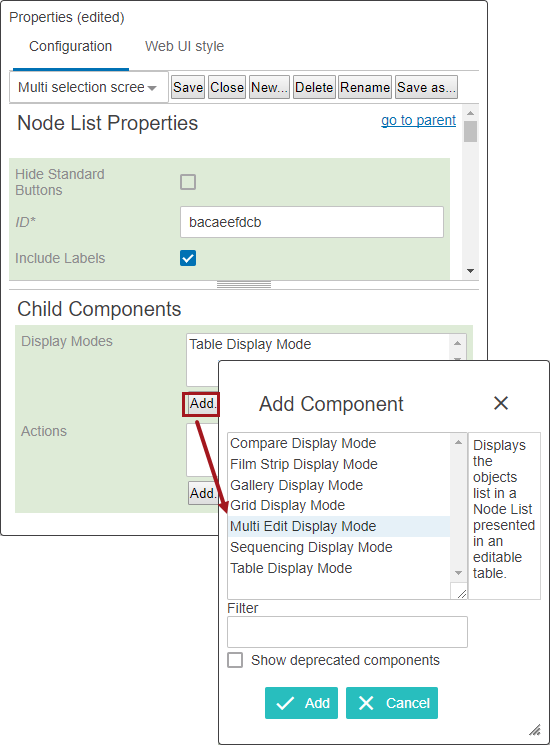
- If the purpose is to edit the objects selected in the Tree navigator, then be sure to select the Multi-Edit display. When your components are added, press save.
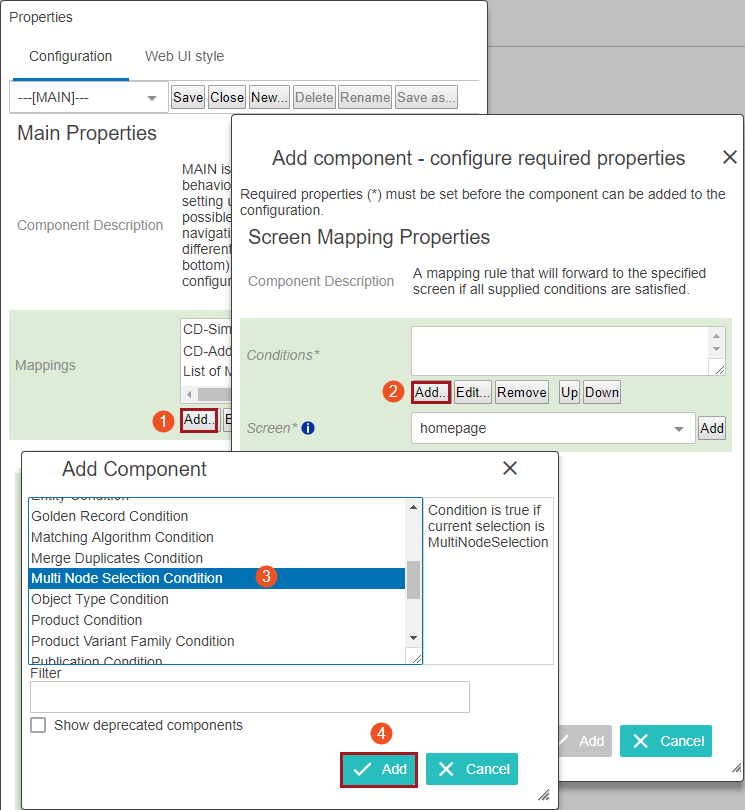
- After configuring the screen, go to "MAIN" in the designer. Under Mappings click 'Add' to open the Screen Mappings dialog. Click 'Add' under Conditions and find the Multi Node Selection Condition in the list. Click 'Add' to select the mapping condition and thereby add it to the list of Conditions.
- Now the mapping condition must be paired with a screen. Select the Multi Selection Screen that was configured for the purpose of showing multiple objects. The selected screen is the screen that the condition will forward to when then condition is triggered as the user navigates the Web UI. Press save again.
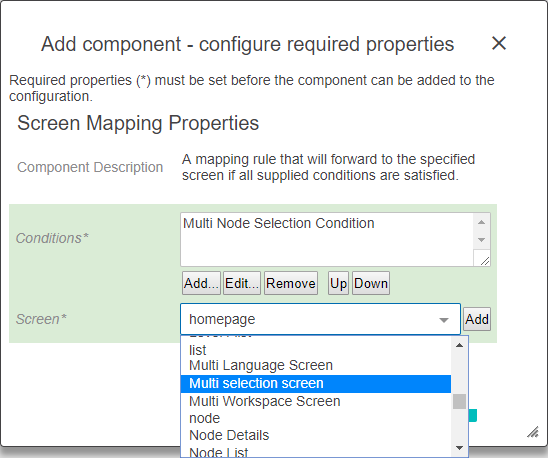
Note: A dedicated screen (Multi Selection Screen) must be configured to display the multiple objects selected from the tree navigator.