Products that have been added to a channel can be set to automatically submit through scheduled automatic submissions. The auto-submission process can be used in both direct and configured channels. This documentation topic will use the direct channel Acme as an example.
Creating a Scheduled Auto-Submission
Accessing the Scheduler
-
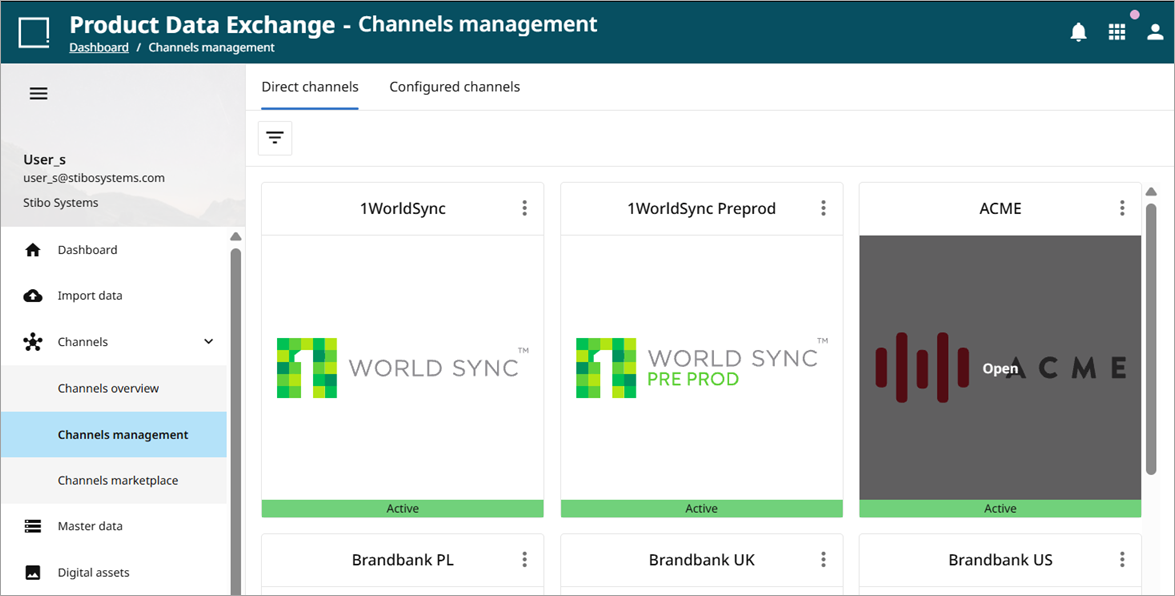
Expand Channels from the sidebar menu and click 'Channels management.'
-
Hover over applicable channel and click 'Open.'
-
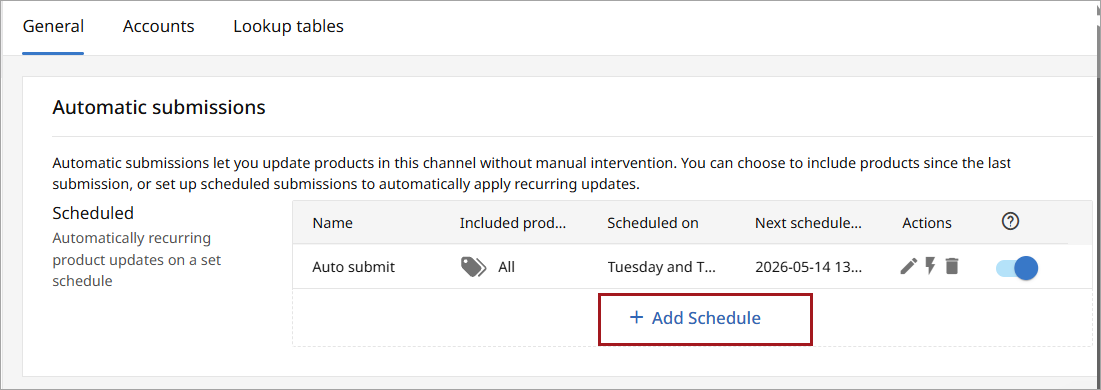
On the General tab, scroll down to the Automatic submissions section. To add a new schedule, click the '+ Add Schedule' button.
-
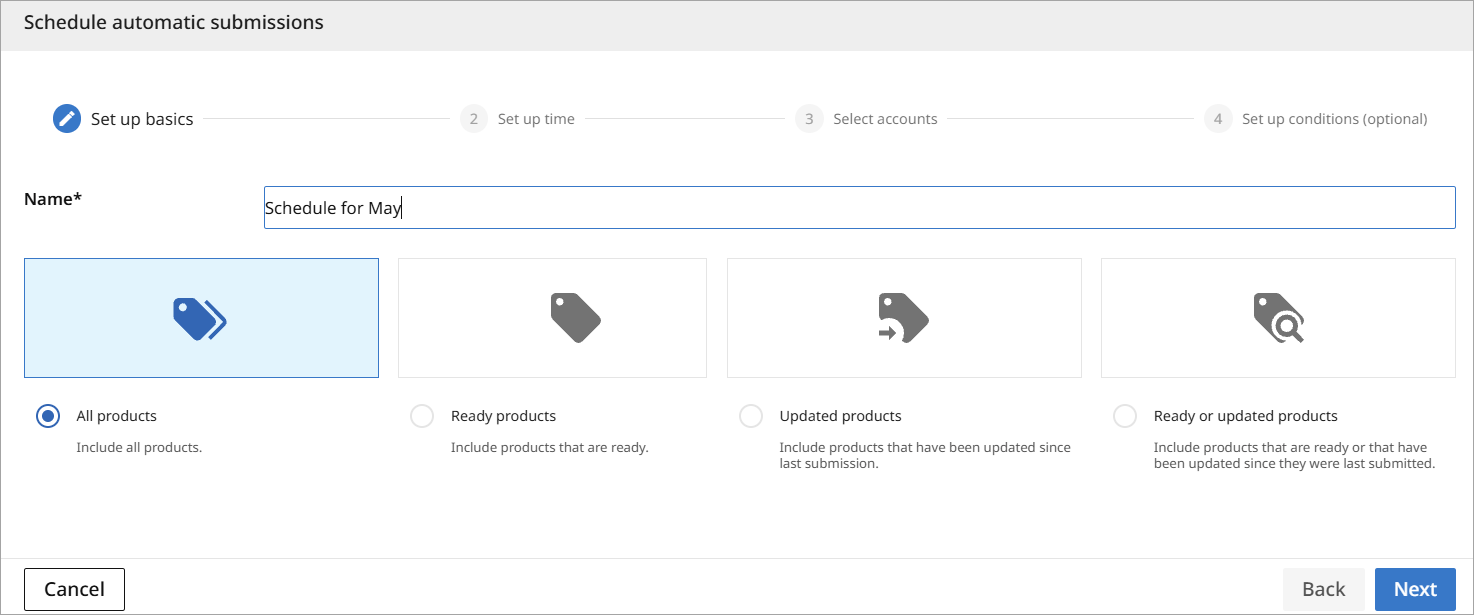
The scheduler popup will open. The scheduler allows you to configure the specific actions of the new schedule. For our example, we have named our new schedule 'Schedule for May.'
Setting Up a Schedule
When setting up a schedule, you will need to perform the below steps:
Set up basics: to set up the basics of the scheduler, you need to name the new schedule and to select which products should be automatically submitted (all, updated, ready or updated).
-
All—include all products
-
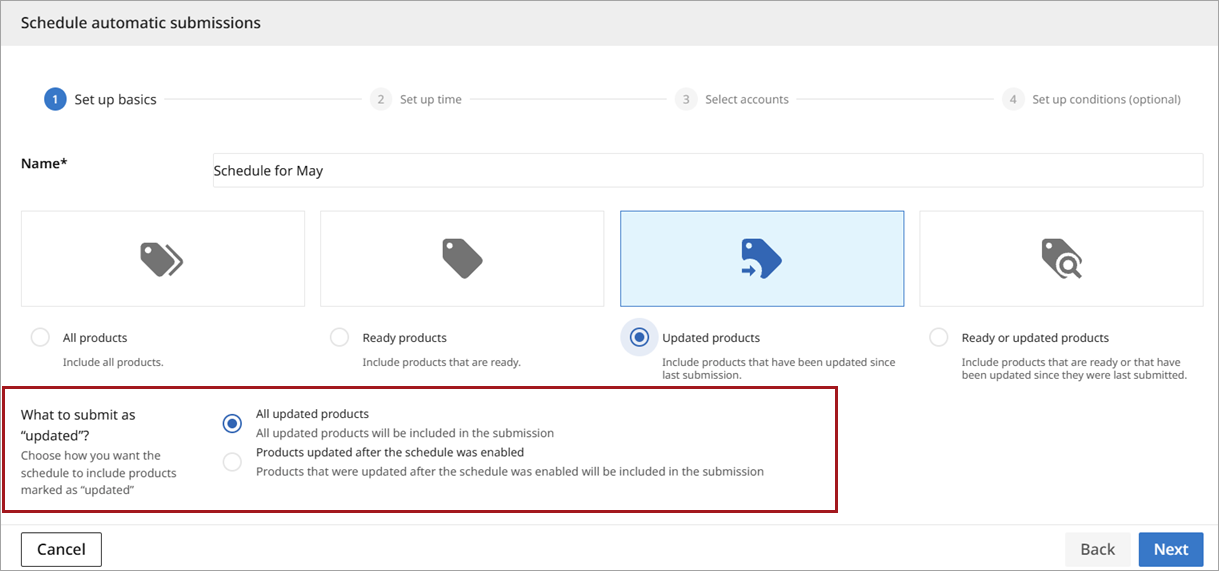
Updated—include only products that have been updated since the last submission.
-
All updated products
OR
-
Products updated after the schedule was enabled
-
Ready or updated—include products that are ready or that have been updated since they were last submitted.
-
All updated products
OR
-
Products updated after the schedule was enabled
Selecting 'All products' or 'Ready products' will take you immediately to step 2 of the process. Additional information is required if you select 'Updated products' or 'Ready or updated products' as in the screenshots below. Steps 2 and 3 are identical for any product type selection.
Updated products
Ready or updated products
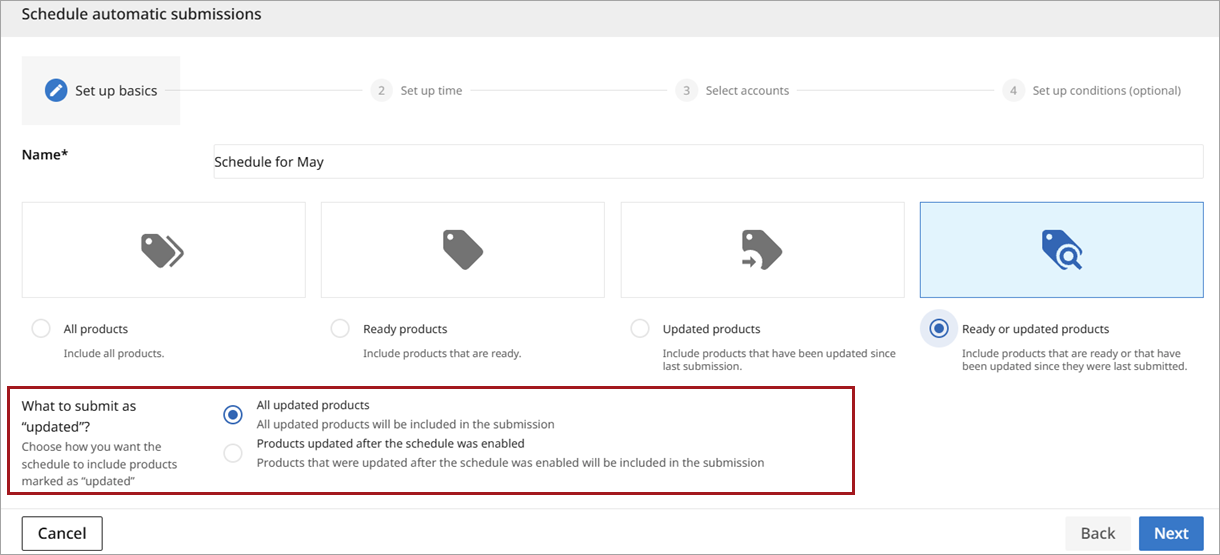
Note: If the updated products option is selected, the ‘update’ flag is only set on the default language (usually English). Auto-submissions for ‘updated’ products look for this flag to determine which products should be submitted. PDX does not detect and ‘flag’ changes to any secondary languages used, so submissions will only be sent if the default language value changes.
-
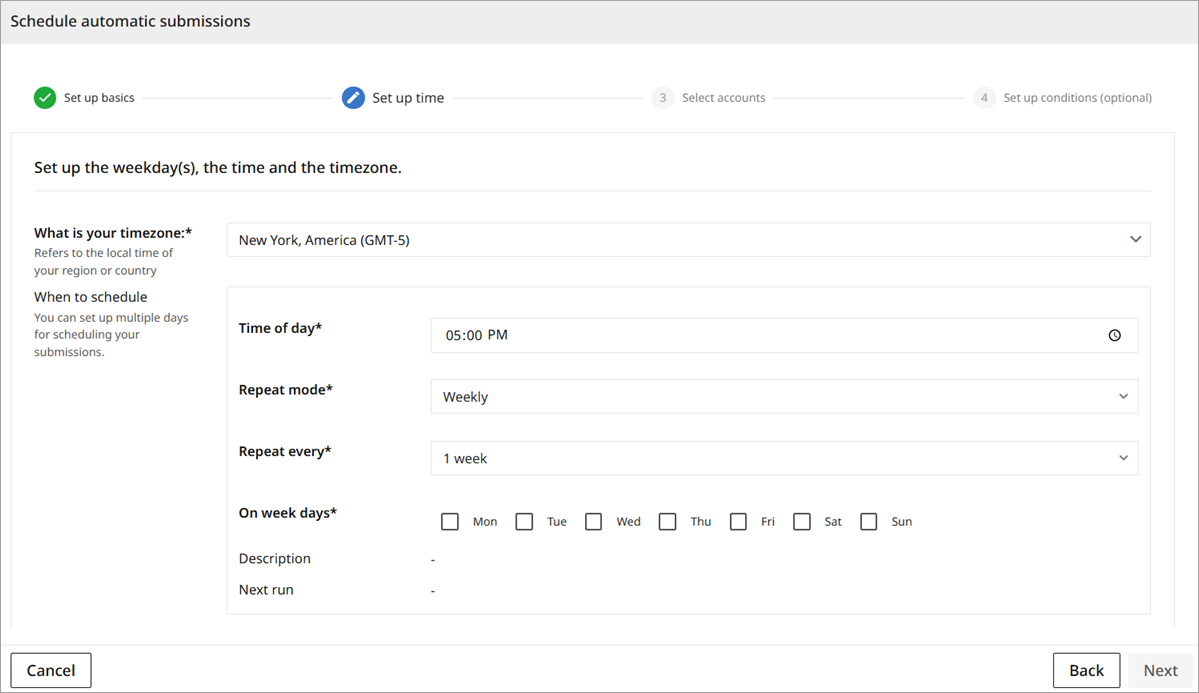
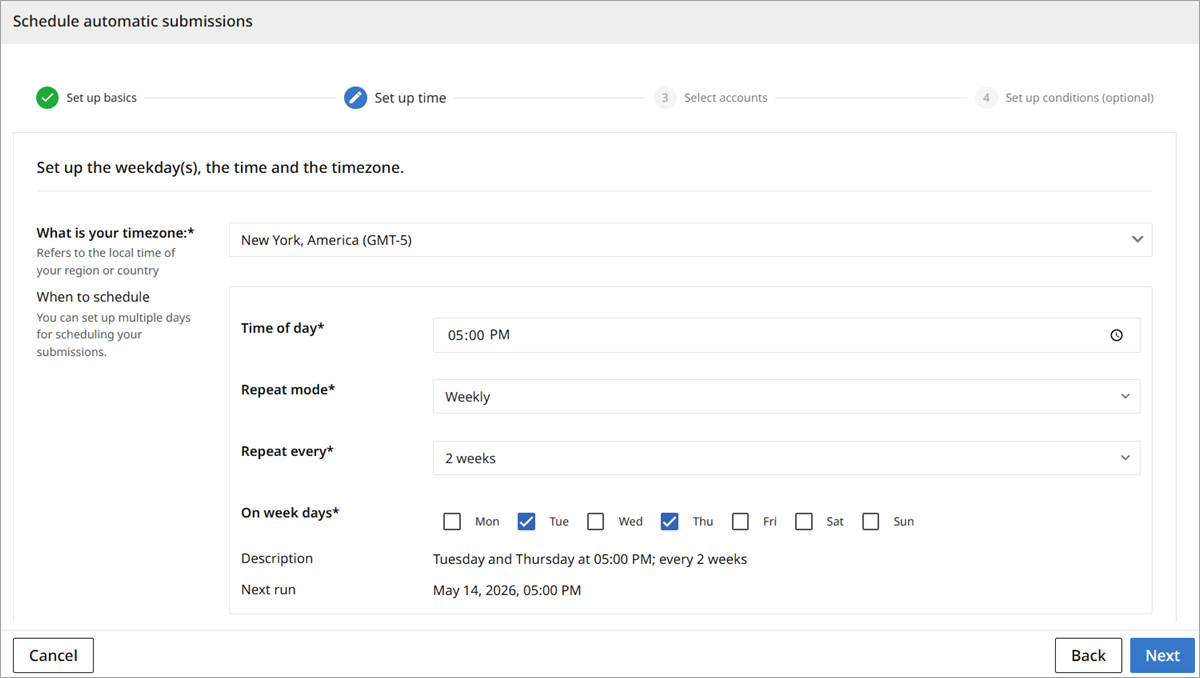
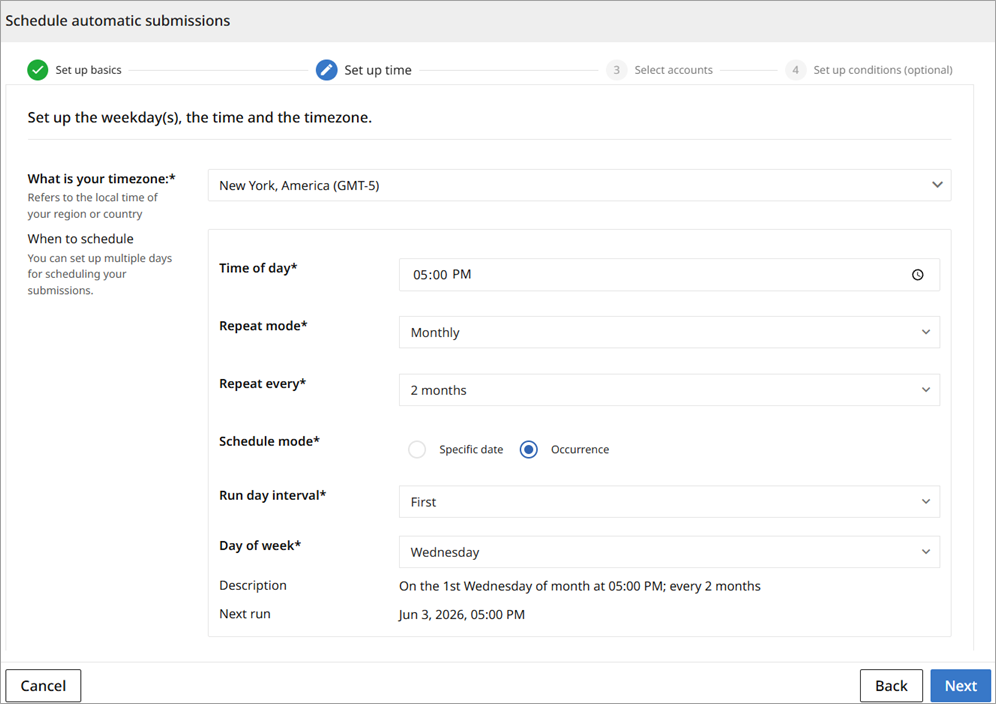
Set up time—you will need to select weekday(s), time, and timezone. The schedule can be set to repeat weekly or monthly.
-
Weekly: the weekly schedule can be set to run every 1-52 weeks, and one or multiple weekdays can be selected.
-
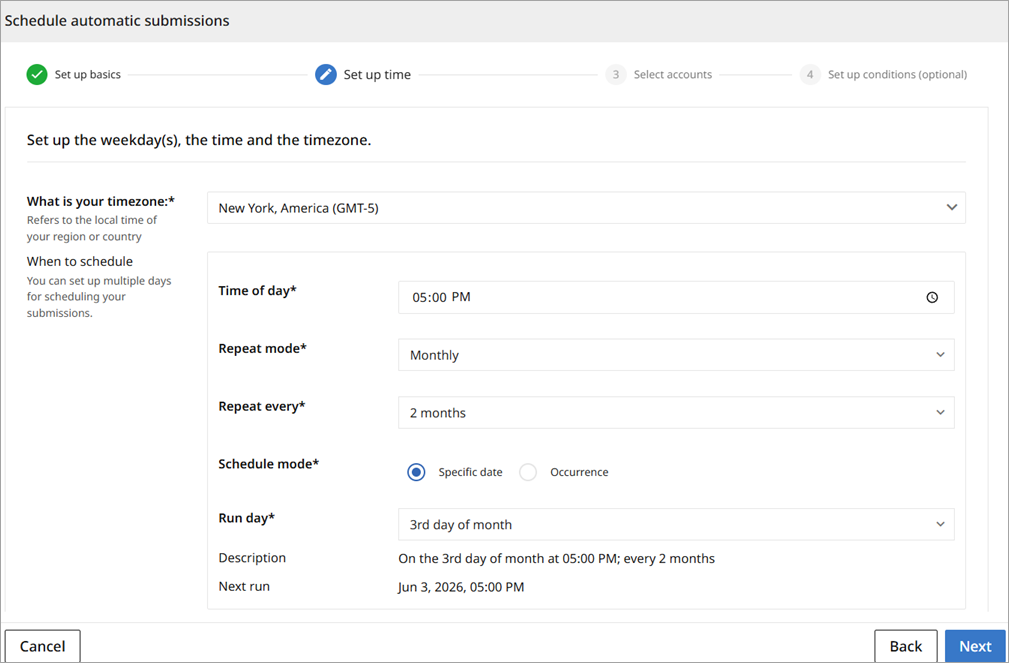
Monthly: the monthly schedule has two settings for scheduling. Both options provide frequency of month(s).
-
Specific date in a month
-
Monthly occurrence: specific day of the week and its occurrence in a month (first, second, third, etc.)
-
-
-
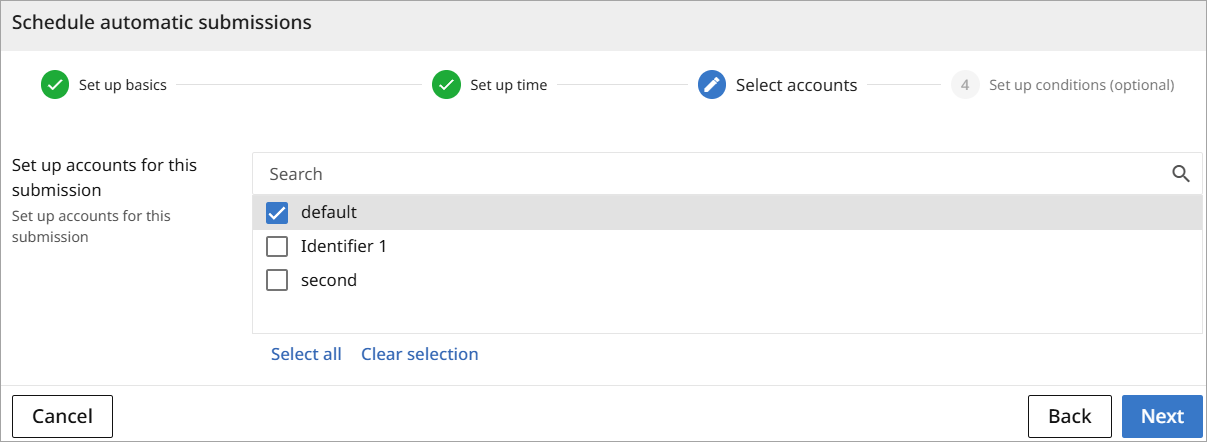
Select account—if there are multiple accounts set up in a channel, you can choose one or more of those accounts to receive notifications regarding the submission(s).
-
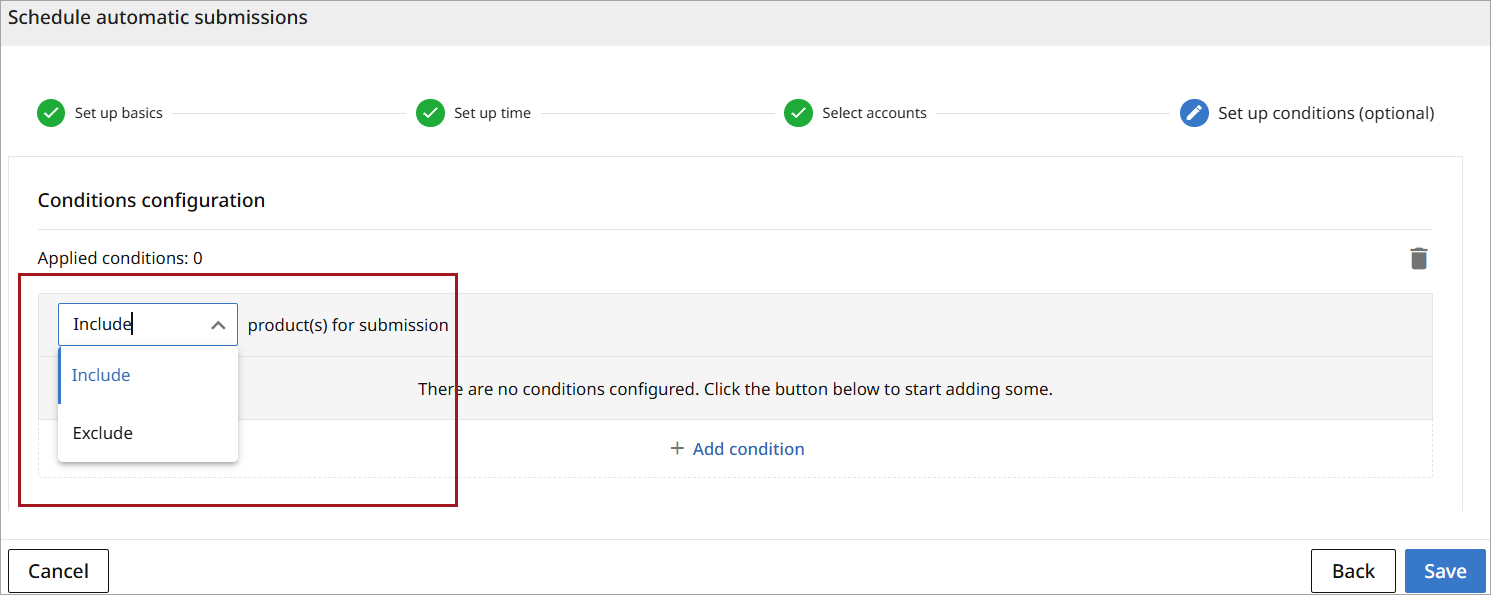
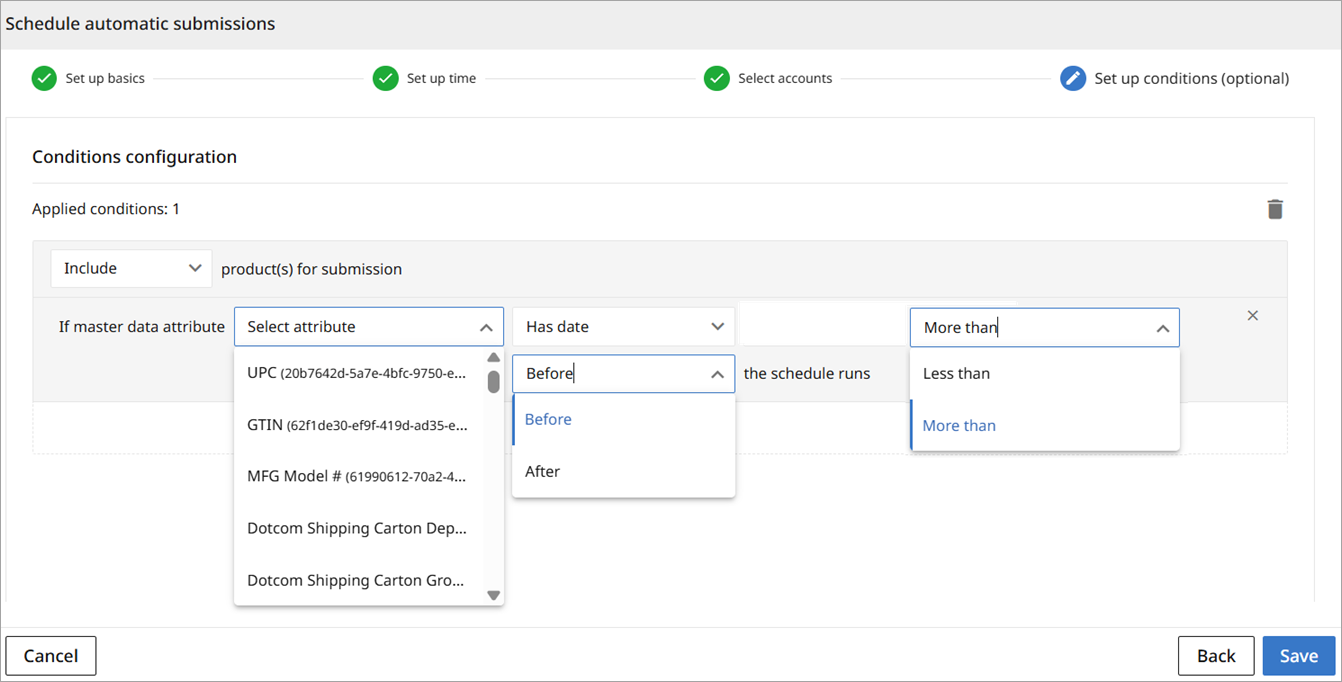
Set up conditions—you can set condition(s) to include or exclude products that meet those conditions. Setting condition(s) is optional. Conditions can be removed by clicking the trash can icon to the right of 'Applied conditions.'
Note: Set conditions only check English (or other default language). No additional languages are checked for conditions. Products that do not pass channel validation or comply with any configured condition(s) will not be submitted.
-
First, identify if the product(s) should be included or excluded based on the condition(s).
-
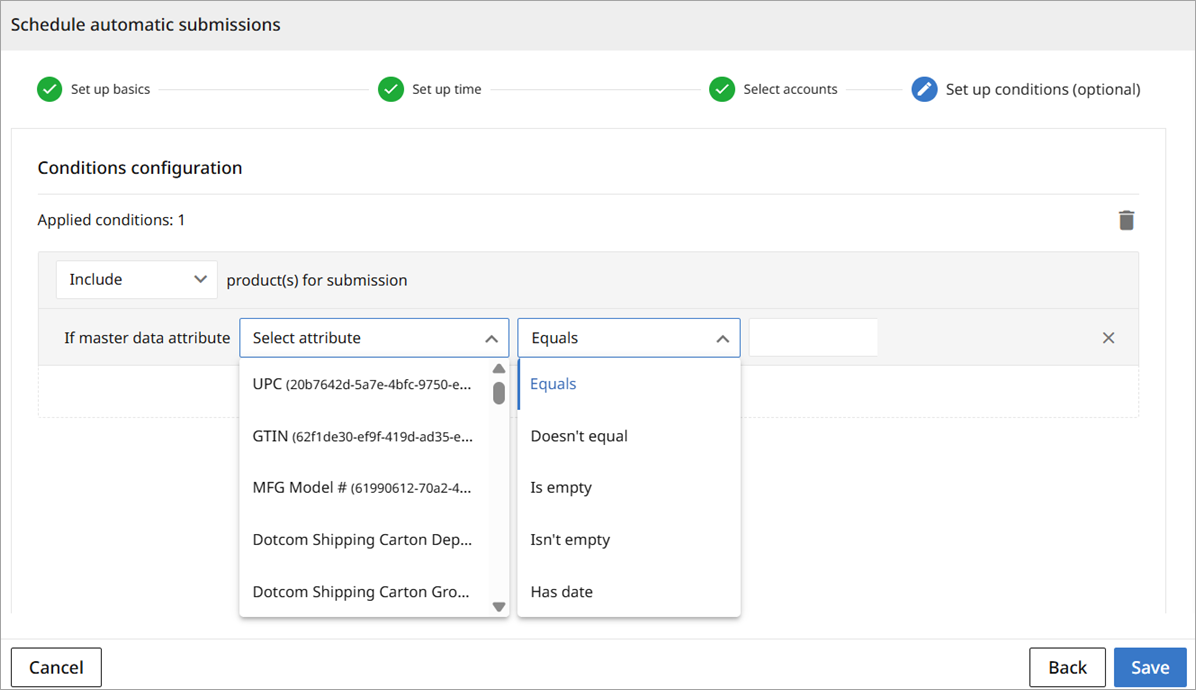
Next, after clicking the '+ Add condition' button, select the attribute, condition type, and value to complete the condition creation process.
-
The third column (value) will not appear if the condition type does not require a value for completion (is empty, isn't empty)
-
Selecting a condition type of 'Has date' will require additional information to complete the schedule.
-
-
Activating or Disabling a Schedule
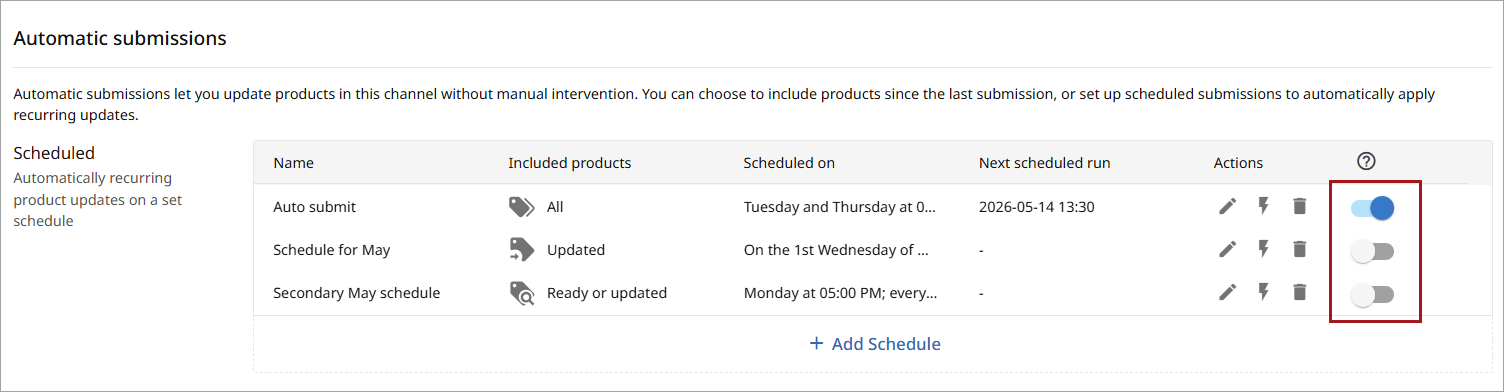
To activate or disable a schedule, toggle the blue button on or off. Disabling a schedule does not remove it. Instead, it allows a user to temporarily pause a schedule if necessary.
Editing a Schedule
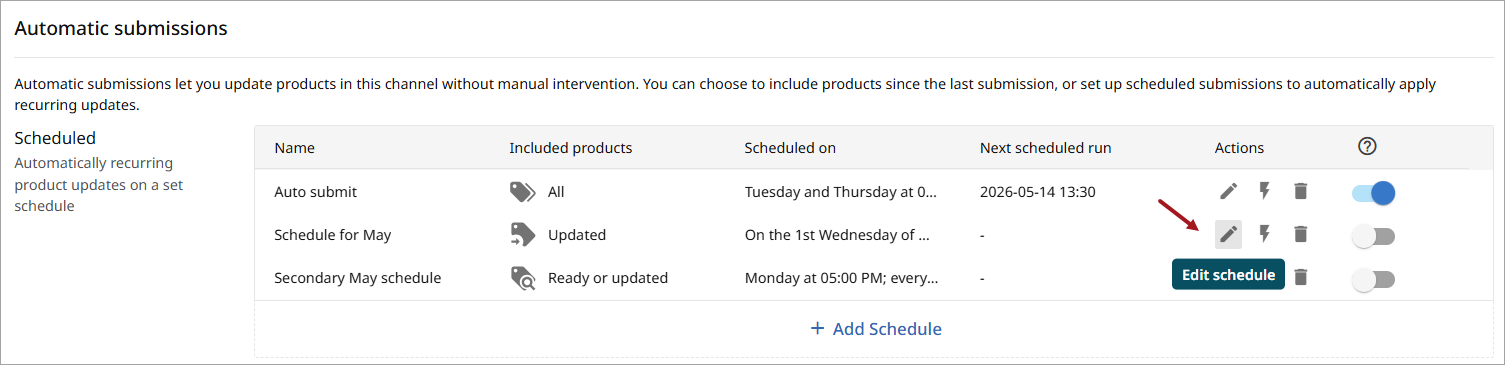
To edit a schedule, click the pencil icon to open the original 'Create schedule' options. The options and steps from the original schedule creation will be available to modify. Click on each pertinent section / step as described in the Setting Up a Schedule section of this documentation to modify and save the change(s) to update the schedule.
Running a Scheduled Submission
To run a scheduled submission on an ad hoc basis, click the lightning bolt icon. This allows you to run a scheduled submission immediately, disregarding the configured schedule. 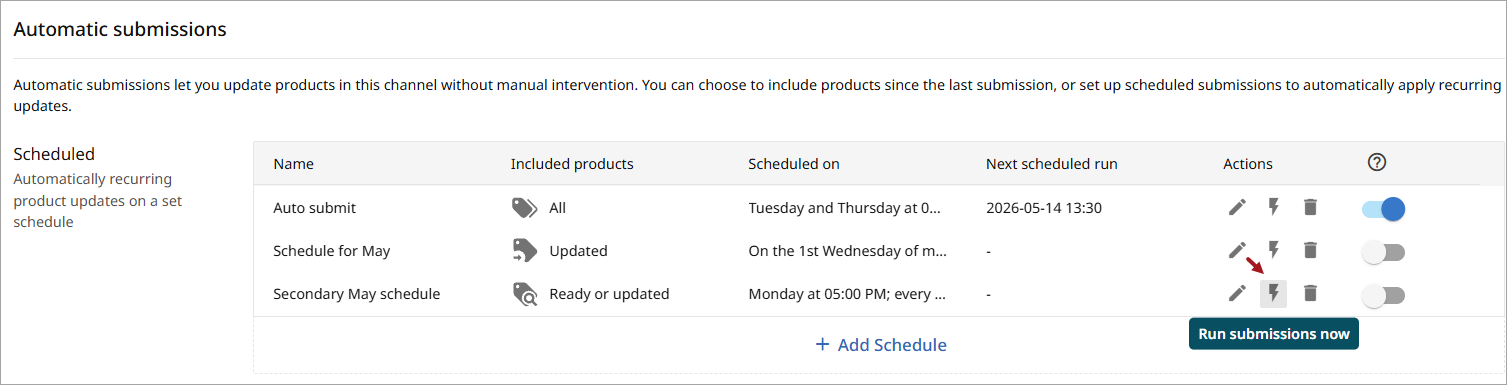
A popup will open asking for confirmation prior to the running the submission.
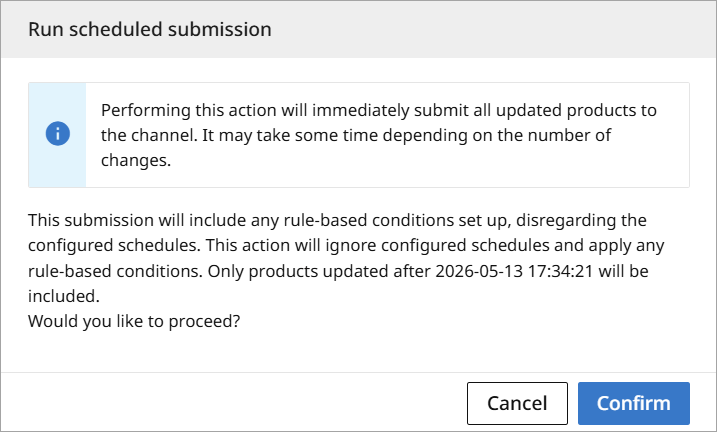
Note: Updated products will be affected, and this process may be time consuming.
Deleting a Schedule
To delete a schedule from a channel, click the trash can icon. The schedule will be permanently removed from the channel.
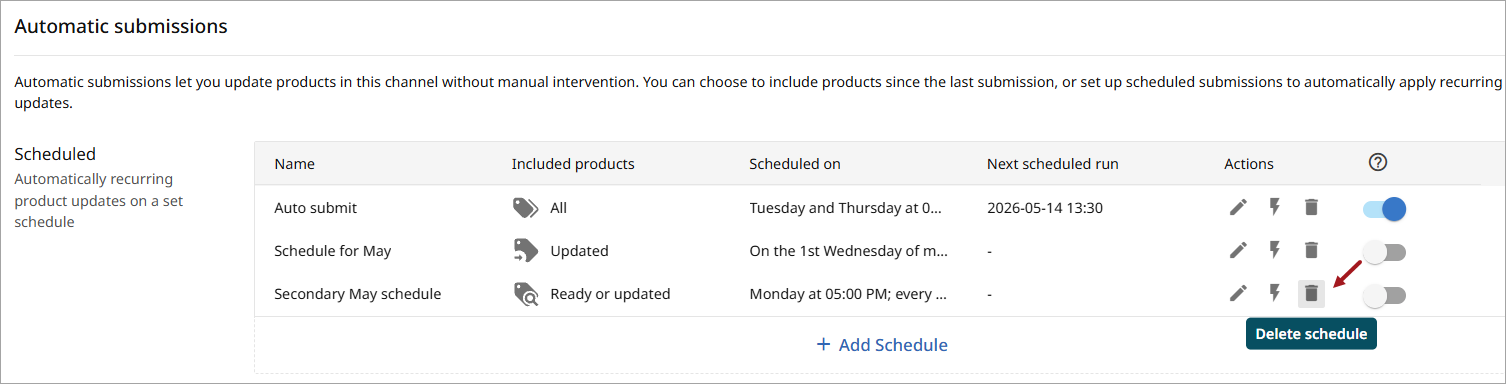
Note: Removing a schedule cannot be undone once performed.