This topic details how to map a view to a workflow state (or states), as well as how to map views to specific users or user groups. When no views or mappings are configured, all states in the workflow are displayed on the STEP Workflow navigator tab (including parallels, clusters, and final states). When a workflow includes automated, system, parallel, and/or cluster states, and users will be interacting with the workflow in the STEP Workbench. It is recommended to create mappings so that only the user states (e.g., states in which a human must interact) are present on the STEP Workflow tab.
Prerequisites
A workflow has been created and one or more views have been created for the workflow. Both the view(s) with an ID assigned and the state(s) must already exist since the mapping task connects a view to a particular state or set of states. Only views with an ID assigned are available for selection in the mapping. For more on creating views, refer to the Configuring Views for Workflows topic.
Configuration
-
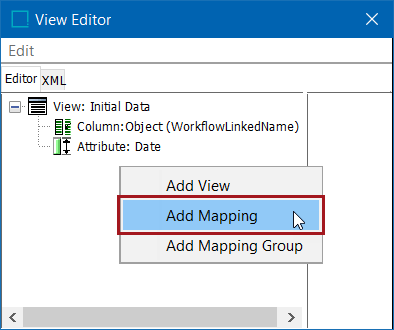
To add mapping to a view, right-click anywhere on the left hand side of the editor panel and select Add Mapping.
-
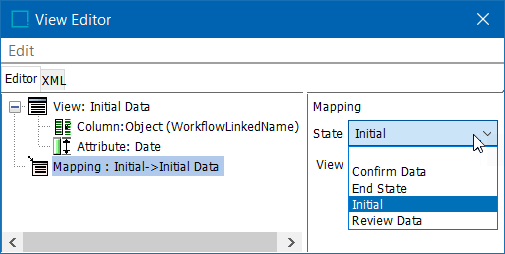
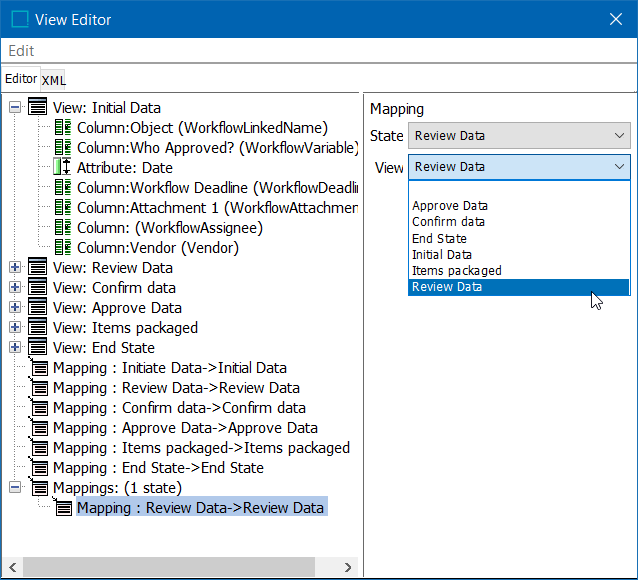
In the right-hand panel in the View Editor window, select the state from the dropdown for which you want to apply a view.
-
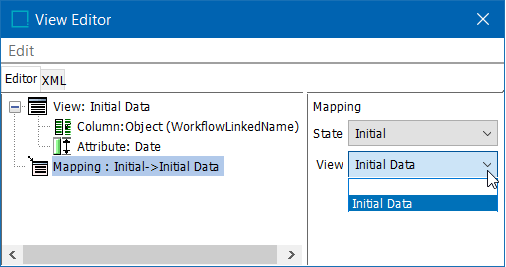
From the View dropdown, select the view that you would like to apply to the state.
-
Repeat the above steps as many times as needed so that each state requiring human interaction has a view assigned to it. The same view can be applied to multiple states.
-
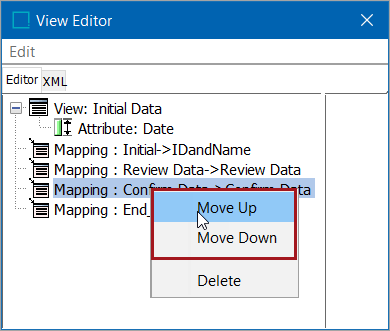
Sequence the mappings in the appropriate order by right-clicking on a mapping and selecting 'Move Up' or 'Move down' to define the order in which the views are presented to the user on the STEP Workflow navigator tab. Mapping sequence is typically assigned alphabetically or sequentially (e.g., the first state in the workflow is sequenced first).
-
Save the workflow, exit the STEP Workflow Designer, and go to the STEP Workflow navigator tab.
-
Select the workflow for which view and mapping is being created and expand the section. Only the states for which a mapping was created are visible.
Workflow User / Group Specific Mappings
You can create mappings that only apply to specific users or user groups so that only users in a specific group can view a given state. For example, only administrator users have access to automated and system states to intervene in case of errors, or users in a specific group can view tasks within the same state with different views, such as an end user who needs to view different data than an administrator.
-
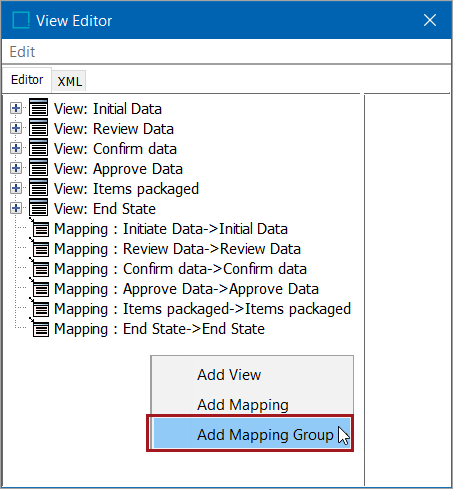
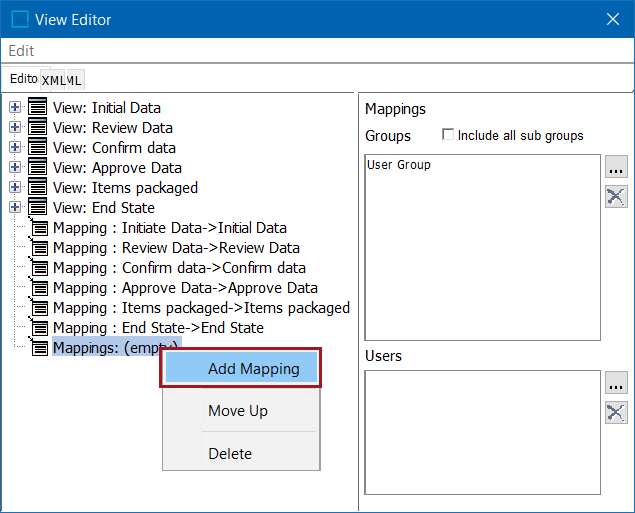
To create user / user group specific mappings, right-click the left panel in the View Editor, and select Add Mapping Group.
-
Select the user(s) and/or group(s) you want the mapping to apply. There are separate fields for if a group is added verses a single user.
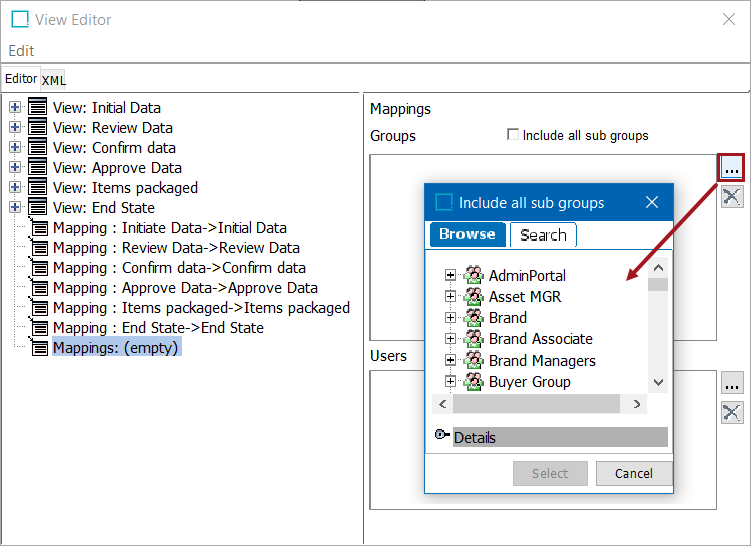
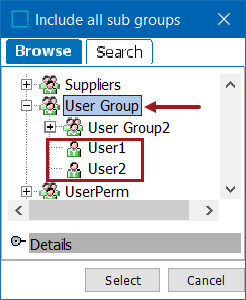
Check the Include all sub groups box if subgroups within the group, as well as direct users in the group, should have access to the view.
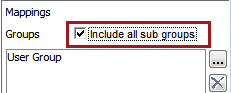
In the example below, checking the Include all sub groups option and selecting the Restricted User group, this would include the 'restricted' user, as well as 'restricted2' and 'restricted3.'

If the Include all sub groups box is not checked, only the top level users directly in the group have access to the view. For example, with Restricted selected, only 'restricted2' and 'restricted3' have access to the view.
-
When all users or groups are added, right-click on the Mappings: empty node and select Add Mapping from the context menu.
-
On the States and Views dropdown menus, choose the appropriate state and view for the user or groups to have access to.
Important: When a state is mapped to a view both inside and outside a mapping group, and a user logs in who is either directly specified on the mapping group, or member of a group that is specified, the mappings will be evaluated from the top down and the first one that matches will be used. In other words, if the same user is in two different groups with different privileges, but both groups are mapped to the same state, then whatever group comes first in the mapping dictates the allowable privileges for that user. Thus, the order of mappings and mapping groups is significant and mappings must be sequenced appropriately.
-
Close the View Editor and save the workflow.