When working with objects in Web UI, a Start Workflow Action button can be added to any Node Details screen. This allows users to work with object data and then initiate the object into a workflow with a click of a button.
Detailed information about how to set up a Node Details screen is outlined in the Node Details Screen topic.
These are the steps to add / configure the button:
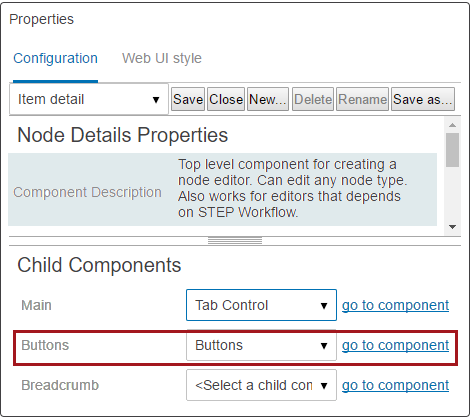
- Enter the Web UI designer and selected the screen ID for the applicable Node Details screen.
- Within Node Details Properties, select Buttons from the Buttons parameter dropdown, then click go to component.
- On Buttons Properties, click the Add button below the Actions field, then select Start Workflow Action from the 'Add component' list and click Add.
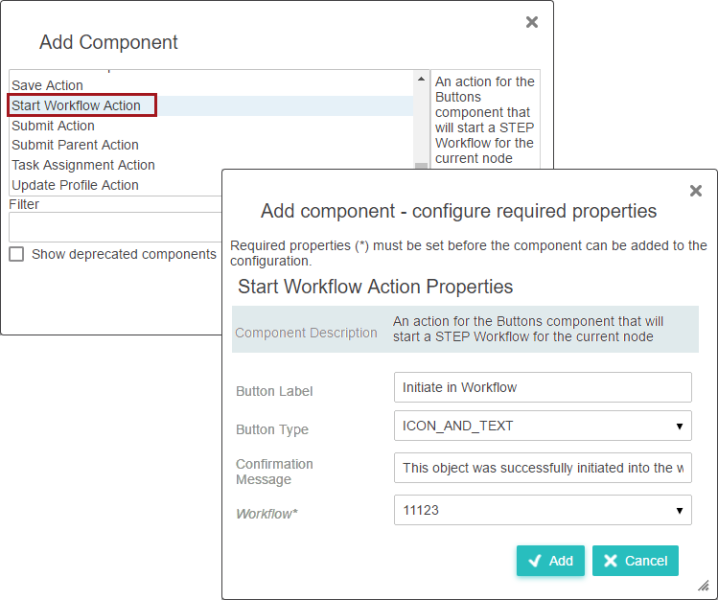
- Within the Start Workflow Action Properties, all parameters are initially blank except for Workflow (defaults to first existing workflow in STEP). Make your selections and click Add.
- Workflow* is the only required setting. This is the workflow that you want to initiate items into.
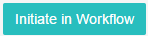
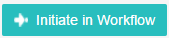
- The Button Label is the text you want to appear in the button displayed on screen.
- Select from ICON_AND_TEXT, ICON, and TEXT using the Button Type dropdown. If you select TEXT or ICON_AND_TEXT and the Button Label parameter is empty, the default text 'Start STEP Workflow' will display.
|
Button Types |
Button Displayed As |
|---|---|
|
ICON |
|
|
TEXT |
|
|
ICON_AND_TEXT |
|
- The Confirmation Message will display to the user once a successful initiation of the object is complete. If the parameter is left blank, a 'STEP Workflow "Sample Workflow (3 states) with Variables" has been started' message will display, with the name of the workflow displaying within the quotation marks.
- Click the Save button in the designer and Close.
Refer to the Initiating Objects in a Workflow using Web UI topic for information regarding how to use initiate an object in to a workflow using the Start Workflow Action.