In support and other situations, it is often relevant to be able to observe exactly what another user accesses, including error messages. Impersonation allows a privileged user (impersonator) to log in with their own authentication credentials and impersonate another user (target) to view these issues.
To set up the privileges for impersonation and learn about how impersonation changes and actions are recorded, refer to the Web UI User Impersonation Setup and Reporting topic in the System Setup documentation.
The impersonator impersonates another user by selecting the user in one of the user impersonation components (shown below). Upon login to the Web UI, the impersonator will be taken to the homepage and can begin acting as the impersonated. The impersonator can continue switching between impersonated users and return to act as the impersonator user as needed.
Impersonating via the Impersonate User Widget
Information regarding how to add widgets to a homepage can be found in the Adding Widgets to a Homepage topic.
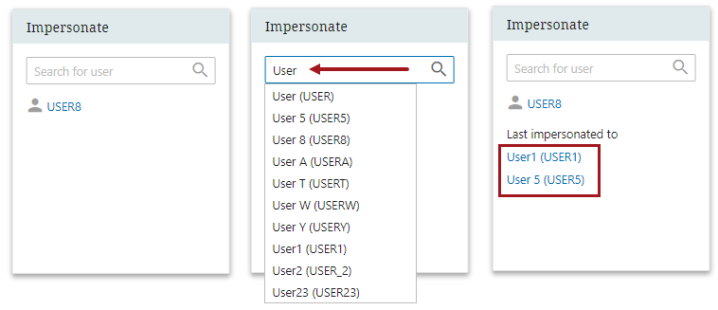
If an Impersonate User Widget is configured to display on a Web UI homepage, then you will type the user name into the typeahead 'Search for user' field. Selecting a user and then clicking the search icon ( ) will start the impersonation. If you want to impersonate a user you have previously impersonated, then click a user under 'Last impersonated to' in the widget.
Below is the same widget shown three times in the order described above.
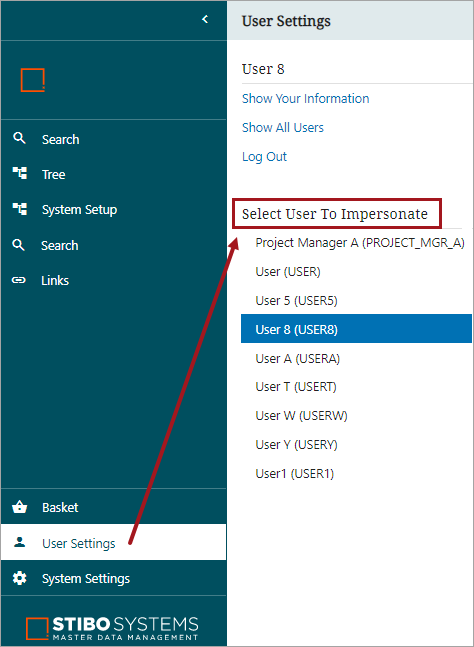
Impersonating via the Global Navigation Panel
If using the Global Navigation Panel, click on User Settings to access the 'Select User to Impersonate' section. Click on the user you wish to impersonate.
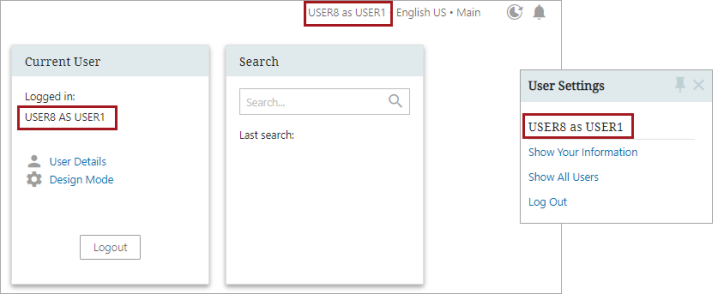
Regardless of the method you use, you will know when impersonation begins by confirming the new system user name in the top right of the screen or, if using, within the User Widget. If using the Global Navigation Panel, the user names displays under User Settings.