User configurable views allow users to work more efficiently with less on-page navigation to find relevant data. Views can be named according to their intended purpose and saved for reuse across Web UI components and screens, as applicable, so users can quickly and easily switch between different views tailored to help accomplish different tasks.
If an existing view does not display the needed data, creating and configuring a more relevant view can easily be done without the Web UI designer.
This topic addresses:
- Prerequisites
- Applying a View
- Creating a New View
- Editing an Existing View
- Copying a View
- Deleting a View
- Renaming a View
- Sharing a View
- Enabling User Configurable Views
Prerequisites
The user configurable view action can be used with the following components / screens: Multi Edit Display Mode (Node List) and the Multi Context Screen. Before a user can view and access the 'Apply view' icon, the admin user will need to have enabled the Enable User Configurable View parameter within the applicable Properties. For more information, refer to the Enabling User Configurable Views topic.
Applying a View
A user can choose to apply a view either created and shared by another user (Shared views) or created by the user (My views).
To apply a view:
- Locate the Apply view icon in the action toolbar.
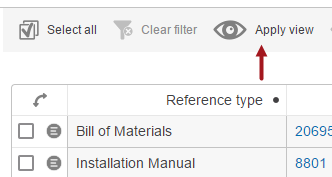
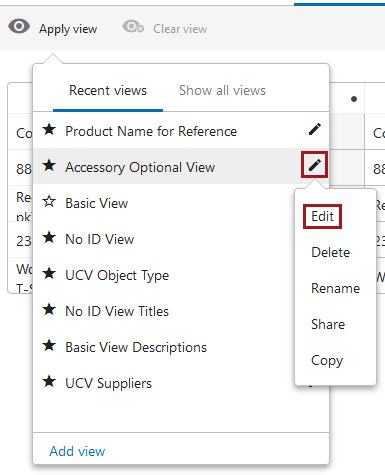
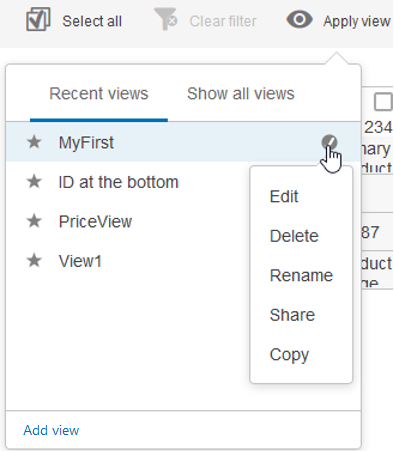
- Click the Apply view button, and a dialog will display with the option to apply a recent view, show all views, or create a new view. Users can also click the edit icon (
 ) to the right of a view's title, and options specific to the view display.

Recent Views
The 'Recent views' tab in the 'Apply view' dialog lists the last eight views the user has used. The list changes dynamically as the user applies different views. The last used or created view is placed at the top.
After clicking the Apply view icon, a user can then click on a specific recent view, and the 'Apply view' dialog will automatically close and the screen will render the selected view settings.
Show all views
If the list of recent views does not include the view a user needs to apply, then the user can click Show all views and the dialog will render the full list of 'My views.'
If the user has access to views that have been created and shared by other users, then those shared views will display in the 'Shared views' tab in the 'My views' section.
Once the desired view is located, click the view name to apply the view settings to the component / screen.
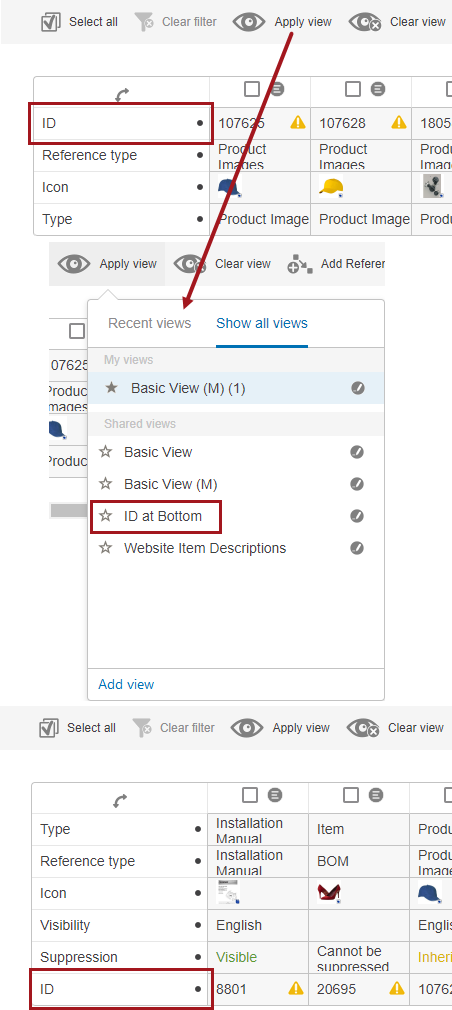
In the screenshot example below, a Node List displays five columns. When the Apply view icon is selected, a list of recent views displays. When the 'ID at Bottom' view is selected the Node List displays the ID row in the last position.
Creating a New View
A user can create new views by clicking the 'Add View' text or by copying an existing view and then editing it.
Steps to create a new view using ' Add View':
- From the 'Apply view' dialog, click 'Add View' and the 'Add view' dialog will display.
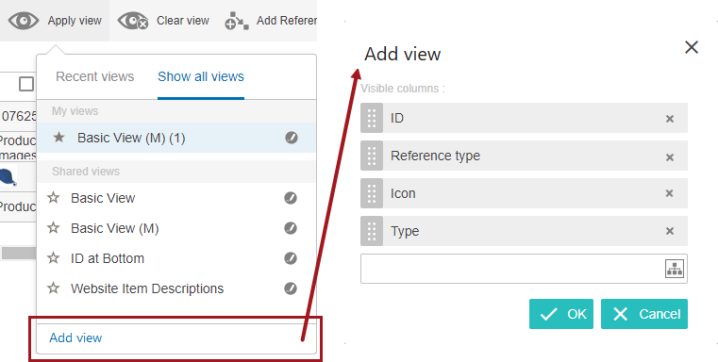
When a user creates a new view using the 'Add View' link, the 'Add view' dialog will list different Visible columns based upon different component settings.
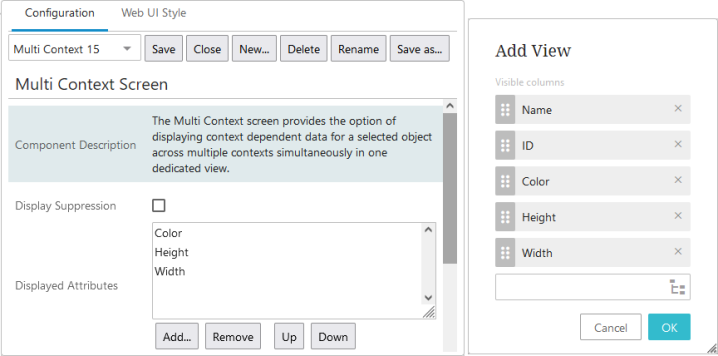
When creating a view while working in a Node List (Multi Edit Display Mode) and selecting the 'Add View' link, the visible columns are ID, Reference type, Icon, and Type. Whereas, creating a view on a Multi Context screen, only ID and Name are listed.
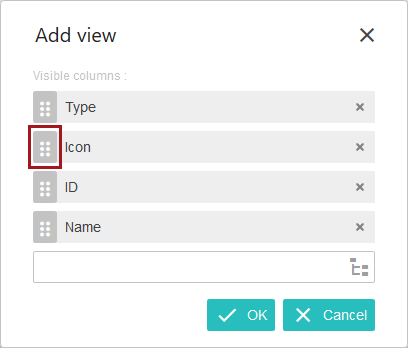
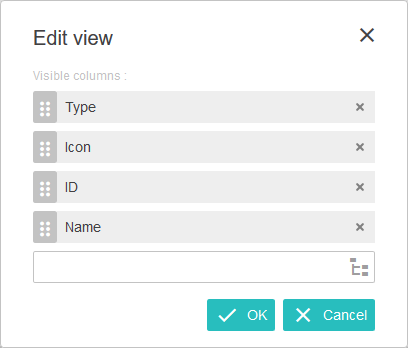
The screenshot below shows how the Node List (Multi Edit Display Mode) headers added by the admin will display when the 'Add view' dialog displays for the user.

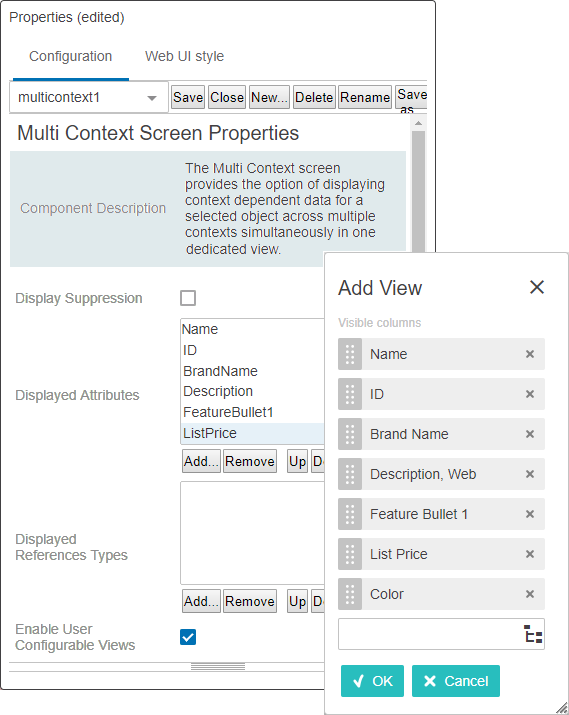
The screenshot below shows how the Multi Context Screen (Displayed Attributes) added by the admin will display when the 'Add view' dialog displays for the user.
- With the 'Add view' dialog displayed, a user can edit the new view by adding and/or removing attributes, and/or editing the display sequence.
Add Attributes / Attribute Groups as Columns
A user can add columns by using the node picker or typing the attribute / attribute group name or ID into the typeahead.
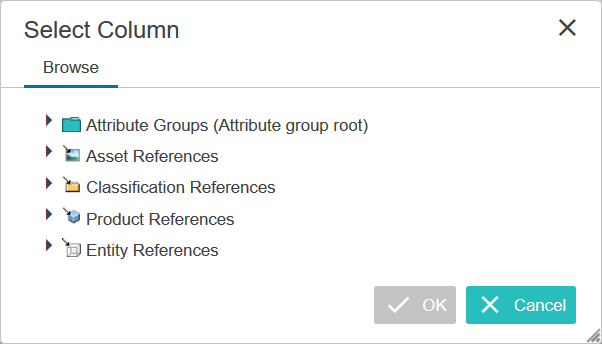
If the node picker is selected, the 'Select Column' dialog will display, allowing the user to browse for the desired attribute, attribute group, or reference. There is no 'Search' tab on the 'Select Column' dialog as this functionality is located at the bottom of the 'Add View' window.
If a single-reference reference type is added to a view, an additional dialog displays that gives users a series of options that determines which value displays in the header and which in the column's cells.
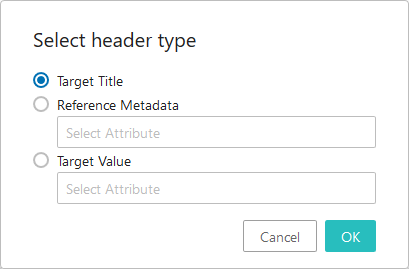
- Target Title. This radio button is pre-selected when the 'Select header type' dialog displays. By selecting this option, the title of the selected single-reference reference type will display in the header. In the column's cells, the ID of the referenced target object will display.
- Reference Metadata. When this radio button is selected, users can display reference metadata in the column's cells. Select the metadata attribute whose values should display in the column. The reference metadata attribute name will display in the column header, and the value will display in the column's cells.
- Target Value. When this radio button is selected, users can display values on the referenced target object. Select a valid attribute on the target object for which values should display. The attribute name will display in the header, and the value for that attribute will display in the column cells.
It should be noted that no node selection option is available for the 'Select Attribute' fields for the 'Reference Metadata' and 'Target Value' options. An attribute can only be selected using typeahead.
After adding columns, be sure to click OK for the changes to take effect.
Removing Attributes / Attribute Group Columns
Remove a column by clicking the 'x' icon on the column. When the 'x' icon is selected the column immediately disappears from the Edit View, however the changes will not take effect until the user clicks OK.
All columns can be removed using the Edit view in the Multi Edit Display Mode, including aspects like ID, Icon, Reference Type, and Type. It is important to note, however, that ID, Icon, Reference Type, and Type can only be added back in by using the typeahead feature in the 'Add view' dialog.
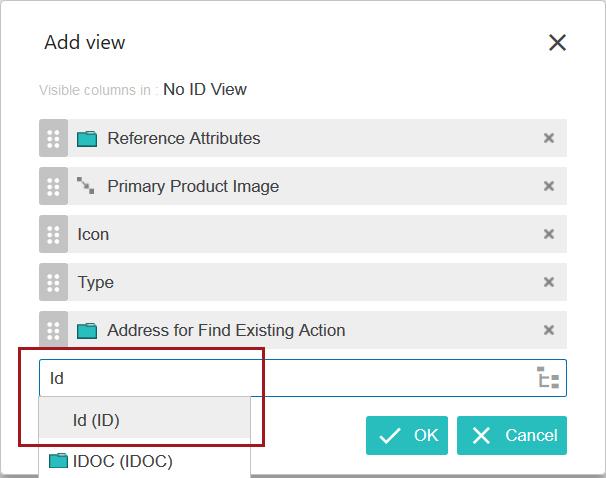
All columns can also be removed from the 'Add view' in the Multi Context screen, including ID and Name. As with the Multi Edit Display Mode, ID and Name can only be added back using the typeahead functionality accessible on either the 'Edit view' or 'Select Column' dialogs.
From the 'Add view' dialog, a user can change the sequence of visible columns by clicking and holding the dark gray drag handles to the left of each column name and dragging the column to its place in the desired order.
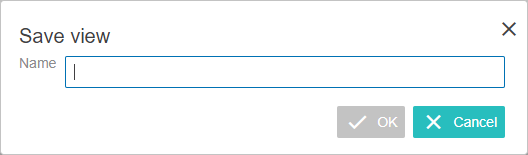
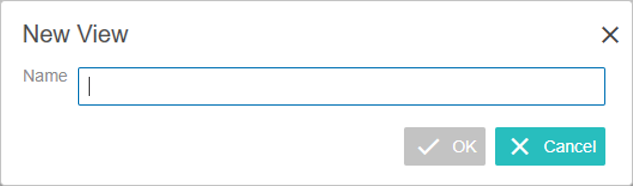
- Once the newly created view has the necessary columns displayed as desired, click the OK button, and the 'Save view' (Node List) / 'New View' (Multi Context) dialog will display, prompting the user to enter the name of the new view.
The 'Save view' window will display for Node Lists (Multi edit display mode).
The 'New view' window will display for Multi Context screens.
- Populate the new view Name and the 'OK' button will activate.
Note: The view name should clearly identify the view's intended use. The 'My views' list is not screen-specific; the same view names will appear across all Node Lists with the user configurable view parameter enabled. The same is true for Multi Context screens; the same view names appear across all Multi Context screens.
- Click OK and the new view settings will be applied.
Editing an Existing View
When a user edits an existing view, they can determine which attributes, references, and aspects display, as well as the order in which they display. A view can only be edited by the user who created it. Shared Views can be edited by copying shared views.
Steps to edit a view:
- From the Apply view dialog, click the edit icon ( ) next to the title of the view to be edited, and the dialog will display a list of applicable options.
- Click Edit and an 'Edit view' dialog will display with the visible columns per the selected view configuration.
- Edit the view by adding and/or removing attributes, and/or editing the display sequence. Details on these are in the Creating a new view section above.
- Click Save and the 'Save view' dialog will appear.
- Edit the Name.
- Select to either Overwrite current view or Save as new. Change the name, if applicable.

- Click OK.
Copying a View
A user can copy any view. This is useful when an existing or shared view needs changes, because once the view is copied, the user can edit it.
Steps to copy a view:
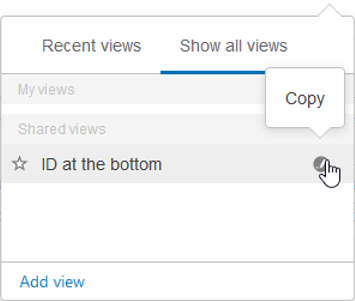
- From the 'Apply view' dialog, click the edit icon ( ) next to the title of the view to be copied and the dialog will display a list of possible options.
- Click Copy and a 'Copy View' dialog will appear.
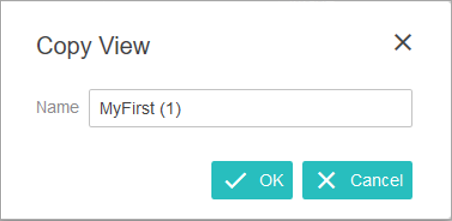
- Enter the desired Name.
- Click OK.
These steps can also be used to copy shared views.
Deleting a View
A view can only be deleted by the user who created it.
Steps to delete a view:
- From the 'Apply view' dialog, click the edit icon ( ) next to the title of the view to be deleted and the dialog will display a list of possible options.
- Click Delete, and the 'Delete View' warning dialog will display.
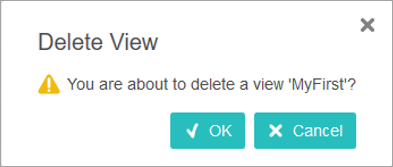
- Click OK.
Renaming a View
A view can only be renamed by the user who created it.
Steps to rename a view:
- From the 'Apply view' dialog, click the edit icon ( ) next to the view to be renamed and the dialog will display a list of possible options.
- Click Rename and a 'Rename View' dialog will appear.
- Enter the desired Name.
- Click OK.
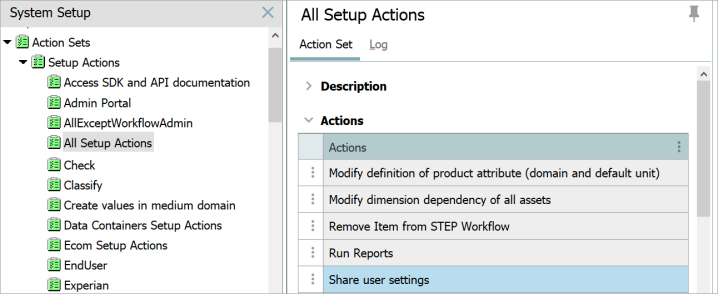
Sharing a View
Users with a Share User Settings privilege (set in the workbench) can share views to the groups that the user is a member of. Shared views cannot be edited or shared by others users. Only the user who created the shared view can edit / share. Once a user has access to a shared view, they can copy and then edit their copy of the view.
Steps to share a view:
- From the 'Apply view' dialog, click the edit icon ( ) next to the view to be shared, and the dialog will display a list of possible options.
- Click Share, and the 'Share view' dialog will display.

- Select the appropriate user group(s).
- Click OK.
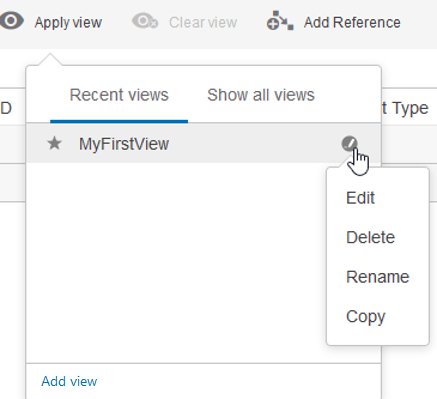
Users with no ‘Share user settings’ privilege will not have the 'Share' option, as illustrated in the image below:
Clear View
User can clear the applied views by using the option 'Clear View.' Clicking this will clear the applied view and revert to display of the headers as configured for the screen in the designer. 'Clear view' does not delete a view.

Information regarding enabling a user configurable view can be found in the Enabling User Configurable Views topic.