The Mass Creation Widget is a Homepage widget that, once configured, enables users to start the process of creating new objects in Web UI. This widget is used in conjunction with the Mass Creation screen type, which allows users to onboard multiple objects into STEP using Web UI screens instead of using more complex import methods such as Smartsheets.
Adding a Mass Creation Widget
Admin users first need to add the Mass Creation Widget. Once the widget is created, configuration can begin.
To add a Mass Creation Widget to the Web UI Homepage:
- Log in to the Web UI. User must have privileges to edit Web UI configurations.
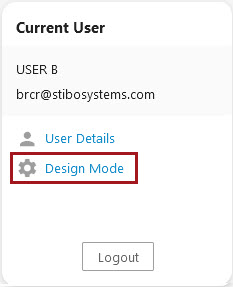
- Click the 'Design Mode' launch button found on the Homepage (in the User Widget).
- If not automatically shown the Home Page Properties, choose ---[HOMEPAGE]--- from the screen dropdown list.
- Add the Mass Creation Widget to a Widget Grid:
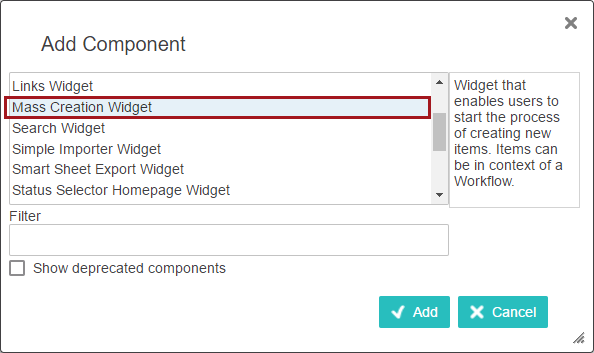
- If adding it to an existing Widget Grid, double-click the desired Widget Grid listed in the Child Components > Content parameter field. Click Add, choose Mass Creation Widget from the 'Add component' dialog, and then click Add again.
- If adding a new Widget Grid, click the Add button under the Child Components > Content parameter field. Select Widget Grid in the 'Add component' dialog and then click Add. Next, double-click the new Widget Grid that is now showing at the bottom of the list in the Child Components > Content field. Click Add, choose Mass Creation Widget from the 'Add component' dialog, and then click Add again.
Widgets can be reordered as needed. Either reorder the individual widgets inside a Widget Grid by clicking on a widget name and then clicking the Up and Down buttons in the Widgets Child Component of the Widget Grid Properties screen. Or, as an alternative, select a Widget Grid in the Child Components > Content field of the Home Page Properties and click Up and Down to reorder the entire Widget Grid. Details on how to add a widget to a homepage can be found in the Adding Widgets to a Homepage topic in the Getting Started documentation.
- Click Save in the Designer window. At this point, either close Designer and configure the widget at a later time, or continue on with the Mass Creation Widget Properties configuration.
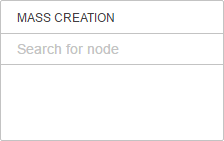
Until the widget is configured, it will sit on the Web UI Homepage and remain non-functional for onboarding purposes.
Configuring a Mass Creation Widget
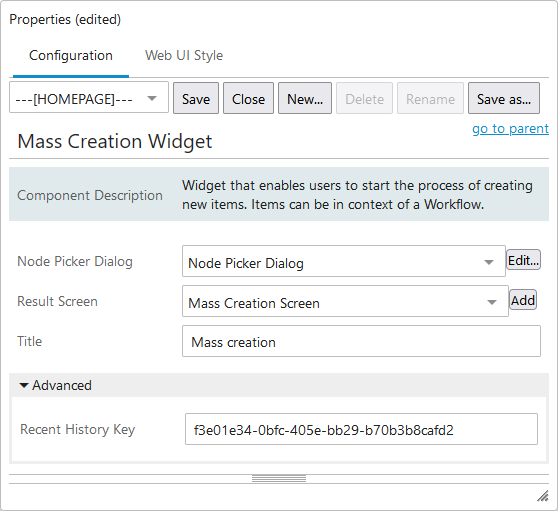
An image of the default properties screen follows. Each parameter should be configured as needed and features help text, accessible by clicking the information icon to the right of each parameter name. The sections directly after the image explain what each parameter does and the steps / options for configuring them.
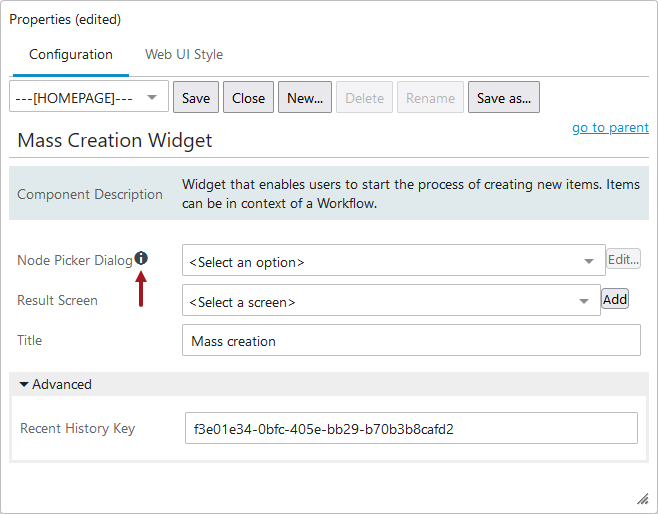
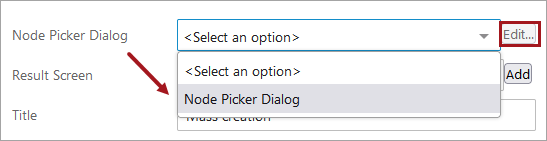
Node Picker Dialog
- Select 'Node Picker Dialog' from the dropdown. The Node Picker Dialog Properties dialog automatically displays.
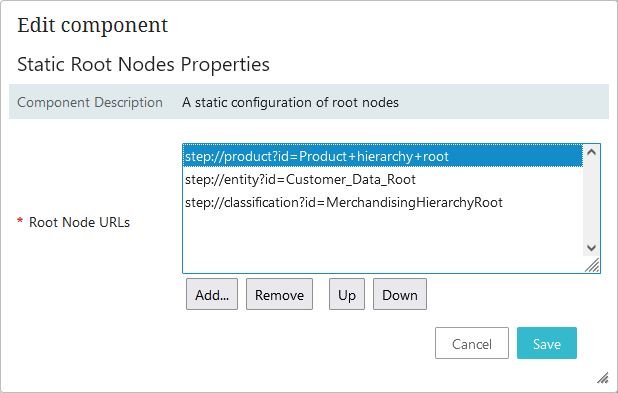
- On the properties screen, select Static Root Nodes within the Root Node Plugin dropdown.
- The Static Root Nodes Properties dialog appears. Click Add, under the Root Node URLs field, to make selections. This selection will determine what nodes are presented to the end user when using the widget and should be limited to Product, Entity, or Classification nodes. Re-order and remove existing root node selections as needed.
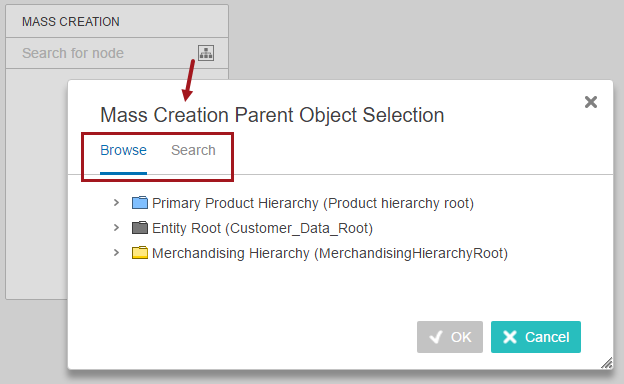
- A selection must be made for the Tab Pages parameter. Two valid options work with the Mass Creation functionality: Browse and Search. After adding a Browse tab, double-click the Browse title in the parameter field to set, if needed, any Tree navigation limitations for end users. If adding a Search Table tab, there is additional configuration to be done to the Search Table Tab Properties to maximize the search feature.
- Leave Title as-is or type in a meaningful title for end users. This title will display above the tabs (created in the previous step) when users click the node picker icon on the widget.

Note: All the steps above cover setting up the parameters for the first time. Where applicable, click the Edit button to the right of the parameter value field (or beneath it) to edit existing settings.
- Click Save and you will be returned to the Mass Creation Widget Properties.
Results Screen
- Using the '<Select a screen>' dropdown for the Result Screen parameter, choose the screen ID for the Mass Creation screen that will be tied to this widget. End users will click on the widget, select a parent object, and be directed to the Mass Creation screen designated by this parameter.
- If the desired Mass Creation screen does not already exist, click Add and create a new screen using the screen type Mass Creation Screen. The screen ID that you give the new screen will automatically populate in the parameter value field. Once all widget settings are made and saved, the Mass Creation screen can be configured following the directions outlined in the Configuring a Mass Creation Screen topic.
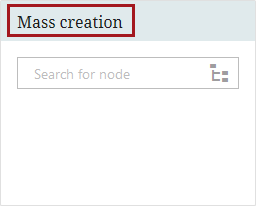
Title
The default title displayed at the top of a Mass Creation Widget is 'Mass creation.' Since multiple widgets can be created for different onboarding needs, the title can be renamed to something more descriptive for end users.
Recent History Key
Under Advanced there is a Recent History Key parameter. The key in the value field may be copied and pasted / used within another widget. The widgets would then share the same Latest searches history information.
Below is an example of the Mass Creation Widget Properties, fully configured:
After parameter selections have been made, click Save at the top of the Designer window. Close the Designer window to exit design mode and return to normal Web UI operation. If a Mass Creation Screen has not been configured yet, instead of exiting design mode, select an existing (or create a new) Mass Creation Screen to continue on with the setup process.
For more information, refer to the Configuring a Mass Creation Screen topic.
For more information about using the Mass Creation components, refer to the Using a Mass Creation Screen and Widget topic.