Formatting transformations enable you to apply transformations to attribute values, rows, column, tabs, and cells. The following formatting transformations are available and are defined in the sections below:
![]()
Prerequisites
The instructions in the following subsections assume that you have already added the specified transformations to your table by following the instructions in the Add a Transformation to a Table or Table Type subsection of the Table Transformations topic here.
Attribute Formatting
The Attribute Formatting transformation allows you to apply an attribute transformation to any selected attribute in the table. These transformations perform tasks on an attribute such as calculating or replacing a value, or applying a prefix or a suffix.
Example
The below column samples show how attribute values look before applying the transformation (left) and how they look after (right). The applied attribute transformation inserts the text 'Made of' before the attribute values for 'Material.'
![]()
Steps
- After adding the transformation, under Parameters, click the ellipsis button (
 ). The Attribute Formatting dialog displays.
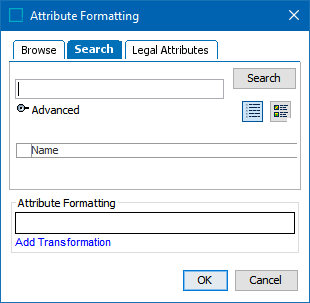
- Search or browse for the attribute to which you want to apply a transformation. Alternatively, click on the Legal Attributes tab to access the specification attributes linked locally to the product / classification node on which your table is built.
- Click Add Transformation to launch the Select Transformation dialog. Select the relevant transformation, and then click OK.
The list of transformations is identical to those that are available when creating an attribute transformation in System Setup. For more information on the attribute transformations and what they do, refer to the Transformations topic in the Resource Materials online help here.
Three transformations to perform cell-level text transformations are also available within the list of transformations: 'Sort values within cells,' 'Range consolidation within cells,' and 'Remove duplicate values within cells.' For more information on these transformations, refer to the Cell Text Formatting Transformations topic in this guide here.
![]()
Cell Formatting
The Cell Formatting transformation allows you to narrow down formatting to individual cells in a table.
Example
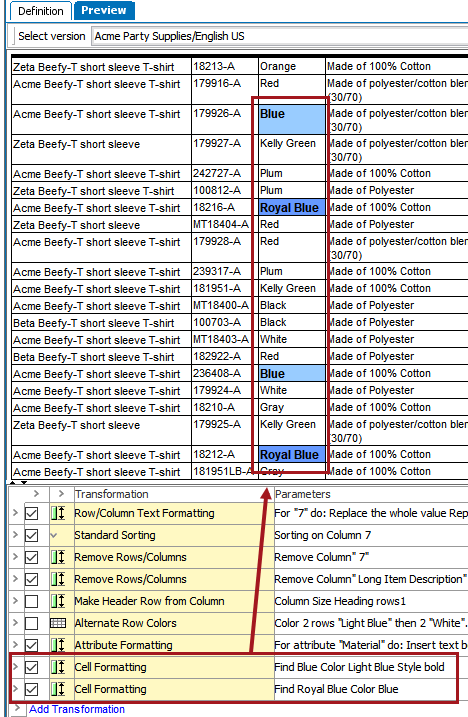
This example uses two Cell Formatting transformations—one to change cells containing the word 'Blue' to have a light blue background and bold text, and the second to change cells containing the text 'Royal Blue' to a darker blue color, retaining the bold text applied in the first Cell Formatting transformation.
Steps
- After adding the transformation, under Parameters, click the ellipsis button (). The Cell Formatting dialog displays.
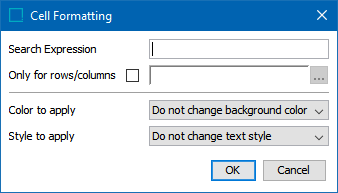
- In Search Expression, enter a regular expression to find specific cells. This option is case sensitive. For example:
- Enter the search expression 'Blue.' The value Blue is searched in the entire table and, if the value matches, the specified style will be applied to the cell.
- Enter the search expression as [A-Z]. The characters A to Z will be searched and, if any matches are found, the specified style will be applied to the cell.
For more information on regular expression and practical examples, refer to the Regular Expression topic in the Resource Materials online help here.
- Check the Only for rows/columns box if you want the formatting to apply only for cells in specific rows or columns.
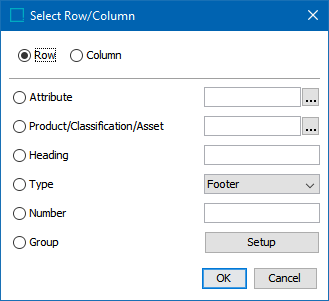
- If you selected Only for rows/columns, then click the ellipsis button () to launch the Select Row/Column dialog.
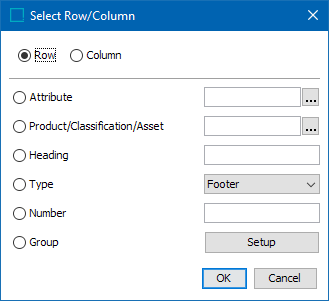
- Select Attribute to apply the transformation to the row or column that contains the specified attribute. Click the ellipsis button () to search or browse for the relevant attribute.
- Select Product/Classification/Asset to apply the transformation to the row or column that contains the specified object. Click the ellipsis button () to search or browse for the relevant object.
- Select Heading to identify the row or column by typing the header text of the relevant row or column.
- Select Type to choose a specific row or column type from the dropdown list.
- Select Number to identify the row or column by entering the sequence number. For example, to apply the transformation to the third column, type 3.
- Select Group to apply the transformation to a group of rows / columns and/or a range of row / columns, then click the Setup button.
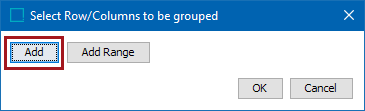
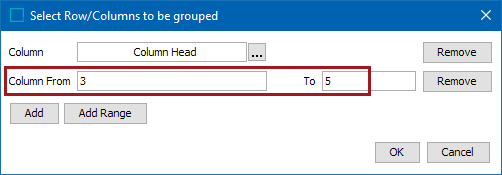
- Click Add in the Select Row/Columns to be grouped dialog to add rows or columns to the group individually.
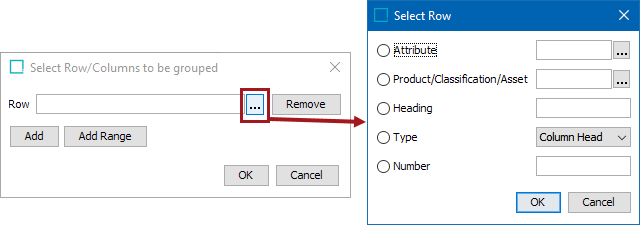
After clicking Add, either a Row or Column field displays, depending on whether you are selecting a row or column. Click the ellipsis button () to launch another Select Row/Column dialog. This is identical to the previous 'Select Row/Column' dialog, except without the Group option. Click OK after making your selection.
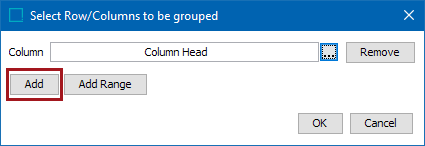
Click Add again on the 'Select Row/Columns to be grouped' dialog to repeat the previous steps and add more columns to the group. Click OK when done.
- To add a Range of columns to the group, click Add Range.
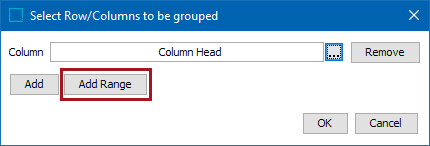
Enter the starting and ending column numbers in the Column From and To fields, then click OK when done. To enter a range that will contain the remainder of the table if rows or columns are added later, enter a large number in the 'To' field such as 5999. Note that these fields can only contain integer values.
- In the Color to apply list, select the color you want to apply to the cells, or leave the default option of 'Do not change background color.'
- In the Style to apply list, select the style that you want to apply to the cells, or leave the default option of 'Do not change text style.'
- Click OK.
Row/Column Text Formatting
The Row/Column Text Formatting transformation enables you to transform data in specific columns or rows. You can calculate or replace values or apply prefixes and suffixes to values in entire columns and rows in one operation. Where the Attribute Formatting transformation is applied to a specific attribute, the Row/Column Text Formatting transformation enables you to transform data in columns and tables of your own choice.
- After adding the transformation, under Parameters, click the ellipsis button (). The Row/Column Text Formatting dialog displays.
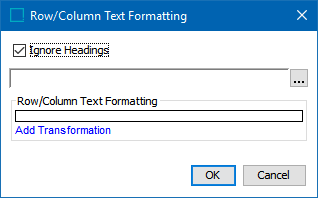
- Select Ignore Headings if you want the transformation to ignore contents in header column types.
- Click the ellipsis button () to launch the Select Row/Column dialog.
The options available in this dialog have already been explained in this topic in the Cell Formatting section above; refer to that section for more information.
- Click Add Transformation to launch the Select Transformation dialog.
The list of transformations is identical to those that are available when creating an attribute transformation in System Setup. For more information on the attribute transformations and what they do, refer to the Transformations topic in the Resource Materials online help here.
Three transformations to perform cell-level text transformations are also available within the list of transformations: 'Sort values within cells,' 'Range consolidation within cells,' and 'Remove duplicate values within cells.' For more information on these transformations, refer to the Cell Text Formatting Transformations topic in this guide here.
![]()
- Select the relevant transformation, then click OK.
Tab Formatting
The Tab Formatting transformation inserts a tabulator in a row or column, which indents the text in the row or column with a tab.
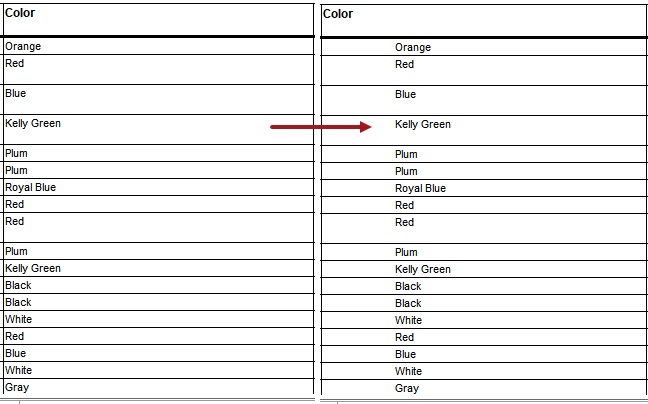
Example
The below screenshot shows how a column looks before (left) and after (right) applying the transformation, which in this example inserts a tab before the values in the 'Color' column.
Steps
- After adding the transformation, under Parameters, click the ellipsis button (). The Tab Formatting dialog displays.
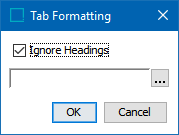
- Select Ignore Headings if you want the transformation to ignore contents in header column types or header row types.
- Click the ellipsis button () to launch the Select Row/Column dialog. The options available in this dialog have already been explained in this topic in the Cell Formatting section above; refer to that section for more information.
- Click OK.