The Footnote transformation enables you to control how footnotes are displayed in a table and create a specified footer row for footnotes.
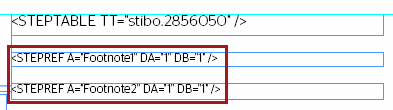
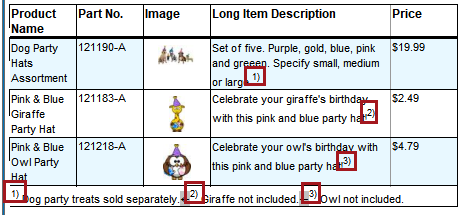
For tables with uncomplicated footnotes, a typical standard setup is to keep the footnotes in separate text boxes below the table on the product template, driven by a regular footnote text attribute, as pictured below. This works well when footnotes apply to the entire table in general. It may also be easier to set up and maintain.
However, the table footnote transformation is often a better option when there are multiple footnotes in a table. The transformation also provides these advantages:
- Automatic superscript for footnote markers (e.g., superscript 1, 2).
- The setup is more dynamic; footnotes are embedded within attribute values and do not have to be stored in separate footnote attributes.
- Footnote numbering is dynamic; users do not have to manually enter superscript numbers into attribute fields, avoiding the possibility of numbers being incorrectly sequenced.
- Footnotes may be added into a free text cell of a table, again avoiding the need for separate footnote attributes.
- Footnotes are placed in a dedicated, spanned row at the bottom of the table, which is an advantage when using folded tables.
Creating the Footnote Tag
If no footnote tag exists, you must create one in System Setup. For more detailed information on how to create tags, refer to the Tags section of the System Setup documentation
Follow these steps to configure a footnote tag.
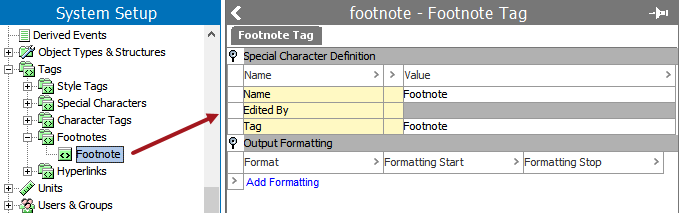
- Go to Tags under system setup and select the Footnotes tag group. Right-click and create a new Footnote tag.
The footnote tag should not have any output formatting. It is merely needed for the system to set up the transformation. If the tag is not created, 'Insert Footnote' will be disabled when you want to add a footnote to an attribute value.
- If the same long text is used many times throughout a catalog, you can create the footnote text as a character tag that you can insert in all the places where you want to use the text. This tag will be created as a regular character tag, not as a footnote tag, though it will be used in conjunction with the footnote tag (i.e., it is not a replacement for the footnote tag). Creating the footnote text as a character tag will ensure that the text is consistent (e.g., always spelled correctly).
Note: It is not necessary to create a footnote text character tag if the text is different on all footnotes.
Add Footnote Texts to an Attribute Value
Before you can add the footnote transformation, you first have to add footnote text to an attribute value.
Note: Do not add footnotes to attributes that may later be extracted for a publication index, e.g., a part number attribute.
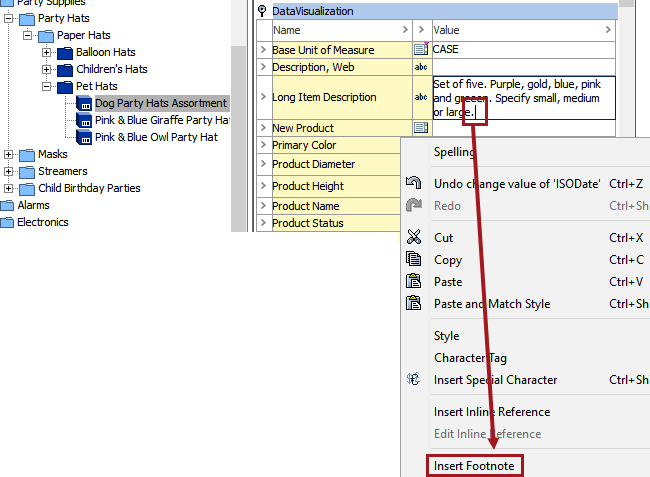
- Navigate to the product In the Tree that has the attribute to which you would like to add a footnote. This must be a text-based attribute.
- Double-click the attribute value field to edit it, then place your cursor in the location where you want to add the footnote.
- Right-click and select Insert Footnote.
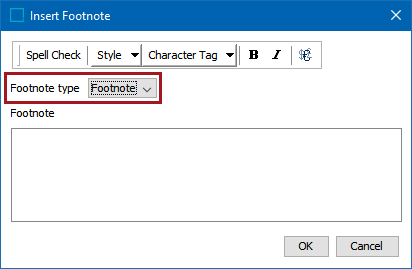
- In the Insert Footnote dialog, choose the relevant Footnote tag from the Footnote type dropdown list.
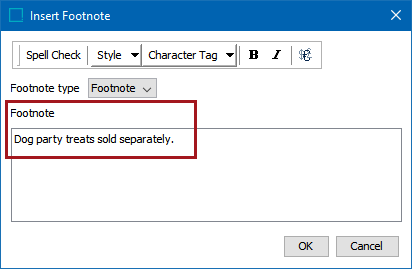
- In the Footnote field, enter the footnote text as either free text or as a character tag, then click OK. The footnote text can also be styled in this dialog.
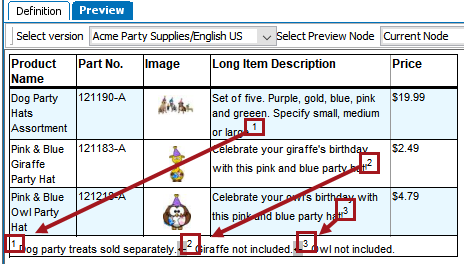
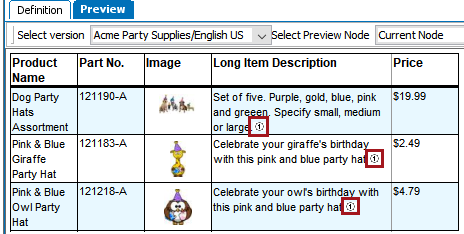
- The footnote symbol (1) displays in the attribute field.

Note: If the same free text footnote is used for different products in same table, the footnote symbols are the same for all footnotes. If the text does not match 100 percent, then different footnote symbols are displayed.
- Repeat these steps for all attributes to which you would like to add a footnote.
Edit or Remove a Footnote
- If you need to edit the footnote, place your cursor before or after the footnote symbol in the attribute field, then right-click and select Edit Footnote.
- To delete the footnote, delete the footnote symbol from the attribute field.
Setting Up the Table
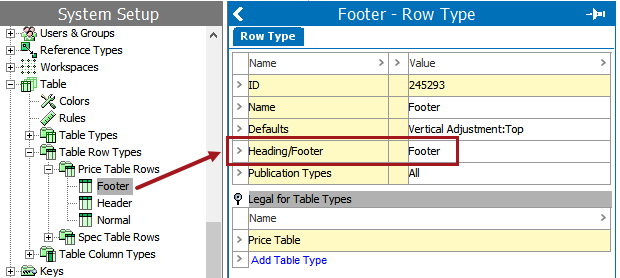
- Create a footnote row type for your table in System Setup. In this step you are only creating the row type; you will not create the footnote row on the table itself. The footnote transformation will later 'fetch' the row and insert it for you as part of the transformation functionality. Then, you can apply styling to the row type if desired.
The row must be designated as Footer for the transformation to work properly.
Important: This row type must only be used for footnotes.
- Navigate to the table in which you want to add the footnote, then view the table on the Preview tab.
- If the footnotes were added correctly in the attribute fields, the footnote symbols in the table are displayed.
Adding the Footnote Transformation
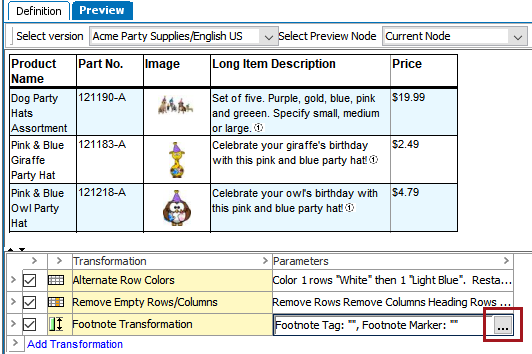
- With your table open on the Preview tab, click 'Add Transformation' to launch the Select Transformation dialog.
- Expand the 'Transformations' folder and select Footnote Transformation, then click OK.
![]()
- The Footnote Transformation is added. Click inside of the Parameters field to display the ellipsis button (
 ).
).
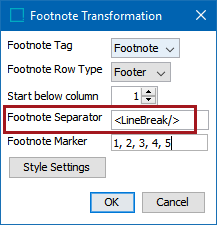
- Click the ellipsis button () to launch the Footnote Transformation dialog.
![]()
- Select the Footnote Tag from the dropdown list. This must be the same footnote tag used when you added the footnote text to the attribute value.
- Select the relevant Footnote Row Type from the list.
- In the Start below column field, specify the column where the footnote row should begin below. This is typically column 1, then the row spans all columns.
- In the Footnote separator field, specify the separator to be used in between multiple footnotes when mounted in InDesign. This applies when different footnote texts with the same footnote tag are found in the same table. In this example, the character tag <LineBreak/> tag is used, though any separator may be used.
Note: The field does not recognize the repeat separators that are used in InDesign, such as \n.
Example
- <LineBreak/> tag in System Setup:

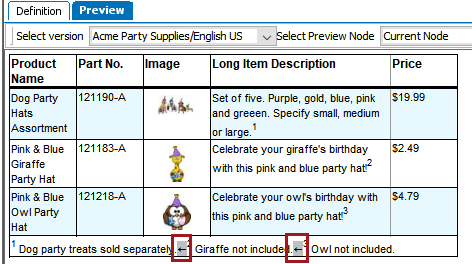
- <LineBreak/> footnote separator in table preview:
- Mounted footnote row in InDesign:

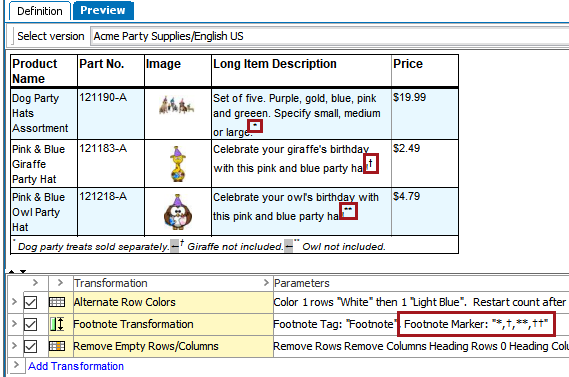
- In the Footnote Marker field, specify how to mark the footnotes in the table; for example, 1, 2, 3, 4, 5. It does not matter whether or not spaces are added after the commas. When all footnote markers have been used in the same table, the numbers / characters start over from the beginning. These values display as superscript characters by default, without needing to have styling applied.
Example
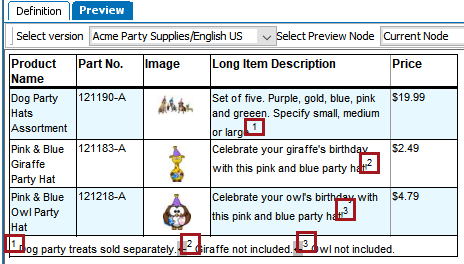
- Footnote markers in table preview:
- Mounted footnote row in InDesign:

- Leaving the field blank will mount superscript numbers with a closing parenthesis character after them, which may not always be desirable.
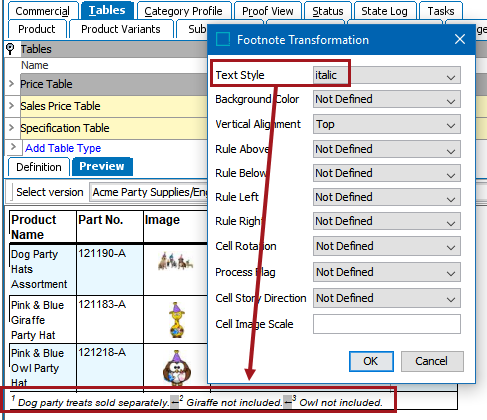
- Click the Style Settings button to specify a style for the footnote text and/or additional styling for the footnote row, such as background color, alignment, borders and so forth. The following screenshot shows the result when 'italic' is chosen as the footnote text style.
Using Characters Other Than Digits as Footnote Markers
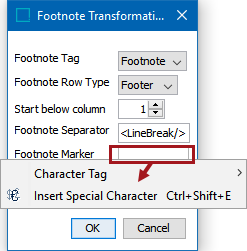
To use characters other than digits as footnote markers, special characters or character tags, right-click inside of the Footnote Marker field of the Footnote Transformation dialog.
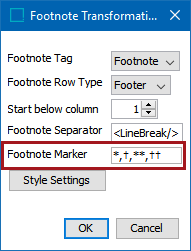
Footnote markers for each desired symbol must be placed into the field. Multiple footnote markers must be placed in this field if multiple footnotes are anticipated. If only one marker is placed in the box, it will only be used for footnote 1, and subsequent footnotes will revert to the '2)' style.
Example
Footnotes Based on Calculated Attribute Values
You can use footnotes based on calculated attribute values to handle new symbols in front of order numbers and generate footnote text below the tables that contain the new symbols.
- Create a calculated attribute using the following value template for the calculation. For information on how to create a calculated attribute, refer to the Calculated Attributes section of the System Setup documentation here.

In this example, the calculation does the following:
If the brand name is Acme pens, then the attribute value is "Acme pens” with a footnote sign. The footnote sign is defined as: <RegistrationFoot><FootnoteRegistration/></RegistrationFoot> where the tags are:
<RegistrationFoot> and </RegistrationFoot>: The footnote tag types. There is a start and an end tag.
<FootnoteRegistration/>: The character tag that defines the output of the footnote text.
- Make the calculated attribute valid for the part of the product hierarchy where you want the calculated attribute to result in table footnotes.