To format STEP tables on InDesign pages, a parallel set of formatting configurations must be created in STEP and InDesign for the following:
- Colors (used both for rule lines and background shading)
- Rule lines
- Text styles
In STEP, these configurations are the Colors, Rules, and Style Tags created on the System Setup tab. The corresponding configurations in InDesign are swatches, line styles, and paragraph styles. The InDesign configurations are created in the InDesign publication template that will be used to mount (generate) tables in InDesign.
This topic deals only with the table formatting definitions created in publication templates. Full details on how to configure the corresponding definitions in STEP are outlined in the Configuring Table Formatting in System Setup and InDesign topic.
Example of a Styled Table in STEP
The following screenshot shows a styled table in STEP as it appears in the STEP Table Preview. The background colors, rule lines, and text styles have been applied using the settings created in System Setup. In order for the table to appear with the same colors, text styles, and rule lines in InDesign, the corresponding settings must be created in the publication template.
Note: If no styles are defined for the table in STEP, the table will be mounted in InDesign with basic InDesign paragraph styling, and the table must then be styled manually using the standard InDesign table editor. Manual styling of tables on InDesign pages is discouraged, as formatting not connected to STEP can be easily lost when tables are updated.

Configuring Table Colors in InDesign
Colors defined in STEP are configured in InDesign as Swatches, as follows:
- In InDesign, navigate to Window > Color > Swatches (or press F5). The Swatches panel displays.
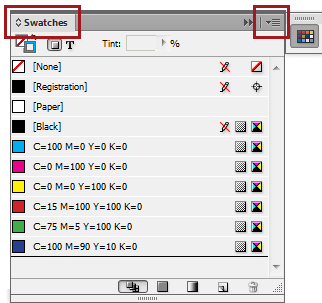
- Click the Options menu in the upper right corner of the Swatches panel, then click New Color Swatch.
- On the New Color Swatch dialog, deselect the Name with Color Value checkbox, then type a name in the Swatch Name field.
Note: The name of the swatch must be identical to the corresponding color created in STEP. Names of colors and swatches are case sensitive.
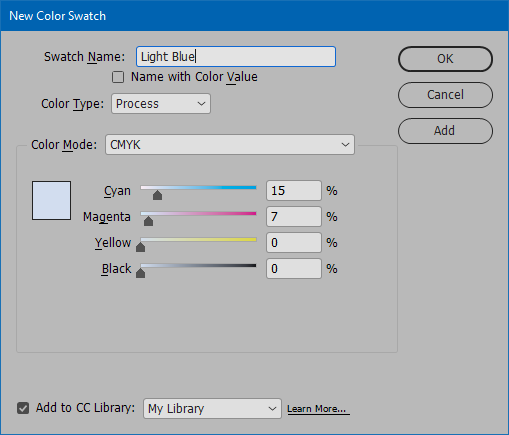
- Adjust the color values as needed, then click OK.
Loading Swatches From Another InDesign Document
To load swatches from another InDesign document:
- In the Swatches panel, click the Options menu, and then click Load Swatches. An Open a File dialog box displays.
- Navigate to the InDesign file that contains the swatches that you would like to import, then click Open. (This file does not have to be another publication template; it can be any InDesign document.)
- The Swatches from the selected InDesign file will automatically import.
Configuring Table Line Styles in InDesign
Rules defined in STEP are configured as table Line Styles in InDesign via the STEP > Table Settings menu. Line styles govern the lines ('borders' or 'rulers') that appear between cells and/or surround the table.
To create line styles in the InDesign publication template:
- Navigate to STEP > Table Settings. The Table Settings dialog displays.
- Click Add in the lower left-hand corner. The New Line Style dialog displays.

- Populate the fields in the New Line Style dialog as follows:
- Style Name: Name of the line style. Must exactly match the name of the corresponding rule created in STEP. Is case sensitive.
- Line Weight: Width in points. The measurement unit will always default to points regardless of what measurement unit is being used for the rest of the page (for example, mm, inches, or picas).
- Line Colour: Color of the line style. An InDesign swatch for the color must first be created in the publication template before the color will appear in this dropdown list.
- Line Tint: Opacity level of the line style. Default is 100%. Value must be typed.
- Line Type: Specify whether the line style should be solid (most common) or a different style such as dashed or dotted. The same line styles available in the InDesign Stroke panel are available in the Line Type dropdown.
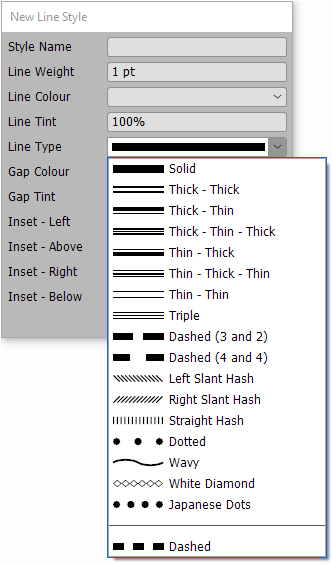
- Gap Colour: Only applicable for non-solid rule lines. Defines the color that goes in between the dashes, dots, hashes, etc. The same colors (swatches) that appear in the dropdown list for Line Colour appear in the Gap Colour dropdown. Leave blank for solid rule lines.
- Gap Tint: Opacity level of the gap color. Default is 100%.
- Insets (Left, Above, Right, Below): How much inset space ('padding') should be placed between the edge of a cell that is bordered by the rule line and the text or image content within the cell. If left blank—or if a value of 0 is inserted—the insets will default to InDesign's default table cell inset, which is 4 points (or, 0.0556 inches or 1.411 mm).
Note: If you would like no inset padding at all, enter a hairline space value of .0001. The system will recognize this value as being so close to 0 that there will be no visible inset padding.
- Click OK when finished. Any values entered during the initial creation of the line style may be edited later if needed.
Loading Table Line Styles From Another InDesign Document
To load table line styles from another InDesign document:
- Navigate to STEP > Table Settings, then click the Import button in the lower left corner of the Table Settings dialog box.

- An Open a File dialog box displays. Locate the InDesign publication template containing the line styles that you would like to import, then click Open.
- The line styles from the selected InDesign file will automatically import.
- Click OK to complete.
Configuring Paragraph Styles for Tables in InDesign
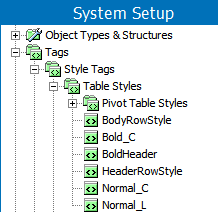
Style tags created in STEP and applied to tables are configured as paragraph styles in InDesign.
For example: If the tables you are mounting from STEP contain the styles 'HeaderRowStyle' and 'BodyRowStyle', then there must be corresponding paragraph styles also named 'HeaderRowStyle' and 'BodyRowStyle'. STEP style tags and InDesign paragraph styles are both case sensitive and must match exactly.
To create a paragraph style in InDesign:
- In InDesign, navigate to Window > Styles > Paragraph Styles (or press F11). The Paragraph Styles panel displays.
- Click the Options menu in the upper right corner of the Paragraph Styles panel, then click New Paragraph Style.
- On the New Paragraph Style dialog, enter a Style Name that exactly matches the corresponding style tag in STEP.
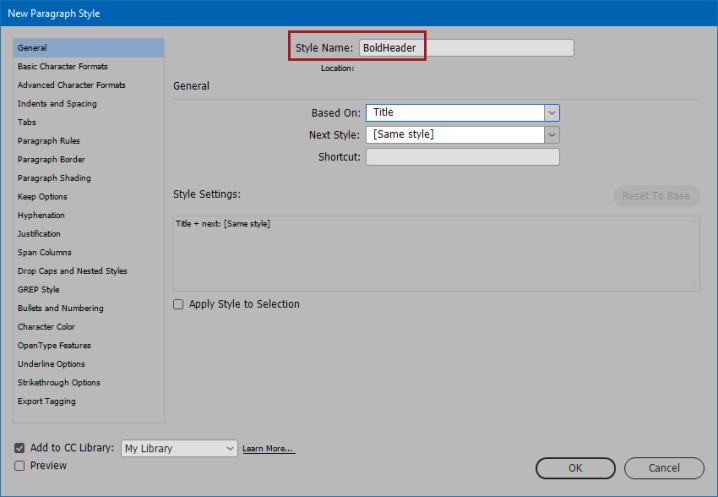
- Continue configuring the paragraph style as needed, then click OK to complete.
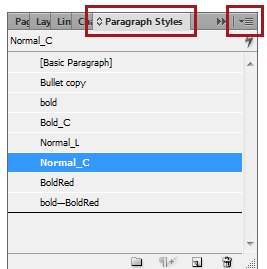
Merge of Row / Column Style Names
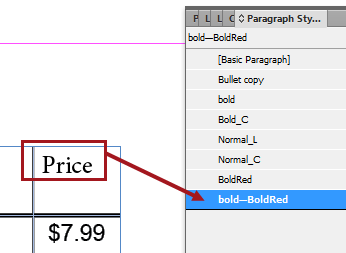
In the case where a row with a style applied crosses a column with a style applied, a third paragraph style is created when the table is mounted in InDesign. The name of this third paragraph style (sometimes called an 'intersection style') is a combination of the name of the paragraph style used for the row and the paragraph style used for the column, connected by an em dash.
For example, a table may contain a row style called 'bold' and a column style called 'RedBold'. In the cells where these rows and columns cross over each other, the two styles will overlap. When the table is mounted in InDesign, the system will automatically create a new paragraph style called 'bold—BoldRed'.
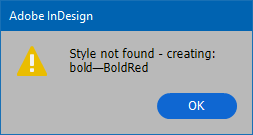
However, with the system not knowing which of the two paragraph styles to pick up, the newly created 'intersection' style will appear as a generic (basic) paragraph style.
Note: To avoid the creation of 'intersection' styles in InDesign, it is recommended to apply text styling at the cell level in tables where an overlap will occur between row and column styles. 'Intersection' styles are essentially duplicates of existing styles and can cause clutter in a long list of paragraph styles.
For more information on applying formatting to table cells, refer to the Configuring Settings for Cells topic.