The List Value Generator allows users to import values from a specified list (e.g., a list of numbers) and assigns those values to an attribute of an object. Additionally, if a user decides that they do not want to retain a value that has been assigned to an attribute, the value can be returned to the list for later use.
Important: While a powerful tool, the use of value generators can result in significant performance impacts in some scenarios. This is dependent on a number of factors and can be difficult to predict. Therefore, use of value generators should be thoroughly tested within your solution and as part of your overall business processes before relying on them as part of critical onboarding and/or import activities.
Configuring a List Value Generator
The following steps are required prior to using the List Value Generator to generate values for selected attributes.
Note: Before a List Value Generator can be configured, a Value Generator object type must be created. For instructions on how to create a Value Generator object type, refer to the Value Generators topic here.
- With the desired Value Generator Configuration Type selected, click the 'Edit' link under the Configuration flipper in the Value Generator Configuration Type editor.
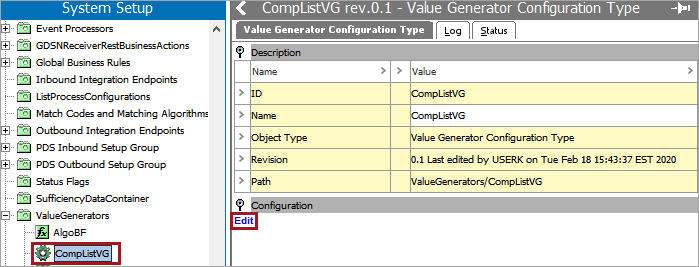
- From the dropdown menu, select 'List Value Generator.'

Within the Edit Value Generator Configuration dialog:
- Prefix (Optional): Characters to precede values generated from a selected list.
- Suffix (Optional): Characters to follow values generated from a selected list.
- Notification (Optional): As the descriptive text indicates, once the Warning Threshold number is met (the number of values left within the list selected by the value generator), an email is sent to the recipients included in the Email parameter. Use a semicolon (;) (but no spaces) to separate multiple email addresses.
Important: The Warning Threshold and Email parameters are dependent on each other. If one is populated, the other must also be populated.
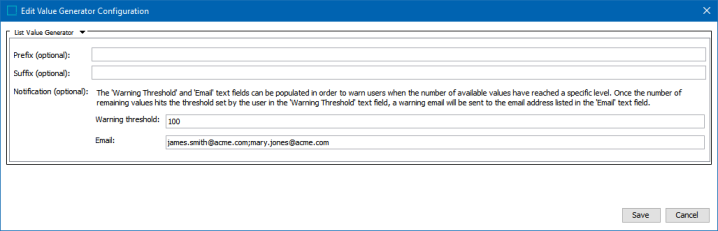
- Once the desired parameters are populated, click 'Save' and close the Edit Value Generator Configuration dialog.
Importing Values into the List Value Generator
Once the List Value Generator is configured, values must be imported for use.
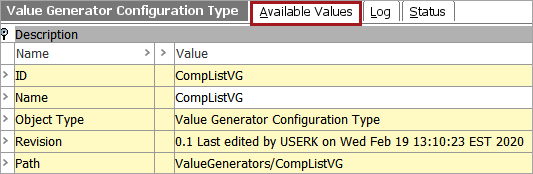
- With the List Value Generator configured, click on the 'Available Values' tab.
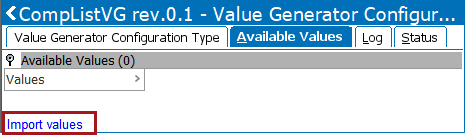
- With the Available Values tab open, select the 'Import values' link.
- In the Import Values dialog, click the ellipsis button (
 ) located next to the 'Select import file' text field.
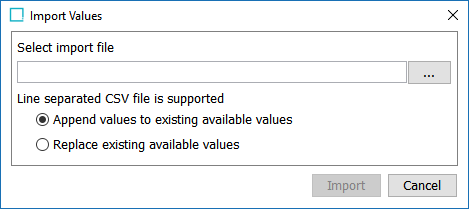
Important: Only line-separated CSV files are supported, and values that are imported can be added to ('Append values...') or replace already-existing values (if applicable). Importing duplicate values is not permitted. If a user tries to import duplicate values, a message stating which values were omitted during import will appear. A duplicate value is considered any value that already exists in the Available Values list or has already been assigned to an attribute from the List Value Generator.
-
Click the 'Import' button to import the values and close the dialog.
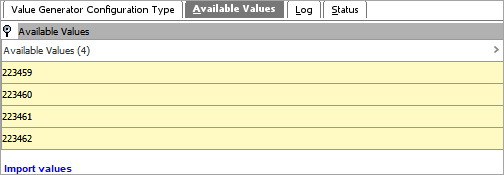
The available values are now ready to be used with the List Value Generator. By default, the available values are sorted by when they were imported and the order of values within the CSV file itself (e.g., the most recent imported values will be at the bottom of the list and a value within a higher row will be above a value in a lower row).
In this example, the first available value is '223458.' This value will be found later in this topic when the business actions used in conjunction with the List Value Generator are run.
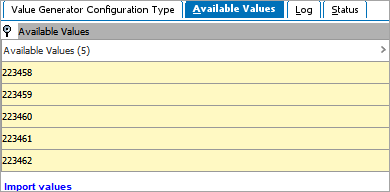
Note: The 'Available Values' table can display up to 5,000 values. If more than 5,000 values exist in a list, the message 'Displaying 5000 of a currently available values' is displayed next to 'Available Values' label. Otherwise, the specific number of available values (in this example, '5') is displayed in parenthesis next to 'Available Values' label. Additionally, filtering only applies to the values that are visible within the table. For more information regarding filtering options, refer to the Sorting and Filtering Views topic in the Views section of the Publisher (Adobe InDesign Integration) documentation here.
Configuring Business Actions for a List Value Generator
Once a list of available values have been added to a List Value Generator, business actions must be configured to assign / release values.
While this section covers the details regarding the configuration of business actions used in conjunction with the List Value Generator, it does not cover the steps necessary to create business actions themselves. For more information regarding the initial setup of business actions (which are a type of business rule), refer to the Business Rules topic in the Using Business Rules in STEP documentation here.
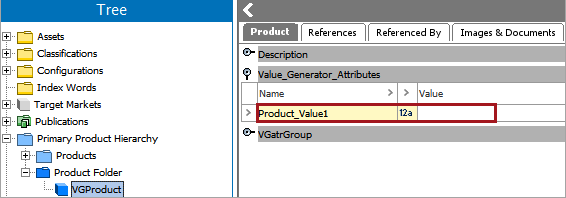
- Within the business action Edit Operation dialog, select 'Value Generator' > 'Assign a value' or 'Release a value,' depending on which action to perform.
- Select an attribute and value generator. In this example the user has selected the attribute Product_Value1 and the value generator CompListVG, which was configured earlier in this topic.
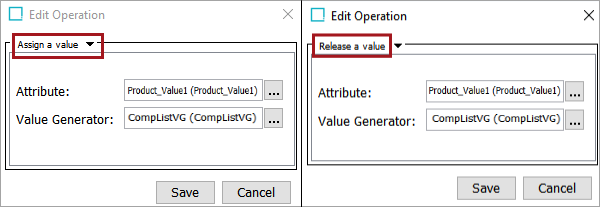
With the 'Assign a value' option selected:
- The value will be assigned to the selected attribute.
- The value will be obtained from the top of the selected value generator's value list.
With the 'Release a value' option selected:
- The value will be removed from the selected attribute.
- The value will be put back at the top of the selected value generator's value list.
Important: When selecting an attribute that the value will be applied to, be aware of the attribute's validation base type, especially if the prefix or suffix text field was populated when the List Value Generator was configured. An error may occur if, for example, a prefix of 'GTIN' (or some other combination of letters) is included as a prefix or suffix for the list value generator, and then an attribute is selected, which does not allow for anything besides numbers. For more information on validation base types, refer to the Validation Base Type topic in the Validation Rules documentation here.
- Click 'Save' to save your settings and close the dialog.
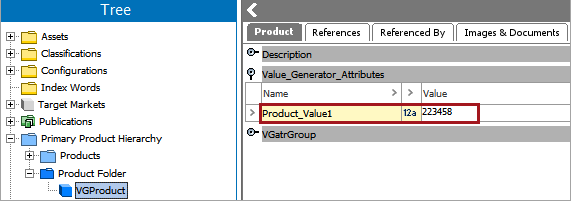
When the business action with the 'Assign a value' setting selected is run, it will obtain the next value from the list in the List Value Generator and assign it to the attribute 'Product_Value1.'
The Available Values list now only contains four available values.
When the business action with the 'Release a value' setting selected is run, it will remove the value from the attribute.
The value is placed back into the Available Values list in the List Value Generator and is ready to be assigned to an attribute when the 'Assign a value' business action is run.
