When creating a key, the user defines what object data is used and how it is combined and transformed. Multiple keys can be created and inactive or active in the system. More than one key can be valid for the same object type at the same time.
Prerequisites
It is expected that anyone creating a STEP Key is familiar with the 'Defining Keys' section of the Unique Keys topic.
Create a Key
Below are steps to create a key.
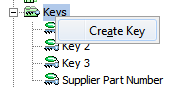
- Go to System Setup > Right-click Keys, and then click Create Key.
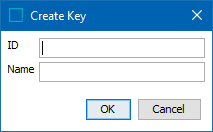
- In the Create Key dialog enter an ID and a Name for the key, and then click the OK button.
- Navigate to the Key tab of the newly created key.
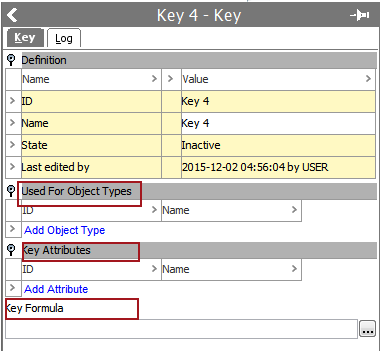
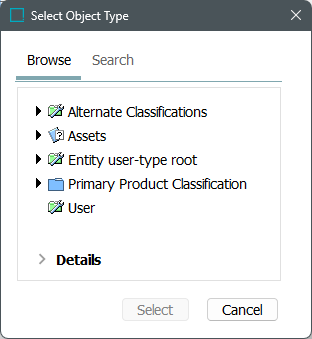
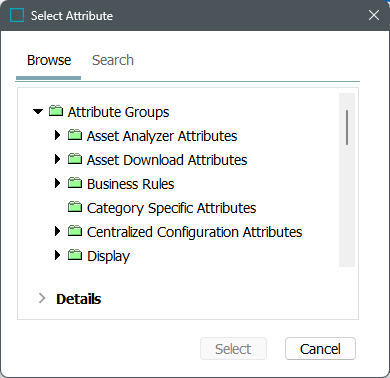
- Expand the Used For Object Types section, click the Add Object Type link. Browse or search for the object types to be valid for the key.
Note: Key functionality does not work with product overrides. If a product override object type is selected, then an Error dialog will display.
- Expand the Key Attributes section and click the Add Attribute link. Browse or search for the attributes to be used in the key formula.
Note: A number of restrictions apply to the attributes used for calculating the keys. For more information, refer to the 'Defining Keys' section of the Unique Keys topic.
- In the 'Key Formula' field, click the ellipsis button (
 ) and the Function editor dialog will display. Define the key formula so that the object data will be properly combined and transformed.
The following are valid functions:
- stepid()
- prodval()
- All text functions: concatenate, replace, upper, lower, left, and more.
- All number functions: - +, -, *. /, round, trunc, and more
Important: When writing the STEP Function, only the value extraction and string manipulation functions will be available. Thus, you can combine and manipulate the key attribute values but not e.g., let the key include the ID of a parent or similar.
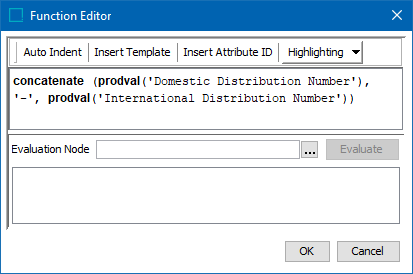
Note: It is recommended practice to always evaluate your formula on the Function editor by using a sample object on which the key could be implemented using the “Evaluate Node” option before activating the Key. For more information about the Function editor, refer to the Using Function Editor section of the Resource Materials online help documentation.
Once a key is created, it must be activated before it can be used. For more information, refer to the Activating and Deactivating Keys topic.
Optionally, before activating the key, use the Check Key function to confirm the setup of the STEP Key. For more information, refer to the Checking Keys topic.
Note: To edit a key, it must be in the deactivated state. Active keys cannot be edited. For more information regarding activating or deactivating keys, refer to the Activating and Deactivating Keys topic.
Delete a Key
A key must be deactivated before it can be deleted. Below are steps to delete a key, after it has been deactivated.
- On System Setup, expand Keys and right-click the relevant key. Click Delete Key to display the Delete dialog.
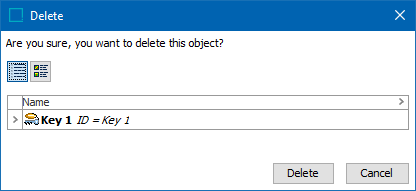
- Click the Delete button.