Legacy BGP functionality uses specified queues, while the recommended BGP execution mechanism prioritizes BGPs based on the priority setting of the BGP and the created time. Refer to the Background Processes and Queues topic.
For SaaS environments, create a Stibo Systems Service Portal ticket to modify these properties.
In the steps below, the legacy default configuration is changed to allow for the export and web publisher processes to be run on separate queues.
Note: If you run a clustered setup and you make the following changes in the sharedconfig.properties file, the settings regarding the size will be applicable for each application server. When you edit the shared configuration file as described in the example on a cluster with two application servers, you would be able to run four exports and four web publisher processes simultaneously on the cluster, i.e., two exports and two web publisher processes on each application server.
Update Legacy Queue Configuration
Use the following steps to modify the export and web publisher processes to run two processes simultaneously.
- In the workbench, click the BG Processes tab.
-
Click Export Manager Pipeline node to display the Process Overview.
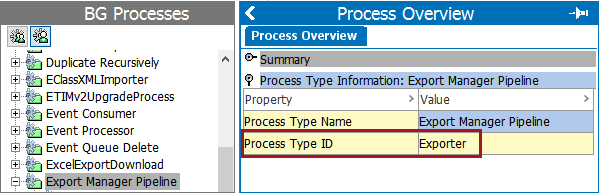
- Expand the Process Type Information: Export Manager Pipeline section.
- Right-click the value of the Process Type ID, copy and paste the value in a temporary text file. In this example 'Exporter' is copied and pasted. This value will be used to set the configuration property below.
- Click the BG Processes tab then click Publish to Website. A Process Overview dialog displays.
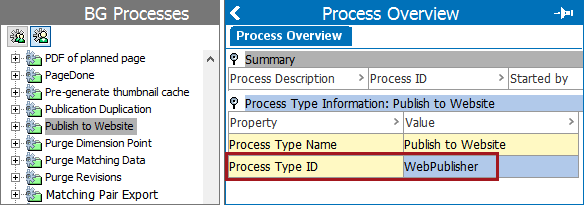
- Expand the Process Type Information: Publish to Website section.
- Right-click the value of the Process Type ID, copy and paste the value to a temporary text file. In this example 'WebPublisher' is copied and pasted. This value will be used to set the configuration property below.
- Open the sharedconfig.properties file on the STEP application server.
- Add the case-sensitive BackgroundProcess.ProcessType.[Process Type ID].Queue=[Queue] property to create the new queues. Replace the text in square brackets with the required data and use the following required format of the property:
BackgroundProcess.ProcessType.[Process Type ID].Queue=[Queue]
Continuing with the above example, the entry in the properties file would include the values pasted to the temporary file above:
BackgroundProcess.ProcessType.Exporter.Queue=EXPO
BackgroundProcess.ProcessType.WebPublisher.Queue=WEBP
In this example, [Process Type ID] is replaced with 'Exporter' and 'WebPublisher' to identify the new types of queues.
[Queue] is replaced with the new Export process queue named EXPO, and the new Web Publisher queue named WEBP.
- Add the case-sensitive BackgroundProcess.Queue.[Name].Size property to set the size on the new queues. Replace the text in square brackets with the required data and use the following required format of the property:
BackgroundProcess.Queue.[Name].Size=[Size]
Continuing with the above example, the entry in the properties file would be:
BackgroundProcess.Queue.EXPO.Size=2
BackgroundProcess.Queue.WEBP.Size=2
In this example, the new queue EXPO and the new queue WEBP can each run two concurrent processes.
- Restart the application server to apply the changes to the properties file.