The 'Switch Attribute IDs' option absolutely allows a user to switch the ID of two attributes. This functionality avoids entering single update mode for changes to attribute definitions (such as externally maintained, full-text indexable, multi-valued, data type, or LOV). Be aware that this method results in the loss of revision history on values of the attribute being changed.
Note: Removing a dimension dependency requires the use of a bulk update operation in a relevant context to repetitively move attribute values from relevant dimension points to the target attribute. This will then implement the prioritization of values. For more information, refer to the Attribute Values: Merge Attribute Values Operation topic in the Bulk Updates documentation.
The following example shows switching the ID of an original non-externally maintained attribute (ID = AttributeA) that contains values, with a new externally maintained version of the same attribute via the Switch Attribute IDs option.
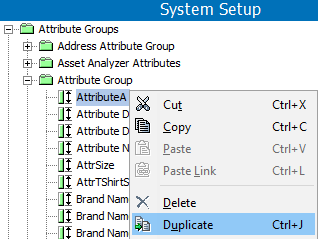
- In System Setup, select the original attribute, right-click and choose the Duplicate option to make a copy of the attribute (i.e., same object validity and attribute links).
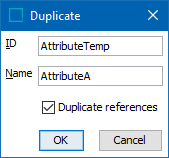
- On the Duplicate dialog, check the 'Duplicate references' checkbox, add a unique ID, set the Name to be the same as the original attribute, and click OK. This example shows 'AttributeTemp' as the ID.
Note: Attribute IDs are case sensitive.
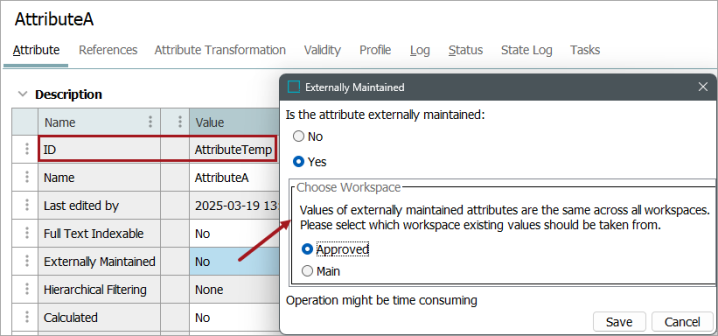
- Select the new attribute (AttributeTemp), double click the Externally Maintained parameter, select the Yes radio button and the Approved workspace (no values exist but a selection is required), and click Save.
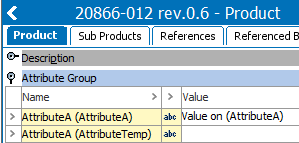
- In Tree, verify both attributes are displayed on an object for which they are valid. Only the original attribute has a value. In this image, the ID was added into the Name field to distinguish the two attributes with the same name.
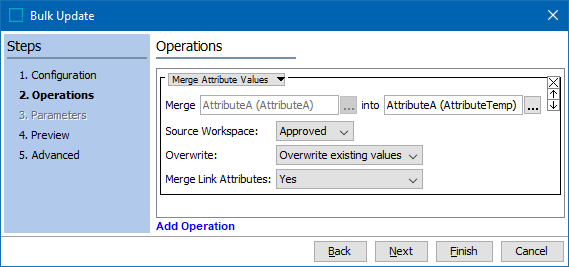
- In System Setup, select the original attribute (AttributeA), right-click, and select the Merge Attribute Values option. The Bulk Update wizard is displayed. To complete the merge, follow the steps defined in the 'Merge Attribute Values Operation' section of the Attribute Values: Merge Attribute Values Operation topic in the Bulk Updates documentation.
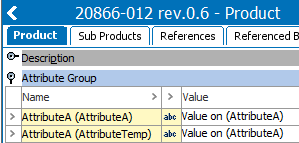
- In Tree, on an object for which the attributes are valid, verify that value from ID AttributeA was copied to ID AttributeTemp. In this image, the ID was added into the Name field to distinguish the two attributes with the same name.
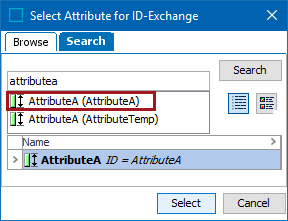
- In System Setup, select ID AttributeTemp, right-click and choose the Switch Attribute IDs option to display the Select Attribute for ID-Exchange dialog.
Because the attributes have the same name, use the Search tab to select the original attribute, click Search, and click Select. In this example, the ID = AttributeA.
The IDs are exchanged between the two attributes.
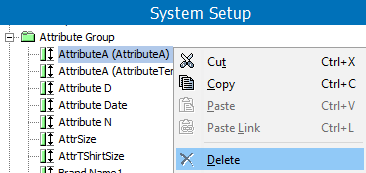
- Select the original AttributeA, which is not externally maintained and that now has the ID AttributeTemp, right-click, choose the Delete option. Use the Force Delete option to remove the attribute, values, and links, and bypass the Recycle Bin.
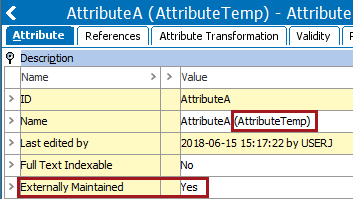
The remaining attribute with the name 'AttributeA', which started as AttributeTemp (as indicated by the original ID in the Name field), now has the values merged from AttributeA, has the ID AttributeA, and has the Externally Maintained parameter = Yes.