After data container setup, a data container instance can be created on entities or products in the Tree. The data container type Validity tab settings determines the object types that display the data container. For more information, refer to the Setting Up Data Container Types in STEP Workbench topic.
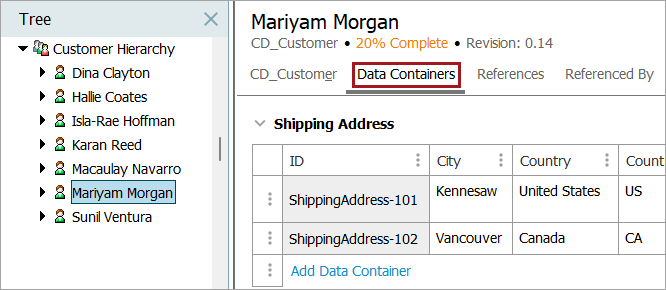
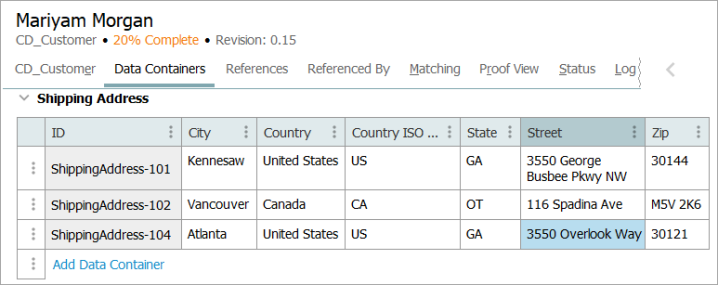
When a data container is valid for entity object types (a customer in the image below) or for product object types, selecting one of the valid objects in the Tree displays the Data Containers tab shown below. This is where you can add and maintain the attribute values and references for each container.
Note: If a data container instance exists in the Tree editor and has values, removing validity for the object type in System Setup does not remove the data container values in the Tree editor, even though the object type is no longer valid. Instead, the delete button is enabled, which allows you to remove the values, and the 'Add Data Container' link is disabled since the validity has been modified.
For information about working with and maintaining data containers in Web UI, refer to the Data Containers in Web UI topic in the Web User Interfaces documentation.
Add a data container instance
- Click on the Data Containers tab to identify data container types that are valid for that particular object.
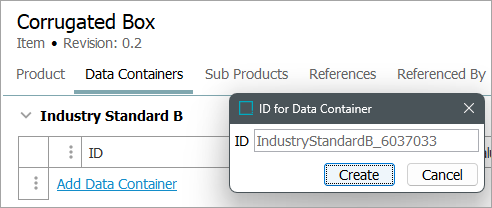
- Click the Add Data Container link below the desired data container type, and supply an ID for a new data container instance, and click the Create button. If there is an auto-ID pattern set up, then no ID needs to be entered.
Alternatively, click the > button at the beginning of a row to access the Add Data Container option.
In the example below, the 'Shipping Address' data container instance is created to hold values for each of the address attributes.

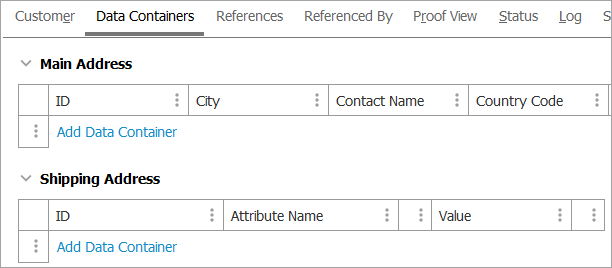
- If a data container type allows for multiple data containers as shown for 'Shipping Address' above, the Add Data Container link continues to display after the first data container is added.
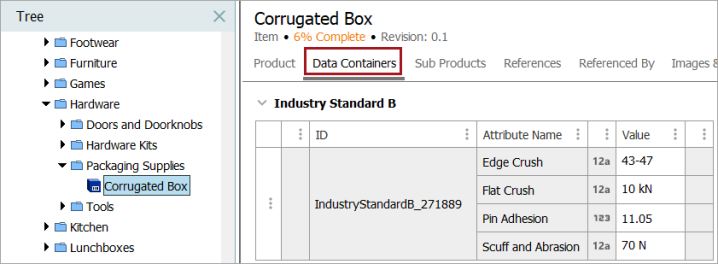
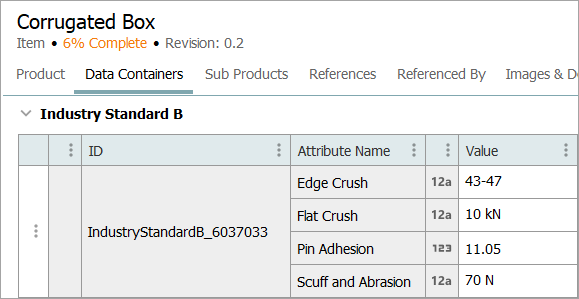
- If multiple data containers are not allowed, as is the case with 'Main Address' and 'Industry Standard B' in the screenshots below, the link is removed after the first one is added.
- Enter attribute values for each data container attribute.
Edit a data container reference
References can also be maintained within the data container workbench tab.
- To add a reference, navigate to the cell of the relevant reference type and click the
 button.
- In the window that appears, browse or search for the desired object and click Select.
To delete a reference, click the  button and confirm the deletion.
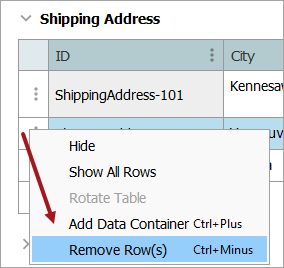
Delete a data container instance
- Click the edit button (
 ) at the beginning of the data container row.
 - Select the Remove Row(s) option.
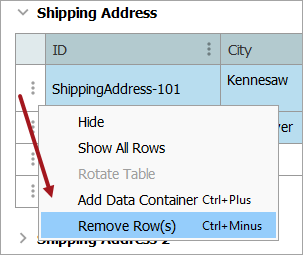
Delete multiple data container instances
- Click the edit button () at the beginning of the data container row, press the Ctrl key on the keyboard, and continue to click the > button at the beginning of each row to be deleted.
- Select the Remove Row(s) option.
Note: If a data container that was originally created using a manually input ID is deleted, that same ID will not be able to be used again for another data container. To avoid this issue, it is recommended that data containers are created using auto-generated IDs, or in the case where data containers need to be identified using specific details (e.g., a name or number that describes what the data container entails), using data container keys. For information regarding creating auto-generated IDs for data containers, refer to the Setting Up Data Container Types in STEP Workbench topic. For information regarding data container keys, refer to the Data Container Keys topic.