Considerations
This setup guide explains how to set up a Supplier Web UI, but first, a Supplier Web UI configuration and a matching workflow must exist on the system.
If allowing self service supplier solutions to alter values for Merge Golden Records, be careful to not allow editability of the attributes and reference types that are given special meaning in the Merge Golden Record Component Model.
Similarly, Clerical Review and Unmerge should be run by a user with privileges to access all records and values implicated in the merge. These workflows do not lend themselves towards self service supplier solutions
Supplier Web UI Principles
The Supplier Web UI differs from other Web UIs by allowing external data suppliers to create and maintain data. Each supplier can only access data that is created / maintained by them. This solution requires three main things to be set up on the system.
- A Supplier User Group for each supplier: the individual Supplier Users must be created below a Supplier User Group. When the Supplier User Group is created, the supplier’s classification structure is automatically created. This process is defined in the Create a Supplier User Group section below.
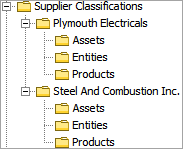
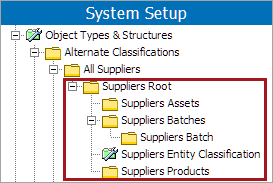
- A Classification structure for each supplier: created automatically when the Supplier User Group is created. The classifications will be used to collect the supplier’s assets, entities, and products. Only the corresponding supplier’s users can access these objects. The supplier classification structure looks like this:
- A Product to Classification link type: used to link the supplier’s products into the supplier’s classification structure (i.e., to the products folder and the batch folders).

How it works
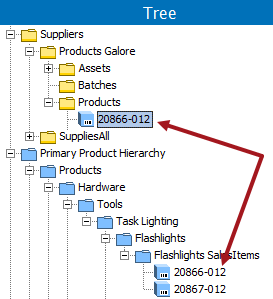
For entities and products, when a supplier user creates a new item through the Supplier Web UI, the item will be created in the blue Product Hierarchy or an appropriate Entity Hierarchy and then linked to the supplier’s classification structure. For example, the following product is created in the PPH and then linked to a classification
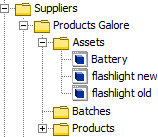
When a supplier user uploads a new asset through the Supplier Web UI, the asset will be placed in the supplier’s classification structure (the Asset folder):
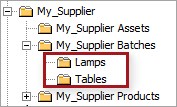
When a supplier user creates a new batch through the Supplier Web UI, a classification folder will be created, representing the new batch. These batch folders will be placed below the supplier’s Batches folder:
When a supplier user adds an item to a batch through the Supplier Web UI, the item will be linked to the corresponding batch classification folder:

Disable Batches Folder
Use of the Batches folder is optional. If it is not needed, it can be disabled manually.
- In System Setup, click the Users & Groups node.
- Navigate to the Web UI Settings flipper.
- Clear the values for the 'Batches classification object type' and 'Batch classification object type' fields.
Note: Supplier nodes can work without the batches folder, but it is required for the auto-generation of the structure as explained below. When the batches folder is displayed, both asset, entity, and product folders must exist.
Auto-generate the Supplier Classification Structure
In order to have the supplier classification structure automatically created, a number of classification object types must be provided as defined below.
- In System Setup click the Users & Groups node.
- Navigate to the Web UI Settings flipper.
- Provide the object type IDs for the following parameters:
- Web UI supplier classification object type
- Web UI supplier products classification object type
- Assets classification object type
- Batches classification object type
- Batch classification object type
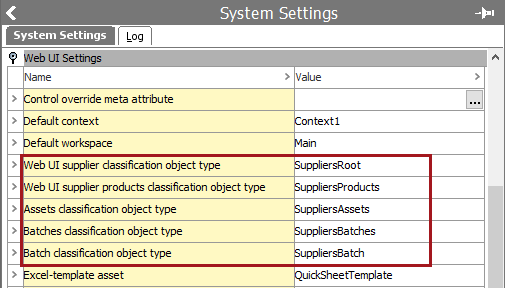
The standard classification object types used for this are these:
Set the Product to Classification Link Type
Products created through the Supplier Web UI automatically get linked to the supplier's classification structure. This is done by using a specified Product to Classification link type.
- In System Setup click the Users & Groups node.
- Navigate to the Web UI Settings area.
- Enter the ID of the link type in the Link type for vendor classification to product link parameter.

View Across Multiple Suppliers
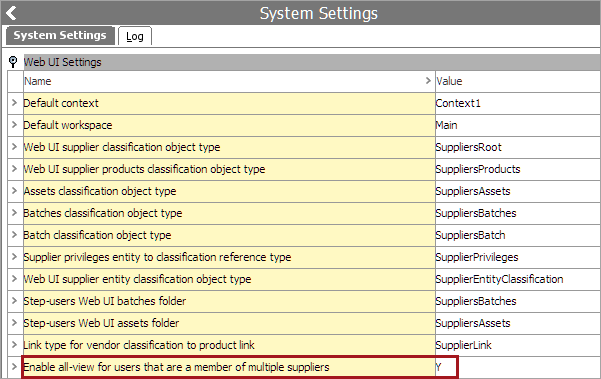
When a supplier user is a member of more than one supplier group, a view can be enabled that allows access to all suppliers via the 'Enable all-view for users that are a member of multiple suppliers' parameter. When set to Y, all suppliers are accessed with the same view. Additional setup is required as defined in the Additional All-View Web UI Setup section below.
Additional All-View Web UI Setup
After having changed the 'Enable all-view for users that are a member of multiple suppliers' parameter to Y in the workbench, additional changes must be made in Web UI to activate the all-view across multiple suppliers. The following components can be used in the Web UI for the All-View:
- Supplier Field
- Supplier Product Assets
- Create Supplier Product Action
- Create Supplier Product Toolbar Action and Create Supplier Asset Toolbar Action
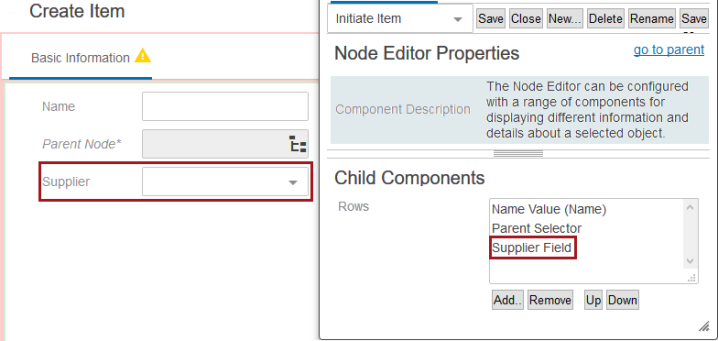
Supplier Field
To be able to create products or entities for a specific supplier group, the Supplier Field component must be added to the initiate screen. This allows all accessible supplier groups to be chosen when creating a product or entity. Otherwise, a new object will be added to the first in a list of available supplier groups.
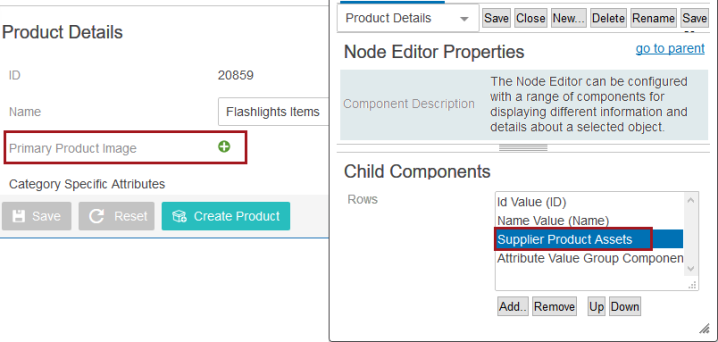
Supplier Product Assets
To be able to upload an asset to a specific supplier group or to all accessible supplier groups, the Supplier Product Assets action should be used to support all-view across multiple suppliers functionality.
After adding the row, select the reference type. The name of the reference type is used as the label for the row by default, or you can type a custom label.
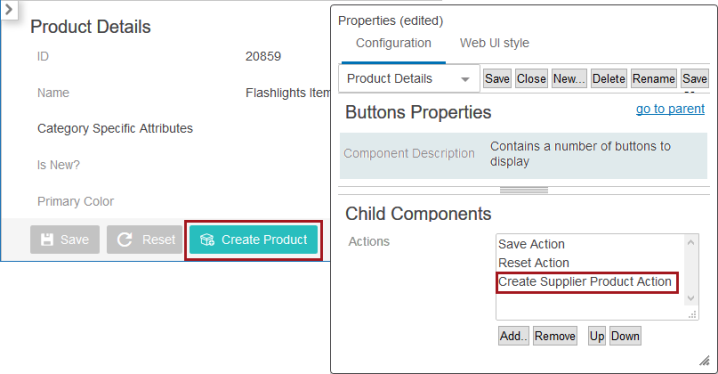
Create Supplier Product Action
To be able to create new products for a specific supplier while in the blue product hierarchy, the Create Product Action must be replaced with the Create Supplier Product Action to support all-view across multiple suppliers functionality.
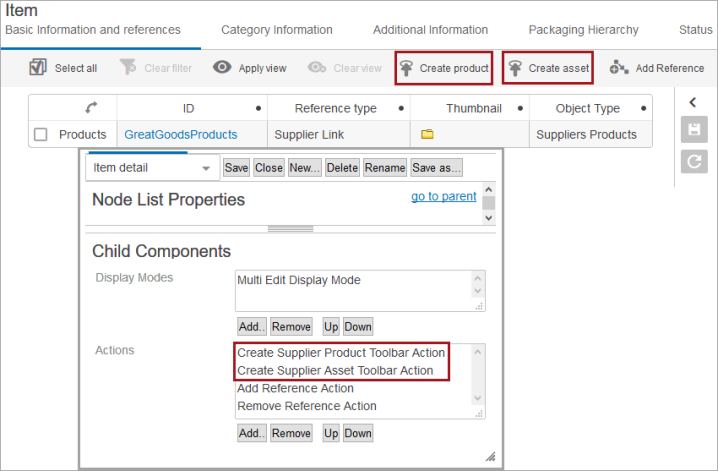
Create Supplier Product Toolbar Action and Create Supplier Asset Toolbar Action
For these toolbar actions, you must be using the multi-reference editor which allows it to identify valid reference types. These toolbar actions are not available in the yellow classification hierarchy. No additional configuration is required when adding these actions to a screen.
- The 'Create Supplier Product Toolbar Action' option creates products in the blue product hierarchy.
- The 'Create Supplier Asset Toolbar Action' option applies assets to products in the blue product hierarchy.
Create a Supplier User Group
Once the classification object types are set, a Supplier User group can be created. A Supplier User Group is a special user group where a supplier can have each supplier user created below. Each supplier must have their own Supplier User group.
Note: In a workflow, supplier users can only view objects that are directly linked to their supplier classification. Objects that are children to blue folders within a classification folder are not available to supplier user workflow tasks. For more information, refer to the Moving Tasks through a Workflow in Web UI in the Web User Interfaces documentation or the topic Moving Tasks through a Workflow in STEP Workbench in the Workflows documentation.
- In System Setup, select the Users & Groups node and right-click.
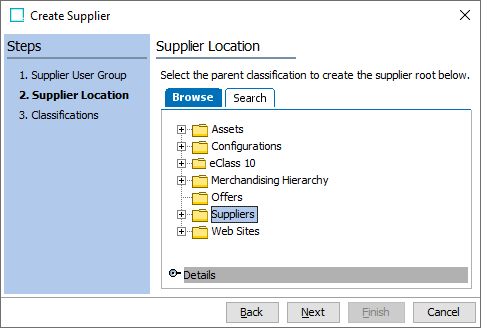
- Select New Supplier. A Create Supplier wizard appears.
- Enter the ID and the Name of the supplier.
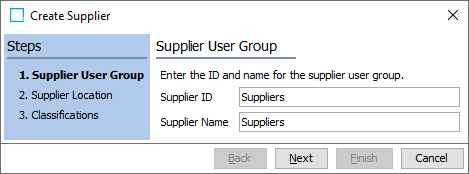
- Use the Browse tab to find and select the position in the classification hierarchy where the suppliers classification structure should be created. You can also use the Search tab to type in a specific node.
- Automatically generated IDs and names for the supplier root, product folder, entity folder, assets folder, and batches folder are displayed. However, IDs and Names can be modified as needed.
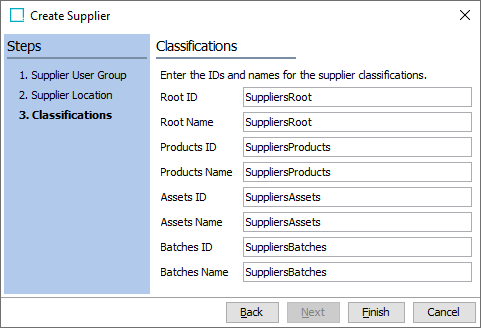
- Click the Finish button. The Supplier User Group is now created and the supplier's classification structure is also created. Users must be added to the supplier user group to enable the supplier functionality.
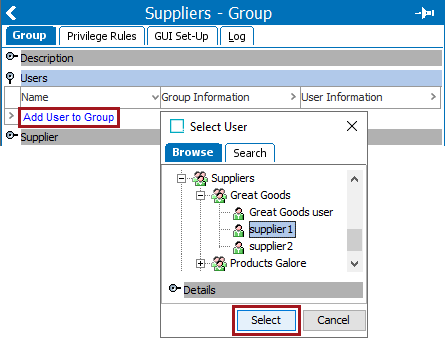
- In System Setup, click the new supplier user group to display the editor.
- On the Group tab, Users flipper, click the Add User to Group link and select the necessary users.
Note: Workflows show only products / entities that are linked to the current supplier user. For workflows to display products / entities that are linked to other suppliers or not linked to any supplier, the user must have the necessary privileges to view them. Therefore, you must provide privileges to the supplier user group once it is created. For more information, refer to the topic Privilege Rules in the System Setup documentation.
Setting Up Smartsheet
Smartsheet is an Excel format that can be used to initiate and maintain products via the Supplier Web UI. For more information, refer to the section Excel Smartsheet Format of the Data Exchange documentation.