A key feature in Print Publisher is the ability to update previously created page(s) with the latest content changes from STEP. This functionality allows the page-building process to begin even when product data is not yet complete or approved. The update features within Print Publisher ensure that the contents of your pages always match the corresponding content in STEP.
Print Publisher supports three ways of updating documents from within InDesign:
- Checking the STEP database for updates
- Selectively choosing which data structure to update
- Direct update, where specific elements on the page are chosen for updates
This section describes how to check the content of the document against the corresponding content in STEP—from within InDesign—and how to update previously created pages with the latest changes from STEP.
For information on how to update documents from within the workbench without going into InDesign, refer to Updating Documents From the Workbench
Checking Database Update
Because pages can be built before product data is complete or approved, it is possible, and often necessary, to check the database for updates and update the InDesign pages accordingly throughout the publication production cycle.
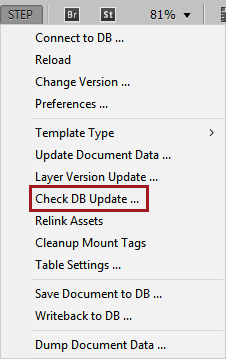
- Open the page that you would like to update, then navigate to STEP > Check DB Update ....
- The Database updates since place dialog displays. This dialog shows a list of elements placed on the page (such as attributes) where the content no longer matches what is in STEP.
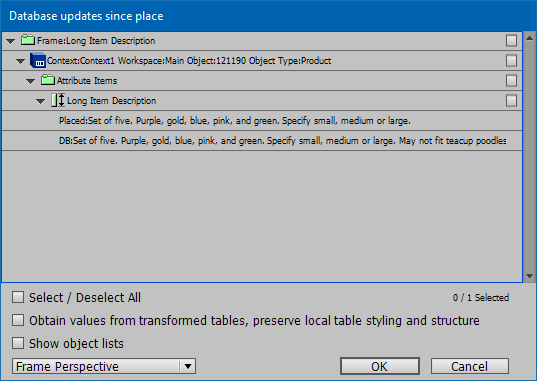
- Check the relevant boxes on the right side of the dialog to make updates to specific content only. Checking the parent-level change will automatically select everything underneath. To select all boxes at once, check the Select / Deselect All checkbox.
- If a table is chosen for update, check the Obtain values from transformed tables, preserve local table styling and structure box in order to retain the existing table structure and only update the values. For example, local styling might have been applied to the table on the InDesign page after its original mount, such as the alteration of row / column sizes or the addition of color shading (either manually or through a previous table transformation). Checking this box ensures that the table structure and formatting remain as-is and only the values are updated. If the box is not checked, the entire table is re-sent from the database (force updated) and any local updates made to the table are lost.
Note: If actual table structural changes have been made to the table in STEP, such as the addition or removal of rows or columns, then the table will remount regardless of whether you have checked the 'Obtain values from transformed tables' box.
There are two methods to avoid remounting entire tables. An alternate way of updating a table is to update only the attributes within the table using the Update
- From the dropdown list in the lower left corner, select Frame Perspective or Object Perspective to change how the list of update candidates is displayed. The previous screenshot in this topic shows how potential DB updates look in the Frame Perspective, which identifies the frame(s) on the InDesign page that contain out-of-date content. The Object Perspective view lists the changes by object, as pictured in the following screenshot.

- Select the Show Object lists checkbox to split the dialog box into two areas, with the lower area showing object lists. If repeated areas or template sections have a different object list, then items are shown in the object list.
- Click OK to start the update process, or Cancel to exit the dialog.
Updating by Type
You can selectively choose which elements on the page to update if you know that a certain category of data (such as image references, attributes, tables, or commercial data values) have been changed in STEP and you want to update your page to reflect those changes only. You can update either a small set of data, such as one individual attribute, or you can update an entire group of attributes, images, tables, and so forth.
- With the relevant InDesign page opened, navigate to STEP > Update Document Data .... The Document Update dialog displays.
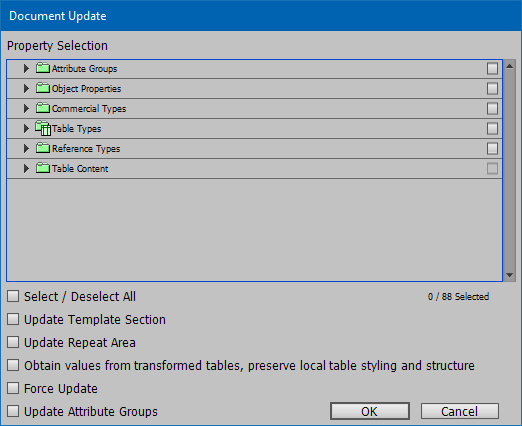
- Check the relevant boxes on the right side of the dialog to make updates to specific content only. Checking the highest level will automatically select everything underneath. To select all boxes at once, check the Select / Deselect All box. Note that boxes will appear for all data categories whether or not they contain changed content. The Document Update feature does not run a check on the page data first to view what needs updating—the dialog provides a list of all data that can be updated.
- Check the Update Template Section box to compare the list of objects applicable to a template section to the objects mounted on the page (ignoring order). Additional objects are placed at the end of the list unless deleted items are also found, in which case added items replace the deleted items until there are no more deleted items and the remaining items are then placed at the end of the list. When the Force Update checkbox is selected, the template section is removed from the page and replaced with the original gap, etc. settings, causing the objects to appear in the order of the database. This will refresh the selected sections with the current data that is in the database.
- Check the Update Repeat Area box to compare the list of objects applicable to a repeat area to the objects mounted on the page (ignoring order). Additional objects are placed at the end of the list unless deleted items are also found, in which case added items replace the deleted items until there are no more deleted items and the remaining items are then placed at the end of the list. When the Force Update checkbox is selected, the repeat area is removed from the page and replaced with the original gap, etc. settings, causing the objects to appear in the order of the database.
- If a table is chosen for update, check the Obtain values from transformed tables, preserve local table styling and structure box in order to retain the existing table structure and only update the values. For example, local styling might have been applied to the table on the InDesign page after its original mount, such as the alteration of row / column sizes or the addition of color shading (either manually or through a previous table transformation). Checking this box ensures that the table structure and formatting remain as-is and only the values are updated. If the box is not checked, the entire table is re-sent from the database (force updated) and any local updates made to the table are lost.
Note: If actual table structural changes have been made to the table in STEP, such as the addition or removal of rows or columns, then the table will remount regardless of whether you have checked the 'Obtain values from transformed tables' box.
An alternative way to avoid entire table remounts is to not update the table at all, but to instead update only the attributes within the table (by checking a box for an attribute or attribute group in the Document Update dialog) or by performing a direct data update on the table (detailed later in this topic in the 'Direct Data Update' section).
- Check the Force Update box to have all selected values re-sent from STEP and overwrite all associated local changes on the InDesign page. If not selected, the content is only updated if the current value is different to the value when it was mounted. Choosing force update will completely re-push the information from STEP, whether it is different to what is on the page or not. This option could cause a much longer update time if there is a large volume of data being updated since the system is re-pushing all data and not just data that has changed.
- Select the Update Attribute Groups checkbox to update the sequence and number of visible attributes within a referenced attribute group.
- Click OK to update the document to match the content in STEP. Click Cancel to exit the dialog.
Direct Data Update
Data can be updated directly from the page—an attribute or a table at a time—using the direct data update features in Print Publisher, which are available through right-click menu options.
Direct Data Update of Attribute Text
Two options are available for direct data updates of attributes: Update Page Selection and Force Update Page Selection.
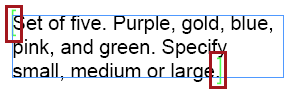
- Place the cursor within the tag markers ([ ]) of the relevant element on the InDesign page, then right-click. (If the tag markers are not visible, click View > Structure > Show Tag Markers.)
- On the popup menu that displays, the data update options appear toward the bottom. (Note that the entire popup menu is not displayed in the below screenshot.)
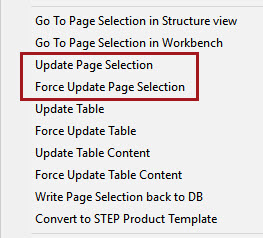
- Choose Update Page Section to update the attribute value if it is different in STEP since mounted on the page.
- Choose Force Update Page Selection to force the attribute value to be updated. (This will update the value whether or not it is different from what is in STEP.)
Direct Data Update in Tables
Four options are available for direct data updates of tables: Update Table, Force Update Table, Update Table Content, and Force Update Table Content.
- Place the cursor anywhere within the relevant table and right-click.
- On the popup menu that displays, the table data update options appear toward the bottom: (Note that the entire popup menu is not displayed in the below screenshot.)
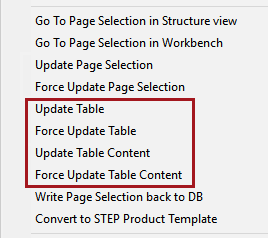
- Choose Update Table to update the values within the table that have changed since the table was mounted.
- Choose Force Update Table to completely remount the table, which will not only update the values within the table that have changed since the table was mounted, but will update any structural changes and remove any local formatting that was applied to the table since it was last mounted.
- Choose Update Table Content to update every attribute in the table if the table structure matches. The update only takes place if the attribute value is different to that when it was mounted.
- If both structural changes and changes to content have been made, then a STEP Alert dialog box appears. Otherwise, only the content is updated.

- Click DB Attribute to update the content of the table. To update the structural changes as well, click DB Table.
- Choose Force Update Table Content to force update the table content with the current values from STEP. This causes all values to be overwritten whether or not they are different than the values in STEP. This option is useful for complex tables, such as tables that contain images.
- If both structural changes and changes to content have been made, then a STEP Alert dialog box appears. Otherwise, only the content is updated.
- Click DB Attribute to force update the content of the table. To force update the structural changes as well, click DB Table.