Once the Index XML has been exported from STEP, the next steps are as follows:
- Format the XML file
- Create the index mounting page
- Configure the paragraph and character styles within the mounting page
- Import the XML file into InDesign
- Mount the index onto the page
- Apply final formatting to the index
Formatting the Index XML File
The typical desired end result for a mounted index is to have what is known as dot leaders to separate the index words from their corresponding page numbers. For example:
Laser Printer ........1
Inkjet Printer .......2
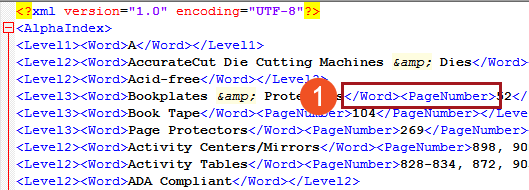
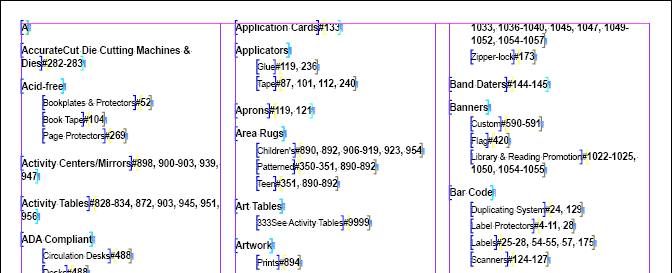
Dot leaders are not placed into the XML file itself. Instead, a special character—typically a # symbol—is added to the XML file, and this symbol will later be replaced in InDesign with a tab character that will generate the dot leaders. This process is explained later in this topic in the 'Replacing Special Characters With Dot Leaders on the InDesign Page' subsection.
To add the special character to the index XML:
- Open the XML file in the XML editor of your choice, such as UltraEdit or Notepad++.
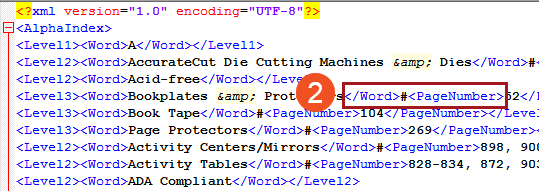
- In the XML file, find all instances of the string </Word><PageNumber> and replace them with </Word>#<PageNumber>.
- Save the file.
Configuring the Index Mounting Page
The recommended practice for index mounting pages is to create an InDesign document that contains columns with threaded text frames on the master pages.
Note: A mounting page for an index is not a publication template.
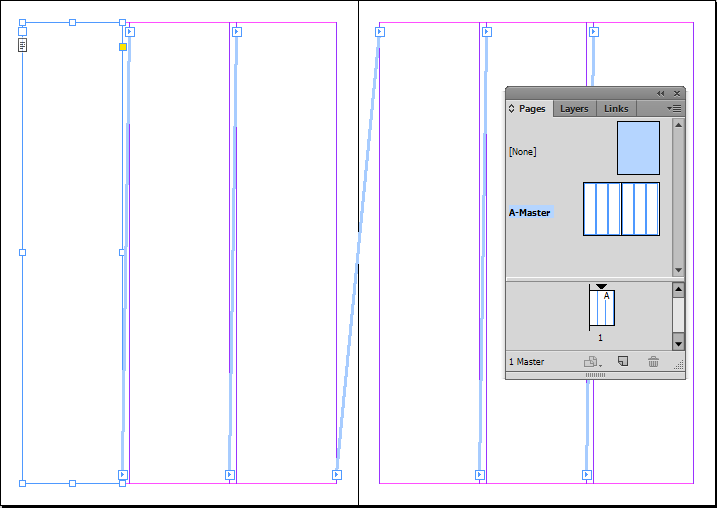
The following screenshot shows an index mounting page with three text columns threaded to one another on the master page. Placing text frames on the master eliminates the need to draw a text frame on the page when mounting an index, as the frames will be automatically created. This setup is ideal for lengthy indexes, as new text frames and pages are automatically created as the index mounts.
Since this type of document is created using standard InDesign functionality, instructions on how to create the document itself are outside the scope of STEP documentation. Refer to Adobe InDesign's help documentation for more information. However, the information is presented to illustrate the recommended document setup for mounting indexes generated from STEP.
Configuring InDesign Paragraph and Character Styles for Indexes
The index mounting page must also have InDesign paragraph styles and character styles configured to properly format the different levels of the index.
Note: This topic does not explain how to create InDesign paragraph styles and character styles themselves; refer to the Publication Template Layout, Formatting, and Styles topic here for more information.
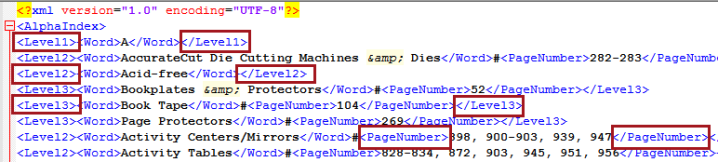
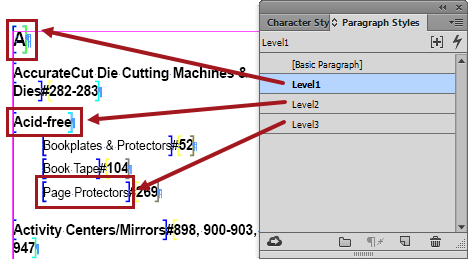
As illustrated in the Creating an Index Words Structure topic here, there are multiple levels to index words—Level 1, Level 2, and so forth.

In the index XML, these levels have corresponding tags. Level1 corresponds to the <Level1> tag, PageNumber corresponds to the <PageNumber> tag, and so forth.
Paragraph Styles for Index Words
Each level of index words needs to have a corresponding paragraph style configured in InDesign, not only for the textual formatting but to place the dot leaders between the words and the page numbers. Recommended practice is to name the paragraph styles to match the tag names, though any naming can be used as long as the styles are correctly mapped to the tags. Refer to the 'Mapping Styles After Importing the XML' section of this topic below for more information.
Formatting of the styles is up to the user, but the following screenshots show a common configuration. 'Level1' is a bold 12 pt font; 'Level 2' is a bold 9 pt font; and 'Level3' is a regular 8 pt font. The font sizes typically get smaller as the index levels go lower.
Creating Dot Leaders in Paragraph Styles
To place dots between the index words and page numbers in your index, you will need to configure dot leaders. Dot leaders are embedded into the Tabs area of InDesign paragraph styles and are configured as follows.
- Open the InDesign Paragraph Styles panel (Window > Styles > Paragraph Styles, or F11), then double-click on the paragraph style that you would like to edit.
- On the Paragraph Style Options dialog, click on Tabs in the left column.
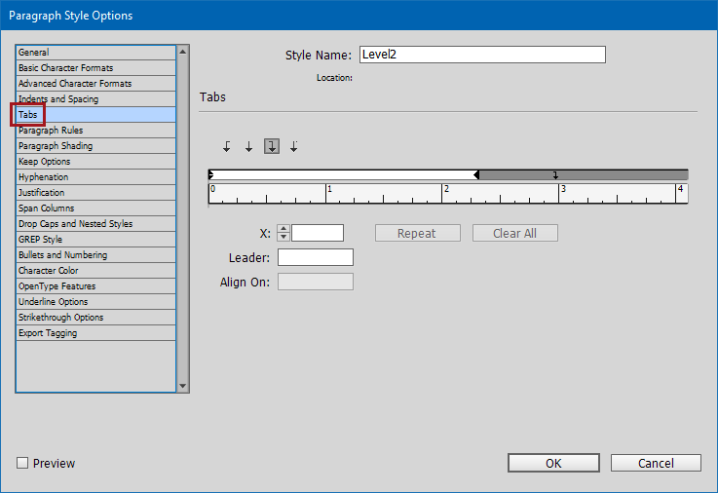
- Under Tabs in the right panel, select the right tab icon (1 in the below screenshot), then click the white area above the ruler to place the tab. Drag the tab over until it aligns with the edge of the column (2 in the below screenshot).
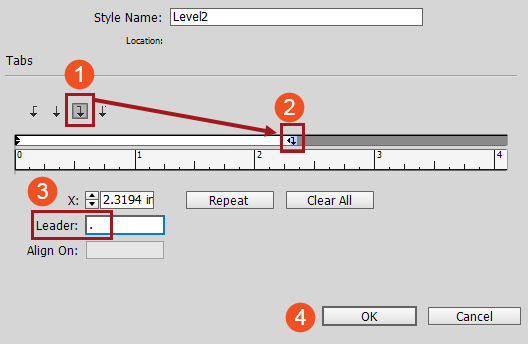
- Enter a period in the Leader field (3 in the above screenshot). Click OK (4).
- The dot leader is now configured. Repeat the above steps for all other paragraph styles that should have a dot leader.
Character Styles for Page Numbers
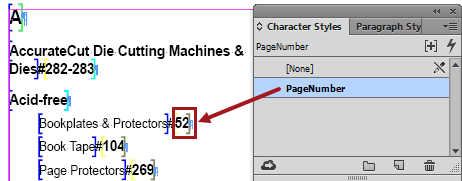
Page numbers are frequently mounted using a character style, as it is common for the page number to be a different style than the index word immediately preceding it. In the below instance, the 'Level3' paragraph style is used to format the index word ('Bookplates & Protectors') and the character style 'PageNumber' is used to override the Level3 paragraph style with a 9 pt bold font for the page number.
Importing an Index XML File Into InDesign
After formatting your index mounting page and the paragraph and character styles, the next step is to import the index XML file into InDesign. With your index mounting page open, follow these steps to import the index XML file.
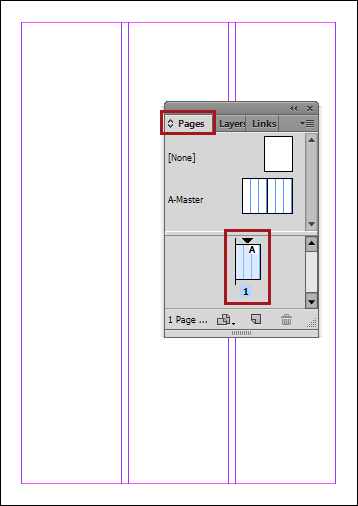
- Open the InDesign Pages panel (Window > Pages, or F12), then click on the page in the lower portion of the panel. Since indexes are not mounted on master pages, the page must be selected.
Note: The master page must be applied to the page. In the below example, the A-Master master page has been applied to page 1.
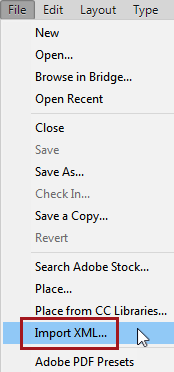
- Navigate to File > Import XML... in the File menu to import the index XML file.
- In the Import XML dialog that displays, locate the XML tile that you want to import, then click Open.
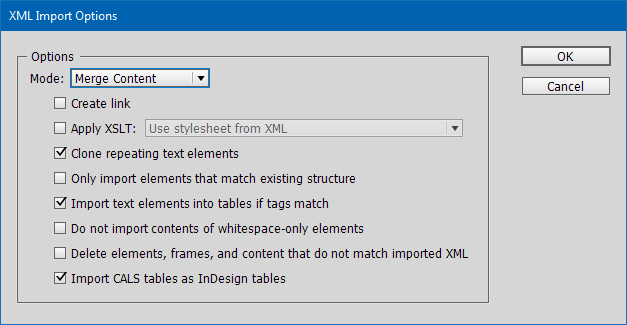
- Click OK on the XML Import Options dialog that displays. All settings can be left as-is.
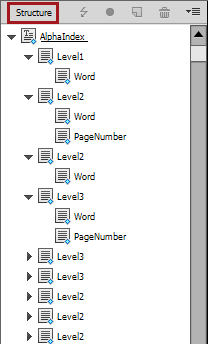
- The index file (AlphaIndex) displays in the InDesign XML Structure window on the left-hand side of the InDesign interface.
Mapping Styles After Importing the XML
After importing the index XML file, the next step is to map your paragraph and character styles to the XML tags contained within the index file. This mapping ensures that your index will be properly formatted and that styles can be applied automatically upon mounting.
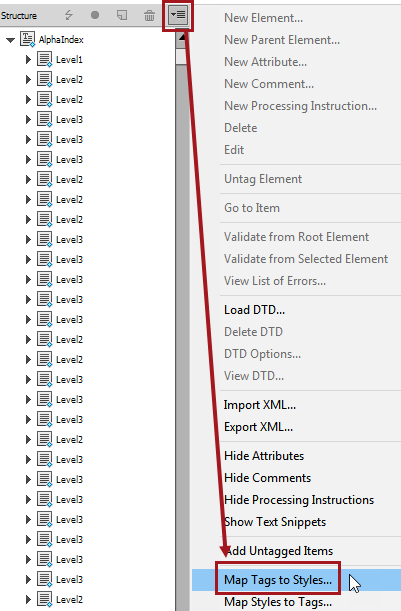
- Click the Options menu in the upper right corner of the InDesign XML structure panel, then click Map Tags to Styles.
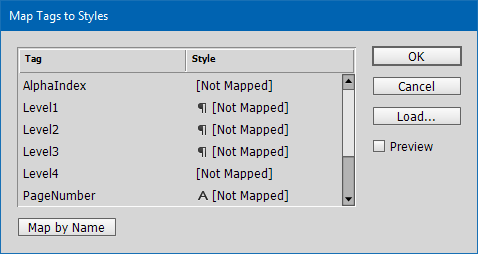
- The Map Tags to Style dialog displays.
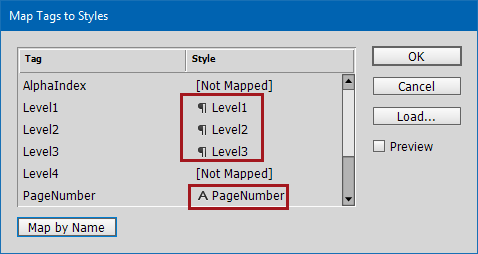
- If your style names are identical to the tag names, click Map By Name to automatically map the tags to the styles. Click OK.
- If your style names do not match the tag names, they must be mapped.
- In the Style column of the Map Tags to Styles dialog, click on [Not Mapped] for each tag that you would like to map.
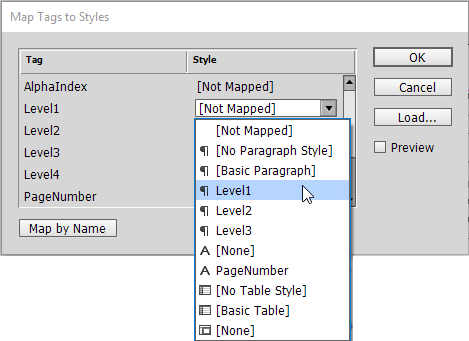
- Select the relevant paragraph style or character style from the dropdown list.
- Follow these steps for the remainder of styles that should be mapped.
- Click OK.
Mounting the Index XML
After mapping the index tags to the paragraph and character styles, the next step is to mount the index onto the page. The mounting is performed by a drag-and-drop method.
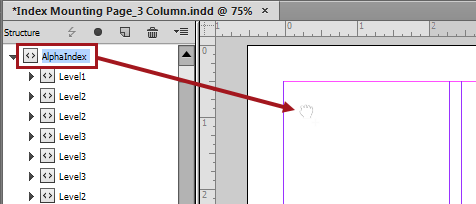
- Select the AlphaIndex XML file in the InDesign Structure panel.
- While holding down your left mouse button, drag the index onto the page in the desired location (typically the upper left corner of the page).
- The index is now mounted with the relevant mapped styles applied to each level of the index. The next step is to generate the dot leaders by replacing the # characters with tab characters.
Replacing Special Characters With Dot Leaders on the InDesign Page
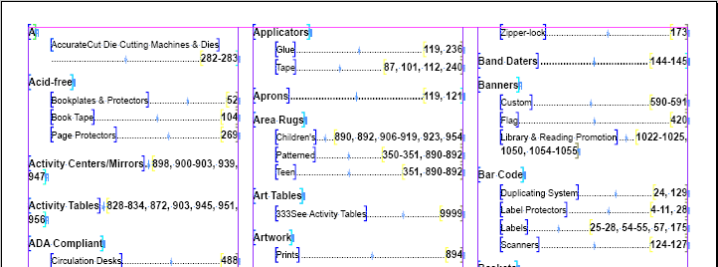
The final step in mounting the index is to complete the formatting by replacing the # symbols with a right-tab character in InDesign, which will insert the dot leaders.
- With the mounted index open in InDesign, click on Ctrl+F or Edit > Find/Change to open the Find/Change menu.
- Type # in the 'Find what' field and ^y in the 'Change to' field. ^y is the InDesign character for Right Indent Tab.
- Click Change All, then click Done.

- Your index should now resemble the following:
Additional Index Formatting Options
Additionally, you may format your index by any of the following methods:
- turn the index into an InDesign table by clicking Convert Text to Table in the Table menu
- format the index any way you want by using InDesign’s native table formatting features