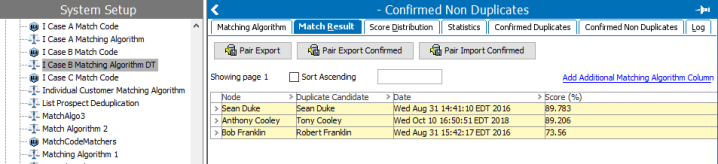
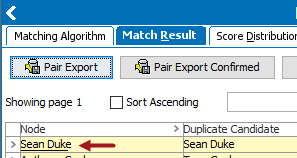
When the matching algorithm runs, the possible matches can be viewed on the 'Match Result' tab of the matching algorithm. The workbench supports the matching user actions defined below.
You can merge identified duplicate source records using the Web UI. For more information, refer to topic Merging Confirmed Matches.
Compare Match Result
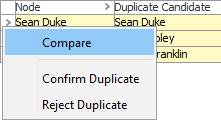
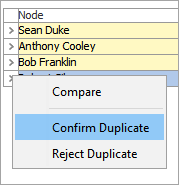
To compare an object with its duplicate or non duplicate candidate, on the 'Match Result' or 'Confirmed Non Duplicates' tab, right-click the first column of a row and select the 'Compare' option.
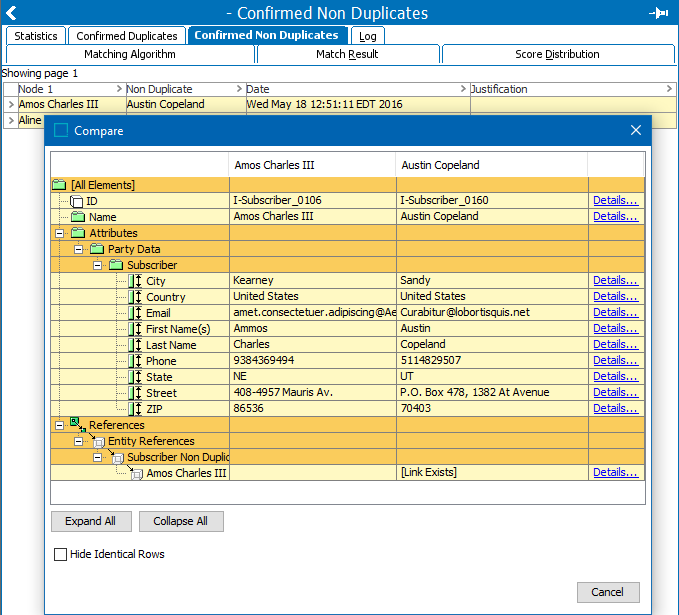
The 'Compare' screen shows the similarities and differences between the paired objects. When accessed via the 'Match Result,' you can confirm or reject duplicates via the 'Confirm Duplicate' and 'Reject Duplicate' buttons.
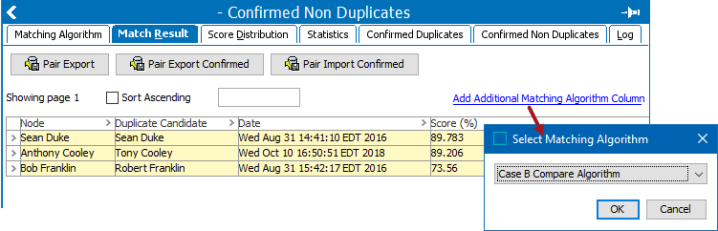
Right-click a column heading and select 'Filtering enabled' to allow easy navigation and filtering of desired data. Filtering in the following image has been set to include only rows that have a score of less than 90.
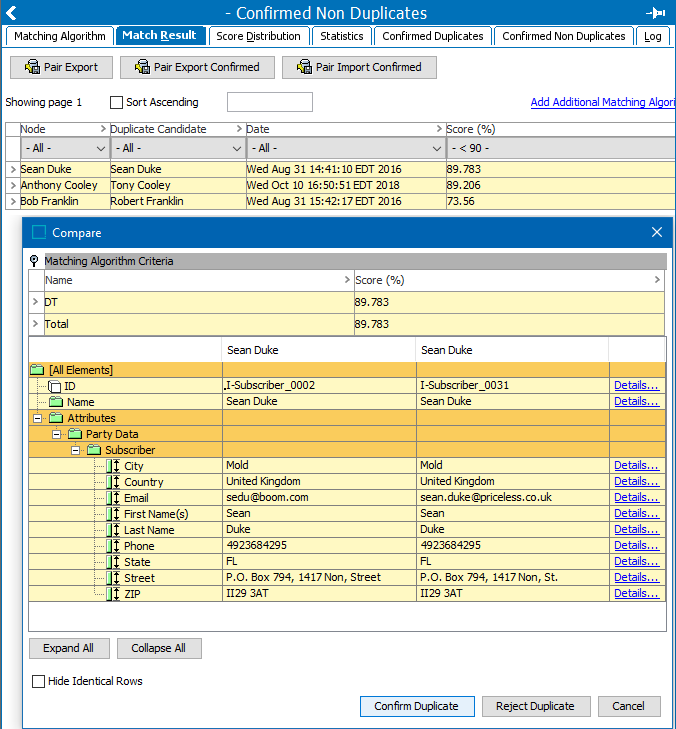
When accessed from the 'Confirmed Non Duplicates' tab, you can only view the data, no further actions are available.
Adding Additional Matching Algorithm
On the 'Match Result tab, click the Add Additional Matching Algorithm Column link to add another matching algorithm to compare the objects. This allows you to review more information about the objects before deciding if they are duplicates or not.
Confirm or Reject a Duplicate
From the 'Match Result' tab, you can compare pairs and mark them as either confirmed duplicates or confirmed non-duplicates.
- In System Setup, select the relevant matching algorithm, and then click the 'Match Result' tab.
- Click the row that contains the record being worked, right-click the arrow in the first column and select Confirm Duplicate or Reject Duplicate from the menu.
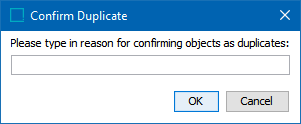
- Provide a reason for the confirmation / rejection and click OK. The reason is saved as an attribute value on the corresponding Confirm Duplicate / Confirm Non Duplicate reference.
-
The Duplicate reference type is created between two objects that are manually confirmed as duplicates. This reference means that regardless of how the objects are modified, the matching algorithm always considers them as duplicates.
-
The Non Duplicate reference type is created between two objects when a duplicate candidate is rejected. This reference means the two objects will never be identified as duplicates by the matching algorithm regardless of how they are modified.
Note: None of the confirmed non duplicates between any two records in the transitive closure (the score of potential duplicates) will be moved to the Clerical Review task list.
-
These references can be manually removed via the 'References' tab of the object in question.
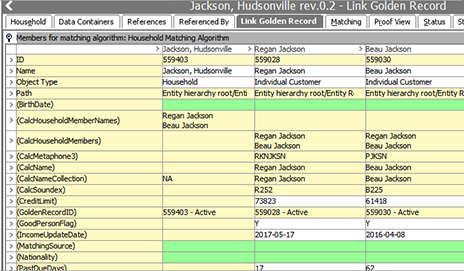
View Matched Objects in Tree
Duplicate information can also be viewed directly on each link golden record source record in the Tree.
Choose a method to view the object:
-
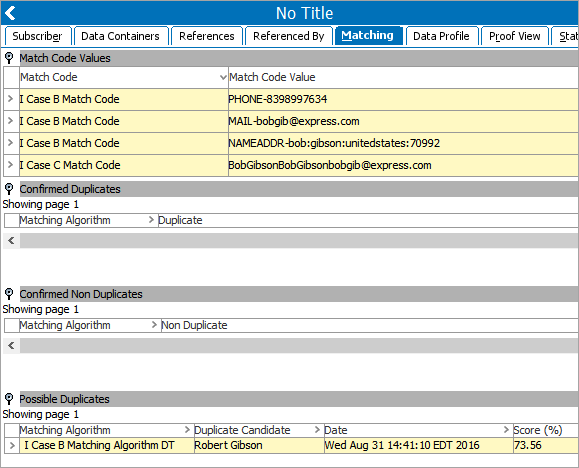
In the Tree, select the relevant source record and click the 'Matching' tab.
-
On the 'Match Result' tab, click the link of the object to open the object editor in Tree.
-
For the link golden record, the 'Link Golden Record' tab display the source records that are linked to it.
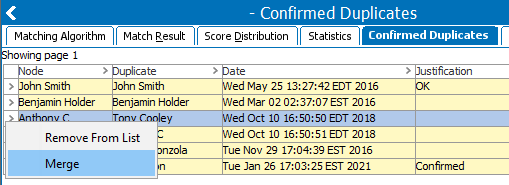
Merge Confirmed Duplicates
The 'Identify Duplicates' or 'Link Golden Record' actions can create two objects that are confirmed duplicates and it is possible to manually merge them into a single object.
Important: Because duplicate source records are deleted during a merge, this should not be used as part of a golden record solution.
-
From the 'Confirmed Duplicates' tab, right-click the first column and choose the Merge option.
-
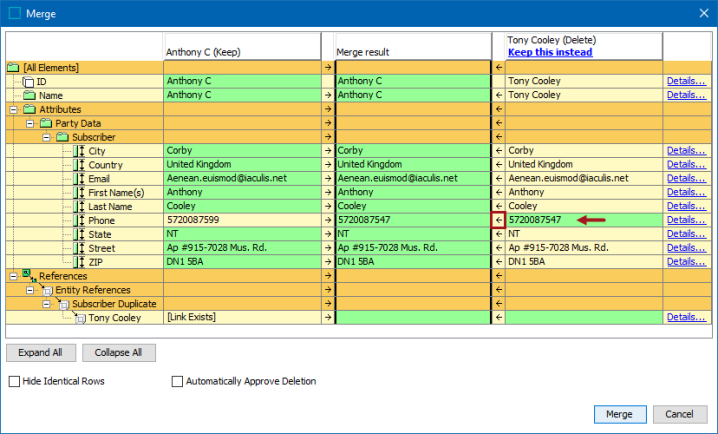
On the Merge dialog, review the data and decide which object to keep.
The first column is the data type. The three data columns are: the '(Keep)' data, the data that will remain after the merge (Merge result), and the '(Delete)' data. The green cell background color indicates where data is taken from.
-
Click the Details... link to open a large display of the data on the selected row.
-
Click the Expand All or Collapse All buttons to show or hide the detailed data.
-
Check the Hide Identical Rows checkbox to show only the rows with different data.
-
Check the Automatically Approve Deletion checkbox to approve deletion of objects in the 'Delete' column during the merge process and avoid having to manually delete the duplicate record.
-
Click the Keep this instead link to move all data from the (Delete) column into the Merge result column.
-
Click the arrow on an individual row to move only the data from that cell to the Merge result column, as shown for the Phone row.
-
When the data in the Merge result column is the record you want to keep, click the Merge button to perform the merge and keep a single record.
Merge Considerations
If the object that remains contains no data in any context, the data is taken from the deleted object and merged into the remaining object. Data is defined as:
- Attributes
- Object name
- Reference types
- Object to classification link types
- Table types
- Object to attribute links
Reference and link types do not accumulate. If the reference or link type is already populated in any context nothing is merged from the object that is deleted.
During the merge process, all references to the deleted object are modified to point to the object that remains in the database. This means that the source objects of these references will be modified. 'Automatically Approve Deletion' only approves the deletion of objects and changes to objects due to references that are pointed to another target are not approved.