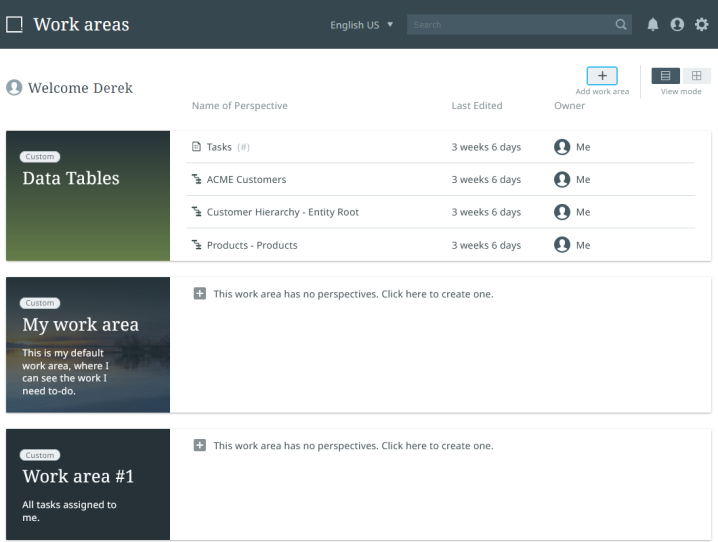
Work areas are the foundation of the interface, determining what data is displayed and how it is organized. They serve as shared containers for related perspectives, and allow you to group and organize your perspectives according to how you work. Pictured below is the work area screen, which is what displays when you first log in.
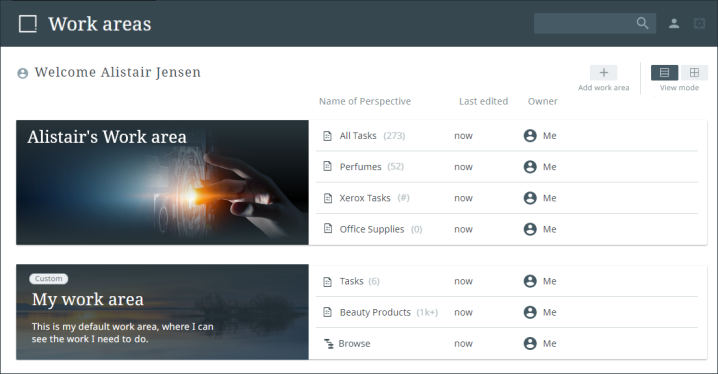
As shown in the examples above, you can easily identify how many tasks you have for each perspective shown based on the number in parentheses to the right of the perspective name.
Adding a New Work Area
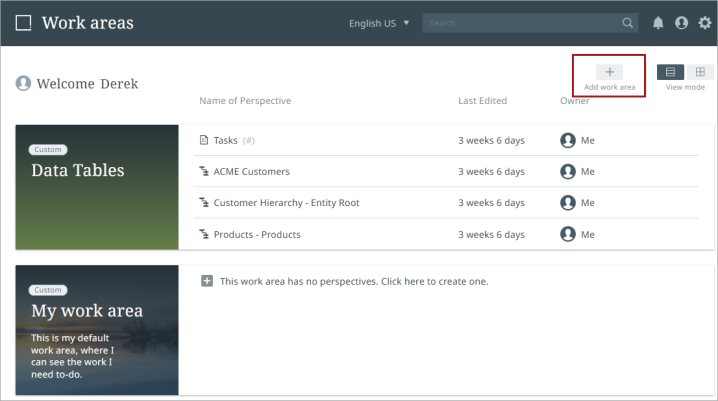
To add a new work area to the work area screen, click the "Add work area" button at the top of the page.
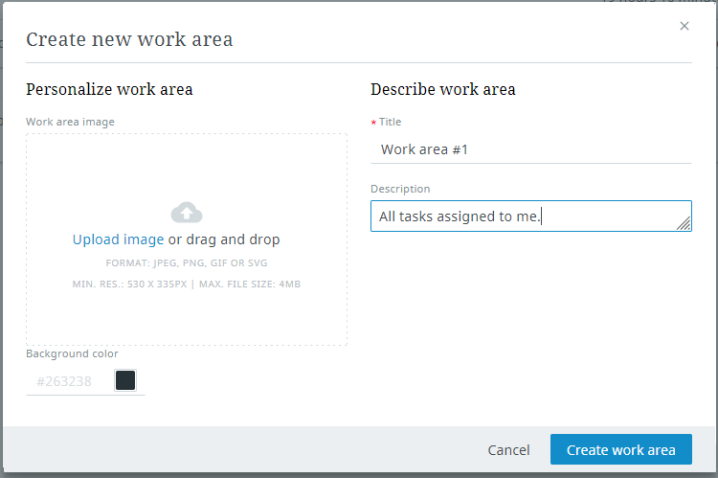
This opens the "Create new work area" editor, as shown in the screenshot below. Using this editor, you can assign a title for the work area, a description of its purpose, and a background color or an image to represent the new work area.
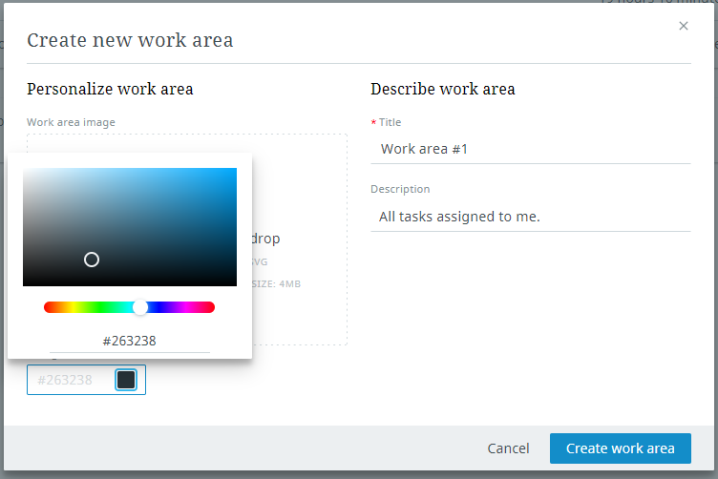
You can specify the background color by manually entering a hexadecimal color code or by picking a color from the palette on the color picker.
Once your new work area has been created, it displays alongside your existing work areas.
Important: Prerequisite—To enable the ability to add images for your work areas, verify, or have a system administrator verify, a classification folder for work area images has been set up in STEP. For more information, refer to the Administration section.
With your work area set up, you may want to add a perspective to your work area. For more on this, go to the Adding a New Perspective section of the Perspective Basics topic.
Preset work area and perspective configurations set by admin users become the default settings for assigned user groups. Columns and filters set by admins display to users. Admin defined filters cannot be deleted or overwritten by users once set. A tooltip message displays stating, "You cannot overwrite admin configurations." However, custom settings such as zoom, additional filters, and column width can still be manipulated and maintained by users in preset perspectives. Upon saving these changes, the 'Reset to default' feature is enabled which allows users to revert to default settings defined by admins. Preset work areas can be duplicated and further customized by users in the duplication. Custom work areas, identified by a "Custom" label above the work area name, are configured by the user and are customized based on user preferences and privileges.
Work Area Views
Your work areas can be displayed on the work area screen in two different ways, depending on which view is selected: list or gallery. The view buttons are located in the upper right-hand corner of the work areas screen. To change the view, click the view button for the view style not currently displayed. The list button is on the left and the gallery button is on the right.
List View
The list view provides a detailed overview for each work area. These details include:
- a list of the perspectives included within it and their respective task counts
- last edit date
- the owner of each perspective
In the List View, you can access the work area by clicking the image. This opens either the most recently accessed perspective or the first perspective tab based on tab ordering. Or you can click directly on the desired perspective to gain access.
Gallery View
The gallery view displays each work area as a clickable card that provides fewer details about the work area than the list view, but displays the selected background image or color more prominently to aid faster identification and access. Gallery view enables users to view more work areas on a single screen and quickly navigate between different work areas. Contained inside each work area card are the following data points:
-
name and description
-
how many perspectives are held within the work area
-
the last edit date for the work area
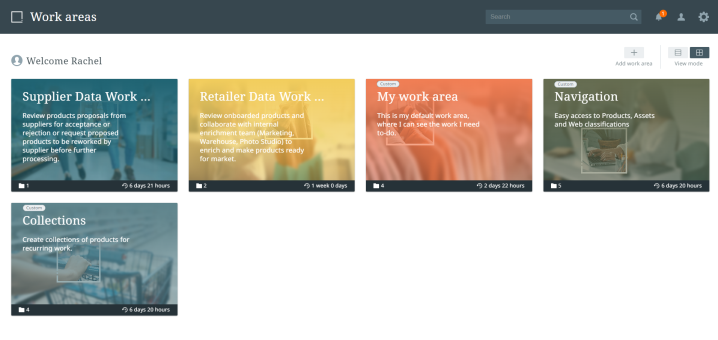
In the Gallery View mode, the work area can be accessed by clicking the image. This will take you to either the most recently viewed perspective tab or the first perspective tab based on tab ordering.
Customizing the Work Area Screen
The work area screen allows you to organize the work areas and perspectives that you configure in a way that best fits your requirements.
Note: Work areas and perspectives configured by an admin user cannot be reordered by users.
Organize Work Areas
In both the list view and gallery view you can reorder your work areas by dragging and dropping the work area image.
Organize Perspectives
In list view, perspectives can be reordered by clicking and holding the drag handle on the perspective, (found at the far right of the listed perspective), dragging the perspective to the desired position, and then dropping it.
Maintaining Work Areas
To make changes to a work area, hover your cursor over the work area's image and select the pencil icon. This opens a menu allowing you to edit, duplicate, reposition, or delete the work area.
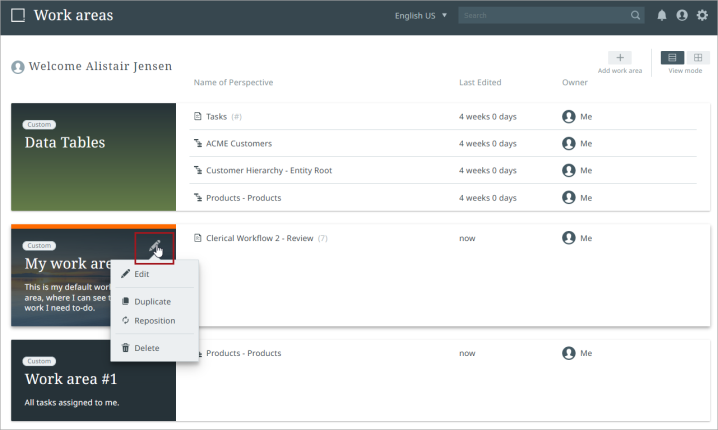
Selecting "Edit" opens the edit work area menu, allowing you to change anything previously set, including the title, description, image, or background color.
Selecting "Duplicate" creates a copy of the work area.
Selecting "Reposition" allows you to move the work area to a different location on the screen. This can also be accomplished by clicking on the work area image and dragging the work area to your desired location.
Selecting "Delete" allows you to delete a work area, following a prompt to confirm the deletion.
Maintaining Perspectives
Perspectives can be modified from the work areas screen in a number of ways. When in the list view, hover your cursor over the perspective you wish to edit and select the pencil icon.
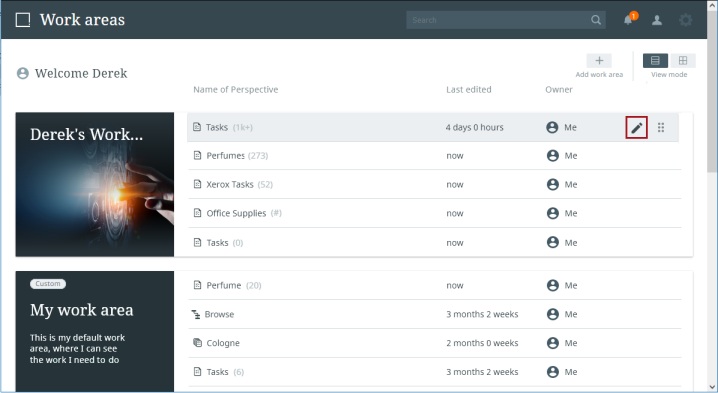
A menu displays that provides the following options:
-
Rename - Allows you to rename the perspective
-
Duplicate - Creates a duplicate of the selected perspective that can then be edited as needed
-
Delete - Prompts display of a confirmation dialog asking you to confirm you want to delete the perspective -- the tasks included in the perspective are not impacted, only the selected perspective is removed
-
Copy to - Enables users to create a duplicate of the selected perspective on a different work area
-
Move to - Enables users to move the selected perspective to a different work area
You can also move a perspective between different work areas by dragging and dropping it via the drag handle.
Task Counts
Within the work area screen, task counts appear to the right of each Tasks perspective name, as shown below:
Things to know about task counts:
-
Task counts load from top to bottom for perspectives as they are visible on the screen.
-
(...) indicates that tasks are still being counted and will display when loading is complete.
-
(0) indicates that there are no tasks in the perspective.
-
1,000 is the maximum task count. (1k+) indicates that there are over 1,000 tasks in the perspective.
-
If the task count cannot be calculated, a (#) will be shown. For example, there may be a combination of filters that limit the system's ability to count tasks fast and efficiently. This would prompt display of a #.
-
Mouse over the task count on the screen to get more information about what it means.
-
Counts are not shown for Browse and Collection perspectives.
Importing Assets
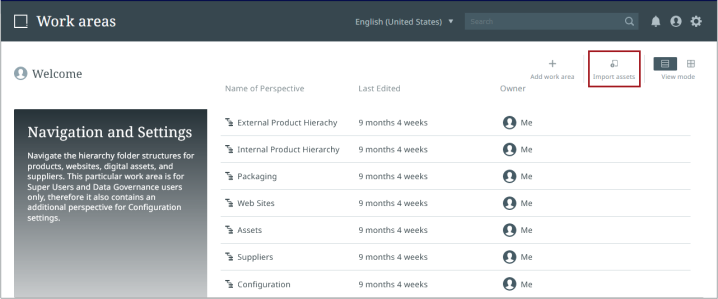
Also available on the work area screen is an "Import assets" button. This feature allows users to mass import assets into STEP via Instrument, independent of any specific product, entity, or perspective. Located to the left of the "View mode" buttons, the "Import assets" button gives you the ability to add an unlimited number of assets that can be linked, categorized, and renamed when it makes sense for your workflow.
To import assets on the Welcome screen using the "Import assets" button, follow the steps described below.
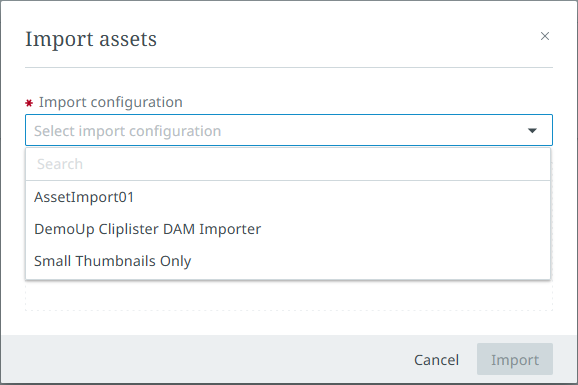
First, click the "Import assets" button.
An "Import assets" dialog displays.
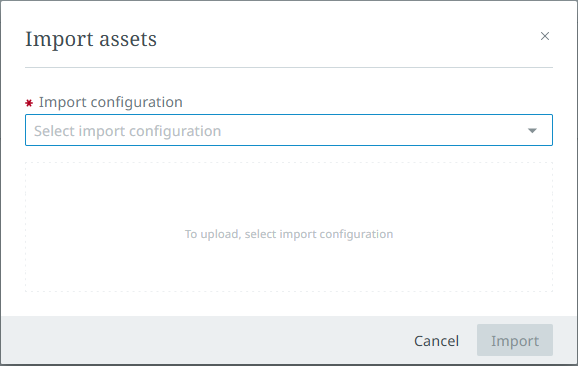
Note: If no asset import configurations have been set up for a given system, the system will display a message to this fact.
From the "Import configuration" field dropdown, select the desired asset import configuration for the assets being imported.
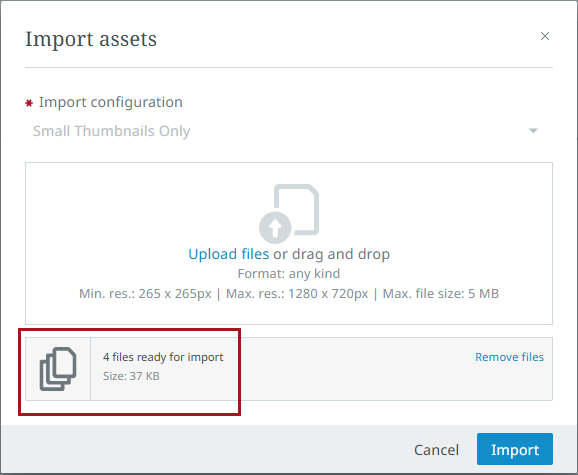
When the desired asset import configuration is selected, restrictions on which assets can be imported display within the dialog, as shown below.

You can drag and drop assets into the dialog, or click "Upload files" to find the relevant assets on your machine to be imported.
Once assets have been selected, the selected import configuration cannot be changed without removing the assets from the pending import.
As the assets are added, the validation immediately evaluates the asset against any restrictions configured in the selected asset import configuration. The number of assets that will and will not be imported is updated in the dialog. To remove all assets validated for import, click the "Remove files" button.
If assets do not comply with the validation configured for the selected import configuration, those assets will display in a separate red-shaded box, as shown in the screenshot below, and will not be part of the import.
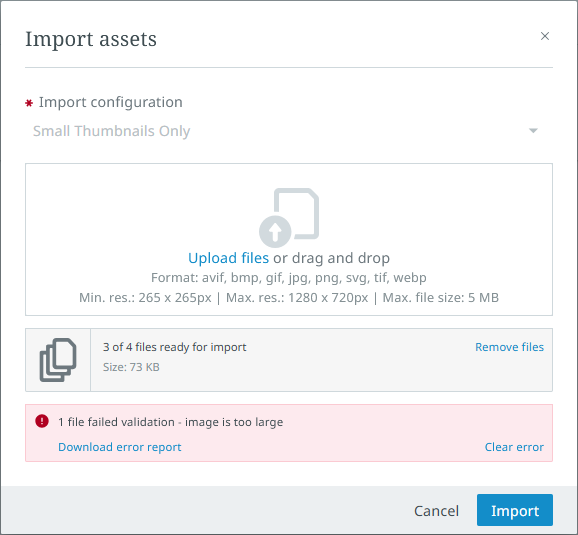
To remove one or more assets that have failed validation, click "Clear error" in the red-shaded box. For more information on why the asset failed validation, you can access a report by clicking "Download error report."
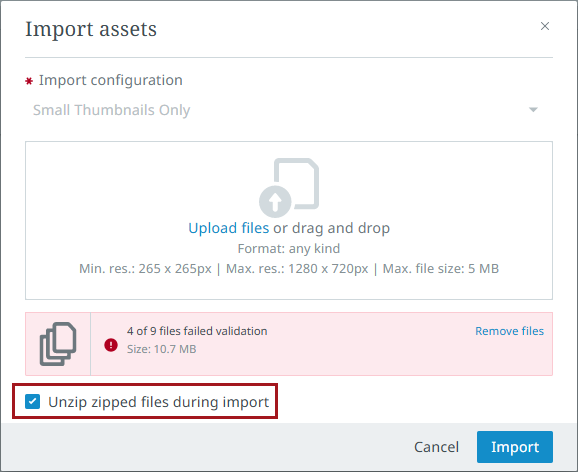
If the selected asset import configuration allows .zip files to be imported, these can be added to the proposed import. If you prefer that the files inside the .zip file are unzipped and imported, check the box for the setting called "Unzip zipped files during import."
While the asset import is in process, other tasks can be done in the Instrument UI, including initiation of additional import actions. If multiple asset imports are happening concurrently, a progress bar will display providing real-time information on the progress of all ongoing asset imports.
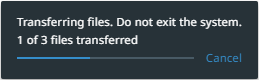
Clicking "Cancel" on this dialog will cancel all pending file transfer requests, but will not affect files already transferred, or in-progress background processes (BGPs).
For more information on importing assets specific to a product, refer to the Assets tab section of the Tabs topic.