Perspectives are the primary way you will access the tasks you must perform in Instrument. As their name suggests, perspectives are designed to empower you to approach your work in a way that best suits you. Before perspectives can be configured to their full potential, you must first understand some of the basics of perspectives, which is what is covered in this topic.
Perspective Types
The first step in creating a perspective is to decide what type of perspective it will be. Because each of the three available perspective types serve a distinct purpose, different customization options and actions will be made available to you depending on the type you select.
The perspective types are:
-
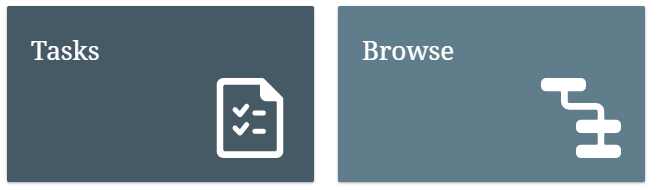
Tasks - Allows you to organize tasks assigned to you and act upon those tasks.
-
Browse - Enables you to explore your data via a customizable hierarchical tree.
-
Collection - Allows you to organize and edit subsets of data pulled from search results.
Note: Collection perspectives are not created via the Add perspective button, but by clicking the "Add to collection" toolbar button.
Tasks Perspective
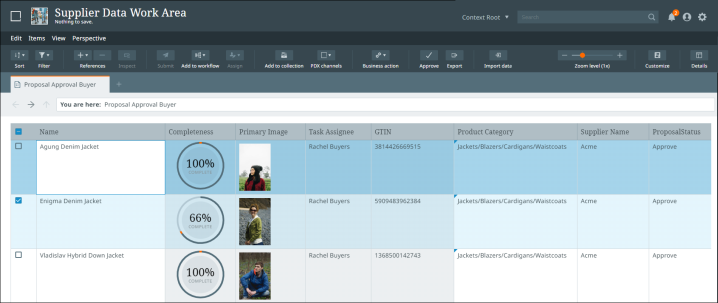
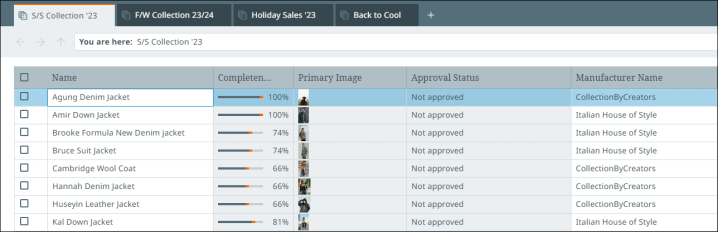
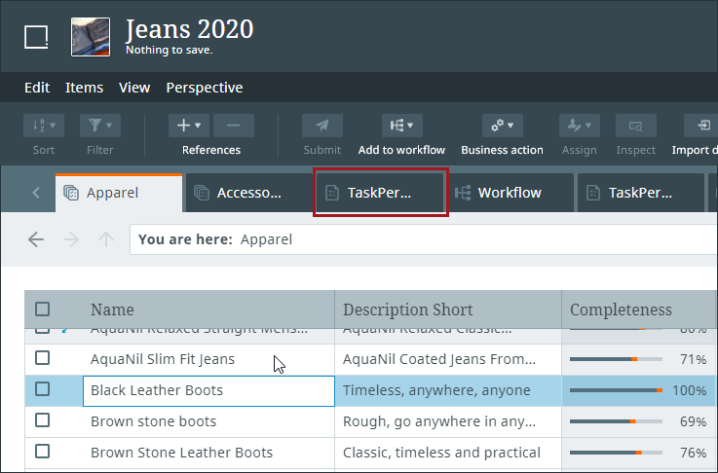
A Tasks perspective allows you to organize and act upon tasks assigned to you. These perspectives can be viewed using either the table or details views. In the screenshot below, the perspective is being viewed via the table view.
Available Actions
When selecting one or more tasks from within the perspective a number of actions are made available from the toolbar:
-
Submit - This action submits the selected task(s) to the next state of whichever workflow it is in.
-
Add to workflow - This action adds the selected task(s) to the desired workflow.
-
Business action - This action applies the desired business action to the selected task(s).
-
Assign - This action assigns the selected task(s) to the desired user.
-
Inspect - This action allows you to inspect the details of selected references.
-
Export - This action creates an export of the selected task(s).
-
Add to collection - This action adds the selected task(s) to the desired collection.
-
Approve - This action submits the selected product or products for approval.
-
Master product - This action manages master product families and allows users to move objects into them.
-
Categorize - This action moves objects to another location in the applicable hierarchy.
For more general information on how these Toolbar actions function, refer to the Toolbar topic in this section.
Browse Perspective
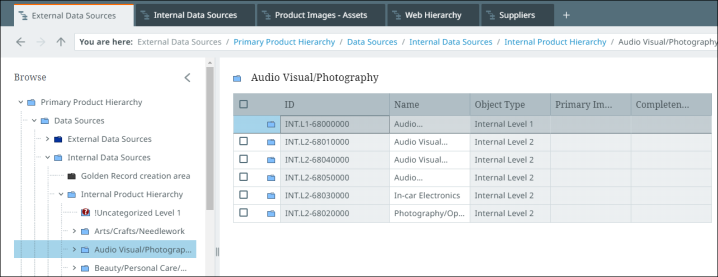
A Browse perspective allows you to customize your own tree for browsing products, entities, classifications, and other objects. Both the table and details views are available for Browse perspectives. The details view is shown in the screenshot below.
Available Actions
When selecting one or more objects from within the perspective a number of actions are made available from the toolbar:
-
Add to workflow - This action adds the selected object(s) to the desired workflow.
-
Business action - This action applies the desired business action to the selected object(s).
-
Export - This action creates an export of the selected object(s).
-
Add to collection - This action adds the selected object(s) to the desired collection.
-
Master product - This action manages master product families and allows users to move objects into them. Available for implementations that include Accelerator for Retail.
-
Categorize - This action moves objects to another location in the applicable hierarchy. Available for implementations that include Accelerator for Retail.
For more information, refer to Browsing Data.
For more general information on how these Toolbar actions function, refer to the Toolbar topic.
Collection Perspective
A Collection perspective allows you to organize and act upon objects within a given collection. Both the table and details views are available for collection perspectives.
Available Actions
When selecting one or more objects from within the perspective a number of actions are made available from the toolbar:
-
Add to workflow - This action adds the selected objects(s) to the desired workflow.
-
Business action - This action applies the desired business action to the selected objects(s).
-
Export - This action creates an export of the selected objects(s).
-
Add to collection - This action adds the selected objects(s) to the desired collection.
-
Approve - This action submits the selected product or products for approval.
-
Master product - This action manages master product families and allows users to move objects into them.
-
Categorize - This action moves objects to another location in the applicable hierarchy.
For more general information on how these toolbar actions function and item selection maximums, refer to Toolbar.
Adding a New Perspective
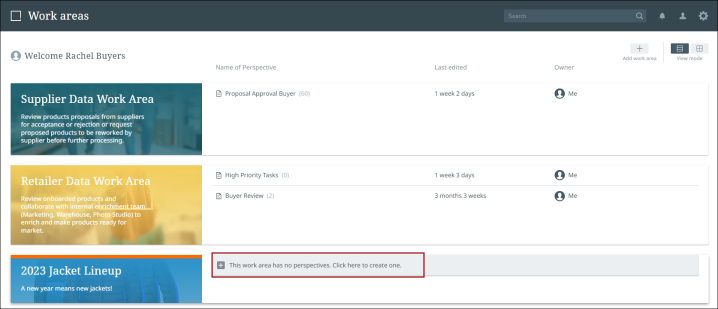
Perspectives can be added to work areas in one of two ways. The first is via the work areas screen.
To add a new perspective to an empty work area, first select the empty work area row.
The second method to add a perspective is from within the perspective itself. When within a perspective, select the plus button to the right of the existing perspective tab(s).
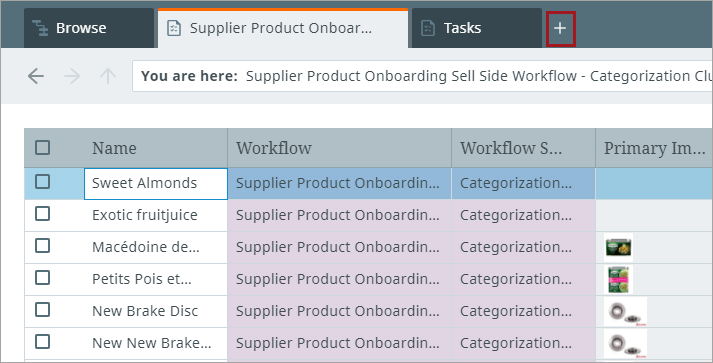
Using either method, you will presented with a choice to create either a Tasks perspective, or a Browse perspective. Click the relevant option.
It is also possible to create a Collection perspective. You can create a Collection perspective by selecting objects in either a Tasks, Browse, or Collection perspective, (or from search results), and then clicking the "Add to collection" button, located in the toolbar.

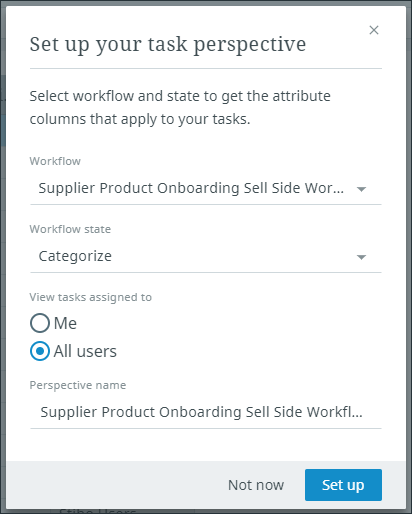
Additional Tasks Perspective Setup
If you select "Tasks", a window will appear prompting you to specify which workflow and workflow state to build your perspective around, whether to only show tasks assigned to you or all users, and to provide a name for the perspective. Anything specified here will automatically apply relevant filters to the perspective upon creation. However, selecting "Not now" will close the window and create the perspective without applying any filters.
For more information on filters, refer to Filtering.
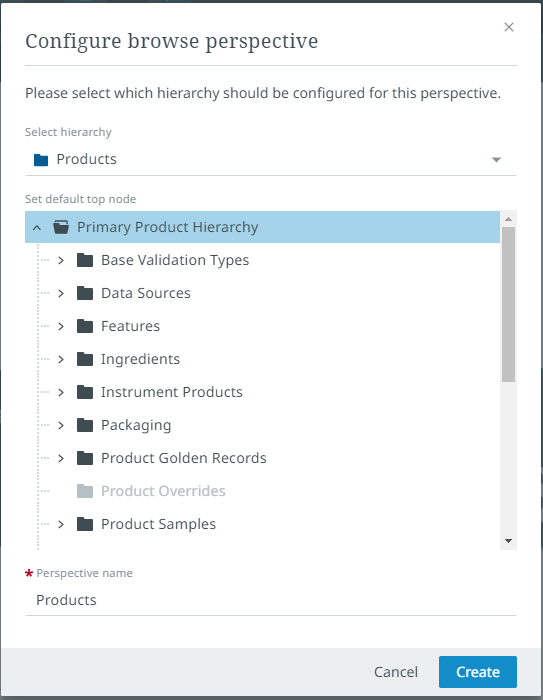
Additional Browse Perspective Setup
If you select "Browse," a window will appear prompting you to specify a name for the perspective. Select an object hierarchy from the dropdown to determine which parts of the hierarchy will display in the navigation tree.
Perspective Views
There are two different ways to view data within a perspective: list view and details view. The list view provides a high-level view of all the tasks or objects in a given perspective, while the details view focuses on the details of a specific task or object.
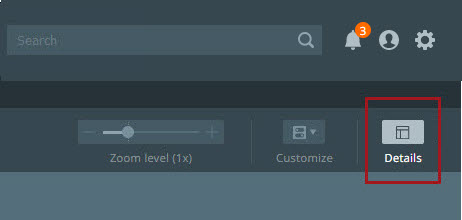
From the toolbar, you can switch between these views by clicking the Details button.

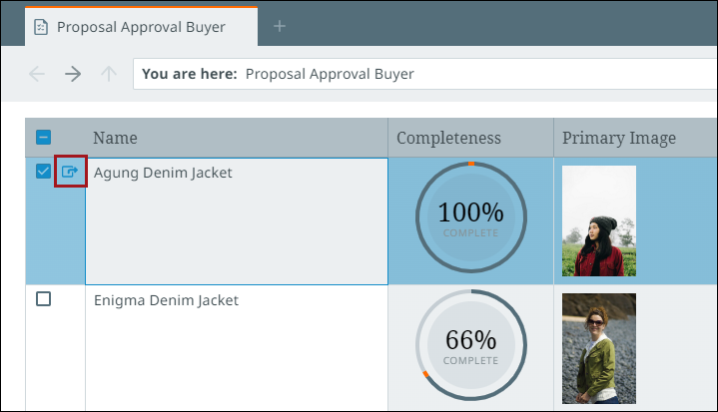
You can switch to the details view from the list view by hovering your cursor over the relevant row and clicking the arrow icon next to the checkbox of a particular task.
List View
The list view features a table displaying your items (which might be tasks or products, depending on the perspective) and details about those items. Besides alphanumeric characters, perspective tables can contain multiple types of data, such as statuses, images, and icons.
Important: The Select All option, found in the header row of the table, allows you to select all items in a table. Alternatively, you can select up to 500 items manually by checking the checkbox for each desired item. Refer to the Toolbar topic for other maximums that you need to consider when taking actions on perspective selections.
Several options are available for customizing the list view, including:
-
Sorting/filtering tasks and objects
-
Adding/removing columns
-
Adjusting the zoom level
For more information on customizing this view, refer to the Customizing Columns, Sorting, and Filtering topics.
Data within gray cells is read-only; data within white cells can be edited (go to Managing Data for more details).
Line breaks can be added to text attribute values within a cell using the Enter + Shift key combo. Refer to Attributes in this section for details.
Copying and pasting data (via OS shortcuts and the web browser menu) can be done between cells within the interface and external applications. If you are unable to copy or paste something within the interface, you will get an on-screen notification. For example:

Note: Date, ISO Date, and ISO Date Time column types all accept plain text, which is either in those forenamed formats as well as the DDMMYYYY format (for example, 21/02/2023 or 21.02.2023).
Zoom Level
You can specify the height of each row in the perspective data by adjusting the zoom level. Doing so may reveal more information that may otherwise have been hidden if contained within a smaller cell.
Details View
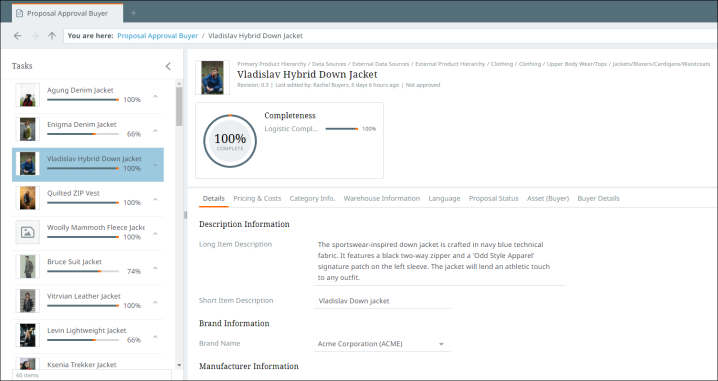
The details view focuses on the details of a specific item. The details view can be accessed by clicking the "Details" button found in the toolbar near the right-hand side of the screen.
In the "Tasks" perspective, for example, the "Details" view shows the details of an item contained in a workflow, thus representing a workflow task. Details for an item in this perspective (shown below) are presented to the user in configurable tabs that can display referenced images and other assets, attributes, attributes groups, languages, and more.
Additionally, items accessed via a "Browse" perspective hierarchy can also be shown via the "Details" view. If, for instance, the user adds a "Browse" perspective to view their assets, they can select an asset, click the "Details" view, and attributes for that asset will display beneath a summary of that asset. For asset attributes that can be edited, users can add and update those values.
Various kinds of information can be displayed via the "Details" view, often through a series of tabs. Tabs can be added in the configuration tool.
For more information on the configuration tool, refer to the Configuration Tool topic.
Note: When you are in the details view, you will have a breadcrumb bar. Another breadcrumb bar with read-only breadcrumbs is shown above the product name to indicate where you are in the hierarchy. If using the details view, the system uses these breadcrumbs to mark your position within each perspective when you log out, and will return you to the same view when you enter each perspective upon your next login.
Navigating Perspectives
Instrument provides several ways to navigate between work areas and perspectives screens, as well as between the perspectives themselves.
Work Areas Screen
To access a perspective from the Work areas screen, click the perspective you want to open.
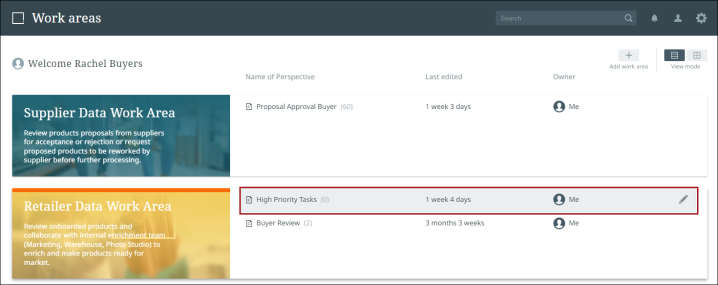
Alternatively, you can click the work area image and it will open the last perspective you looked at within that work area.
Perspectives Screen
From the perspectives screen, you can navigate between different perspectives in a given work area by selecting the perspective's tab.
Breadcrumb Bar
For easy navigation, the breadcrumb bar shows you breadcrumbs of where you are within a Tasks perspective. References are also reflected in the breadcrumb, if applicable.
Navigating breadcrumbs is described below.
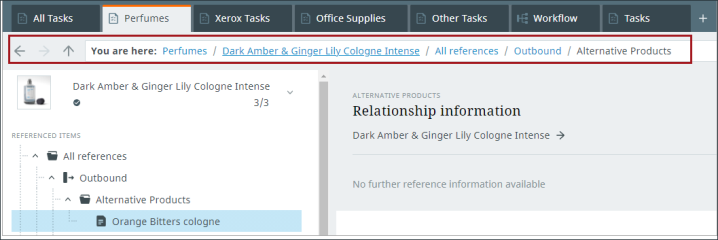
On the breadcrumb bar, you can:
-
Navigate through the hierarchy by using the left, right, and up arrow buttons to the left of the breadcrumbs.
-
Select different reference types within the navigational breadcrumb pages.
-
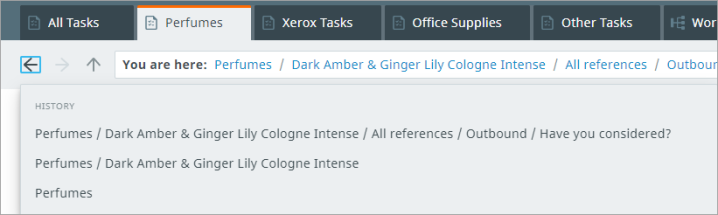
Hold the right and left arrow buttons down to display a history of where you have been within the perspective (as shown in the example image that follows).
Note: Preset work area and perspective configurations set by admin users become the default settings for assigned user groups. Columns and filters set by admins display to users. Admin-defined filters cannot be deleted or overwritten by users once set. A tool tip message displays stating, "You cannot overwrite admin configurations." However, custom settings such as zoom, additional filters, and column width can still be manipulated and maintained by users in preset perspectives. Upon saving these changes, the 'Reset to default' feature is enabled which allows users to revert to default settings defined by admins. Preset work areas can be duplicated and further customized by users in the duplication. Custom work areas, identified by a "Custom" label above the work area name, are configured by the user and are customized based on user preferences and privileges.
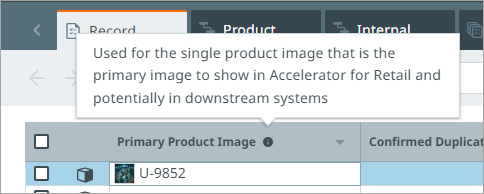
Help Text Tool Tip
A help text tool tip can be configured for assets, references, and data container type fields and is used to guide an end user by giving context for enriching data. An icon ( ) will be displayed next to any fields with the help text field enriched and hovering over or clicking on the icon will allow the user to view the help text. It can be seen throughout Instrument; for example, table headers, attributes table of the details view, and reference headers on Reference tab pages.
Help Text Tool Tip Configuration
How to configure a help text tool tip is described below:
-
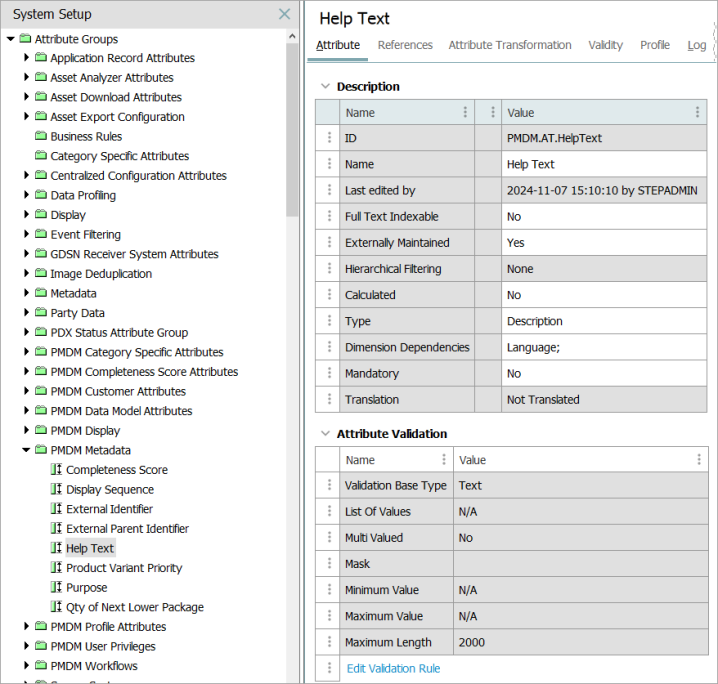
In STEP Workbench, create a metadata attribute with a 'Text' validation base type. Refer to the Creating Attributes topic in the System Setup documentation for more information.
-
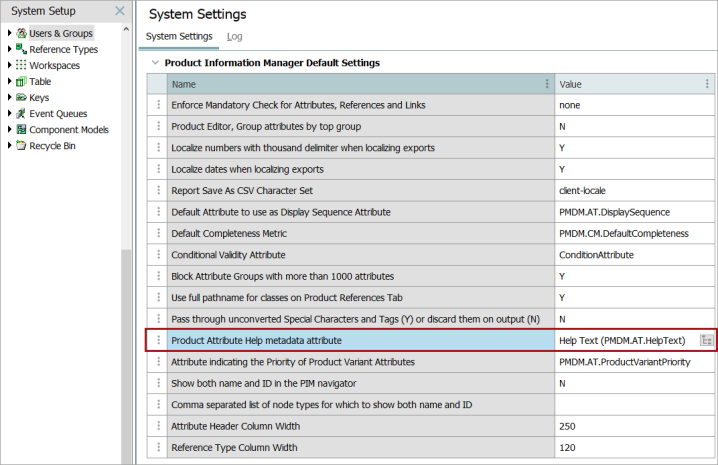
Navigate to Users & Groups in the System Setup menu, and under the System Settings tab, verify the value of the variable under the 'Product Information Manager Default Settings' flipper of 'Product Attribute Help metadata attribute' is set with the attribute created in step 1.
-
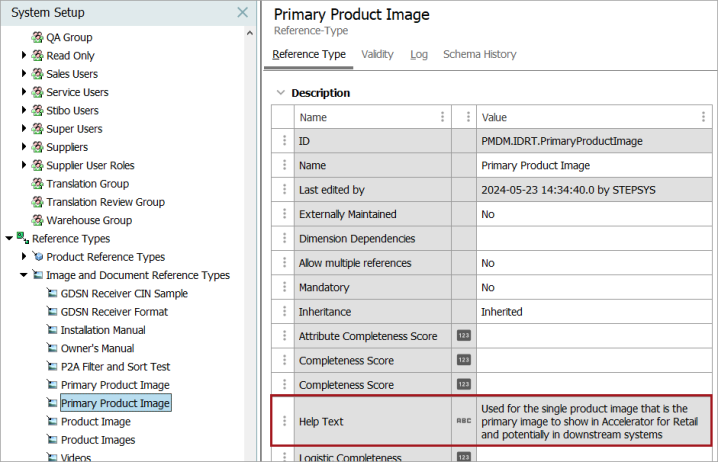
Navigate to the asset, reference, or data container field needing the help text. Find the 'Help Text' variable and enter the Help Text message as the value.
-
In Instrument, navigate to the perspective utilizing the field with the help text configured. Verify the help text by hovering over or clicking on the help text icon (
) next to the configured field to display the help text.