The utilities are located in the upper right-hand corner of the Instrument interface.

The utilities are comprised of five elements that enable users to quickly search, navigate, or configure Instrument settings.
Those elements are:
-
Context selection
-
Search bar
-
Notification center
-
User settings
-
Configuration tool access
These elements are described in detail below.
Context Selection
The context selector is located to the left of the search bar in the utilities.

The context selector is comprised of two elements, listed from left to right:
-
the name of the context currently being viewed
-
a dropdown arrow
The name of the context tells the user which context the user is currently viewing.
When the user clicks the dropdown arrow, a dropdown menu displays.
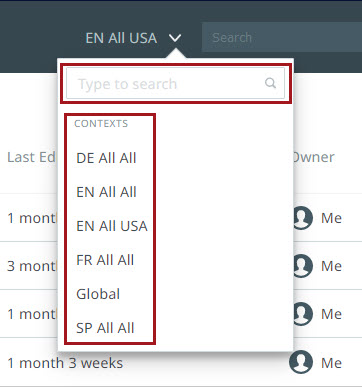
In this dropdown menu, users can search for their desired context from the search field, or manually select it from the contexts listed under "Contexts".
When the user starts to type the name of their desired context into the search field, the list of contexts below the search field are automatically filtered until only the contexts that align with the user's search remain.
To select a new context to view in the Instrument interface, click the desired context from those listed in the dropdown menu. Following a refresh, Instrument opens in the new context.
Search Bar
Located in the utilities section next to the Notifications icon, the search bar can be used to locate products, classifications, and assets within Instrument.

Important: Prerequisite—Verify or have a system administrator verify that a faceted search solution has been set up.
Refer to the Elasticsearch Setup topic / section in the System Setup documentation.
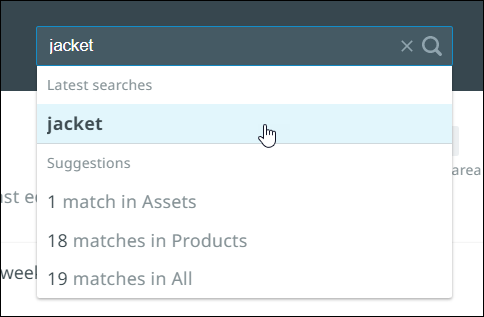
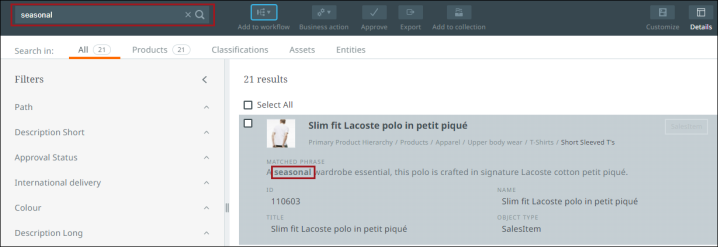
To search for available data, enter the search terms in the search bar, and click the magnifying glass button, hit the "Enter" button, or make a selection from the dropdown. Or, if you prefer to navigate directly to the search screen, click the magnifying glass without typing in a search query.
Filtering Search Results
On the search screen, the column on the left contains a number of filters that can be used to narrow down search results to display only those results that are most relevant.
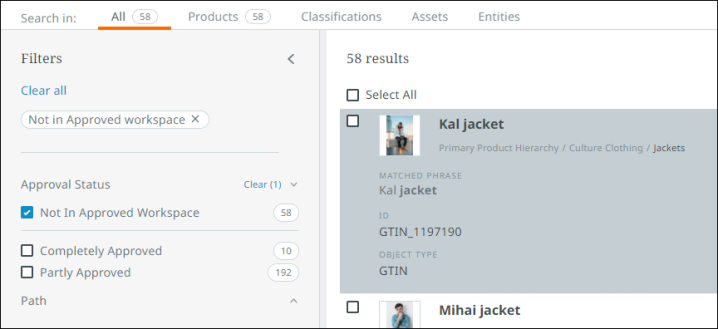
Click on any of the arrows to the right of the attributes in the left nav to display a list of attribute values (facets) available among the items in the list. Each attribute value will be accompanied by a checkbox and a number value that represents the number of items that have that value for the attribute. To filter your list of items to display only those items with the listed value, check the box beside the value. Multiple boxes can be checked to further refine your search.
This list of facets updates dynamically in order to provide you with the most relevant options based on the content of your search.
Search Results
You can select one or more items from the search results, and take the following actions:
-
add a selection to a workflow
-
apply a business action to the selection
-
approve selections
-
export selections into an Excel spreadsheet
-
add selection to a new or existing collection

Adding Search Results to a Workflow
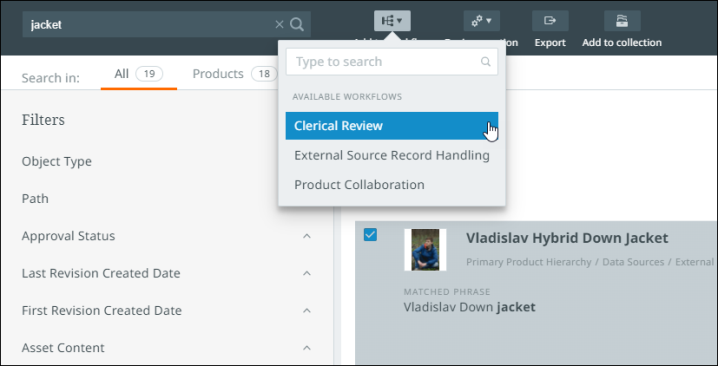
Once the selection has been made from the search results, click the "Add to Workflow" button at the top of the screen. A dropdown will display containing the names of all workflows configured on that system. When the desired workflow has been located from the dropdown, click it. The items in the selection are now added to the selected workflow.
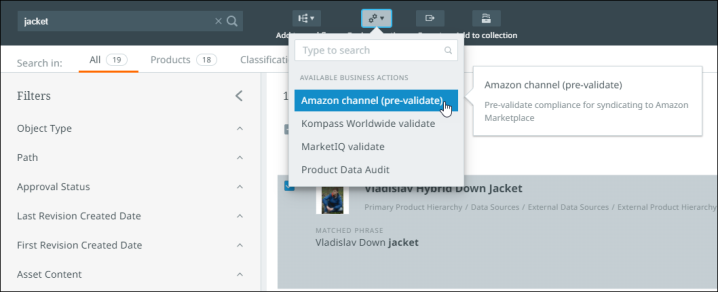
Applying Business Actions to Search Results
With one or more items selected from the list of search results, users can apply a pre-configured business action to that selection. To do so, click the "Business Action" button at the top of the screen. The dropdown displays all applicable business actions configured on the system. Those business actions listed in black text can be applied to the selection, while those in gray cannot. Hover the cursor over each business action for additional information about that business action. When the desired business action has been located, click it. Subject to the business rule configuration and the selected items' suitability, the items in the selection will have the business action applied to them.
Exporting Search Results
Once users have made their selection from the search results, users can export the data for the items in the selection based on a pre-configured export configuration by clicking the "Export" button. If multiple export configurations have been configured, an "Export" dialog will display that allows users to select from all export configurations that user is privileged to use. With the desired export configuration selected, clicking the "Export" button, which also lists the number of items included in the export, initiates the export. The export file can be accessed by clicking the notifications button in the top right-hand corner of the interface.
Approving Objects in the Search Results
Once users have made their selection from the search results, users can approve the selected objects by clicking the "Approve" button. The status of the approval can be accessed by clicking the notifications button in the top right-hand corner of the interface.
Adding Search Results to a Collection
Once the selection has been made from the search results, users can click the "Add to Collection" button at the top of the screen (next to the search bar).
Users will then have the option to "Create a new collection" or add the selection to an existing collection, if available.
When creating a new collection, users can pick a work area and then input the desired name for the collection.
-
Use the check mark to add the collection or the trash icon to delete the information you have entered.
-
To add the selection to the collection, you will choose "Add to collection" at the bottom of the dialog.
If a collection or collections already exist, they will be listed in the dialog. Make a collection selection, and "Add to collection."
As items are added to a collection, the Notification center is updated and the notification gives you a link to the collection.
Note: When a specific search term is entered in the search bar, returned values based on that search term will include a breadcrumb navigation that displays the category / product path. This information is especially helpful for users that want to view the categories associated with the search results and filter the results as needed. While this is not shown above, an example can be found in the Search bar.
Search Results Product Card View
When searching for objects, you need to be able to identify them quickly when reviewing the results. The search cards which display the search results, provides you with enough information within a card view to identify the objects being returned while also allowing you to validate your search.
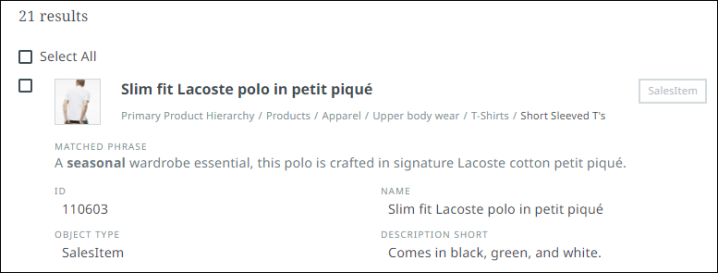
Search cards display up to four attributes per card. The attributes that are configured to show on the card view are the same attributes that will be displayed as columns if creating a new perspective with these results. These attributes can be changed by clicking the customize button via the toolbar and selecting the desired attributes from the "Add to Search Card" menu. Only the first 4 items listed will appear on the search card. Refer to the Item Picker topic for more information.

Any relevant matched phrases appear in bold on the search card.
GraphQL queries have been created to retrieve search attribute configuration settings and to update attribute configuration settings. Administrators can get the information to run these queries from the Creating Default Collection Perspective Columns topic.
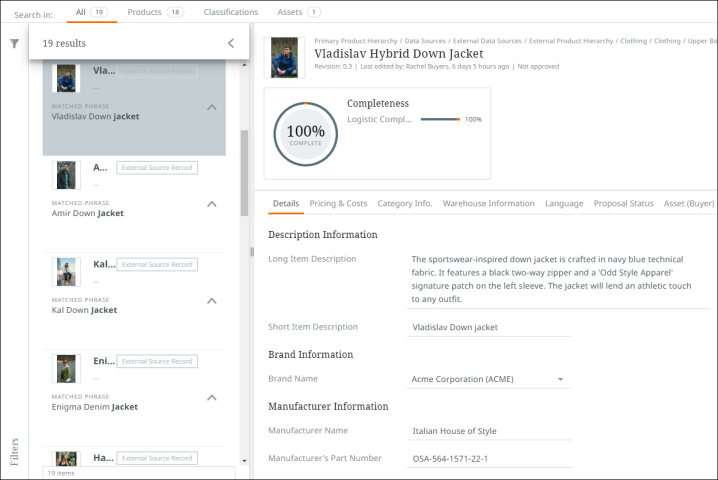
Details Panel
If you wish to view the details of a search result, select a card or click the details button via the toolbar to open up a details panel on the right-side of the screen. Information provided in this panel is identical to the details pane found via Tasks and Browse perspectives.
To return to the search results screen, click the details button in the toolbar.
Notification Center
The notification center, accessed by clicking the bell-shaped button in the utilities, is a centralized place for:
-
Keeping visibility and status of your processes running in the background away from your current activities. This allows you to continue your work after initiating large operations.
-
Receiving actionable notifications that provide messaging and navigation for you to complete the call to action.
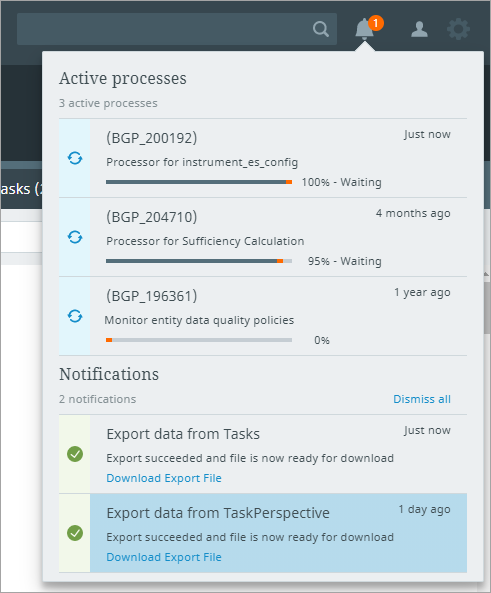
If you have any active processes or notifications that need your attention, they will be available upon opening the navigation panel. If working in the interface with the notification panel closed, you will receive pop-up notifications letting you know of any status changes or new notifications.
User Settings
The user settings button, located in the utilities, is represented by the silhouette of a person.

When clicked, a small dialog displays containing two elements:
-
the name of the person currently logged into Instrument
-
a "Log out" button
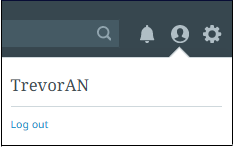
Clicking the user settings button allows users to quickly view the user name of the account currently logged in. This can be useful for admin users confirming access and display configurations for users.
To log out of the Instrument session, click "Log out".
Configuration Tool Access
The configuration tool can be accessed by clicking the gear button found at the far-right in the utilities. This button only displays for users with admin-level privileges.

When clicked, the configuration tool screen opens, which allows admin users to configure various parts of the Instrument interface.
For a full description of the configuration tool and how to use it, refer to the Configuration Tool topics in the Administration documentation.