The Onboarding Mappings Details screen allows users to view and edit Mapper Configurations in Web UI. Key features include:
- Can view existing mapping plugin and its configuration
- Can create new mapping plugins
- Can define global configurations for the selected Mapper Configuration setup entity
Mapper Configuration setup entity can be configured to meet different Onboarding and Offboarding requirements in Onboarding Mappings Details screen.
Creating Mapping Plugins
Before adding any plugin for the Mapper Configuration in Onboarding Mappings Details screen, it is essential that the plugins that need to be listed in the Onboarding Mappings Details screen are configured within the Mappings parameter of Onboarding Mappings Details Screen Properties. For more information, refer to the topic Onboarding Mappings Details Screen.
- With the required Mapper Configuration selected, click on New mapping within the Mappings tab of the Onboarding Mappings Details screen.
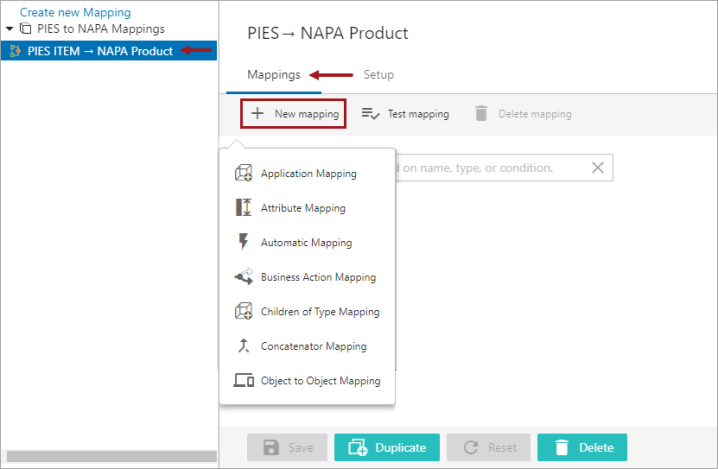
- Select the desired type of mapping plugin, and a screen is displayed prompting the user to further configure the plugin. For example, in the screenshot below, a screen is displayed when the Attribute Mapping plugin is selected.
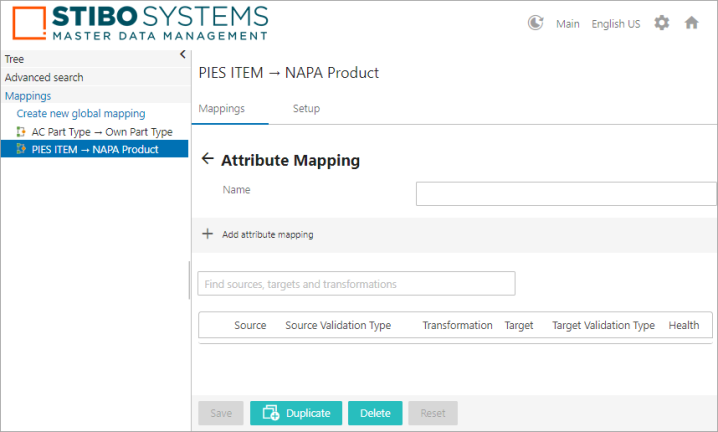
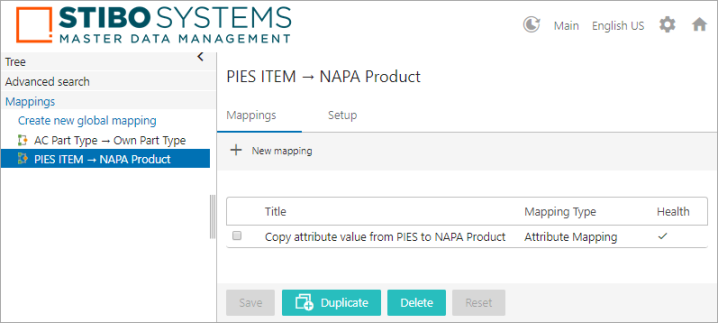
- When done configuring the plugin, click Save button available at the bottom of the screen. The newly added mapping plugin is listed within the Mappings tab of the Onboarding Mappings Details screen (as shown below).
Important: The Delete, Duplicate and Reset buttons present at the below toolbar will delete / duplicate / reset the Mapper Configuration, NOT the individual mapping plugin rows within the configuration. If the user does not want to be able to delete the Mapper Configuration in Web UI, then do not configure the Delete Action.
Managing Mapping Plugins
All of the created Mapping plugins are listed in a table format within the Mappings tab of the Onboarding Mappings Details screen for the selected Mapper Configuration. The user can create, test, and delete the mapping plugins within the Mappings tab of the Onboarding Mappings Details screen.
Delete Mapping Plugin
- Select the Mapping plugins by clicking on the checkbox available at the left side of the listed Mapping plugins. A Delete mapping button will be displayed at the top bar (as shown below).

- Click on the Delete mapping button, and the mapping plugin will be deleted from the table.
Disable Mapping Plugin
You can control the execution of mapping plugins within the Mapper Configuration setup entity. When a mapping plugin is disabled, it remains in a deactivated state, no longer executing unless enabled. This feature is especially useful when a mapping plugin is temporarily unnecessary.

-
In the Mapper Configuration setup entity, check the box next to the mapping plugin you want to disable. This activates the Disable button in the toolbar.
-
Click Disable. This action stops the mapping plugin from executing when the associated Mapper Configuration setup entity is executed.
-
Save the configuration after disabling the plugin.
The mapping plugin turns gray when disabled.
Duplicate Mapping Plugin
Just as you can disable mapping plugins, you can also duplicate them to create new plugins with similar configurations.
-
In the Mapper Configuration setup entity, check the box next to the mapping plugin you want to duplicate. This activates the Duplicate button in the toolbar.
-
Click Duplicate. This action creates a new mapping plugin with the same configuration as the original.
-
Save the configuration after duplicating the plugin.
The duplicated mapping plugin will appear with the same name as the original, but with a number suffix to indicate that it is a duplicate.