This Mapping plugin gives extended flexibility for users to configure and solve unique mapping cases which cannot be achieved by the other Mapping plugins (Attribute Mapping, Application Mapping, and Object to Object Mapping). The Business Action Mapping plugin takes a business action as a configuration and when executed, executes the business action on the target object. This Mapping plugin is configured on the Onboarding Mappings Details Screen for the selected Mapper Configuration.
The data that is copied from a Source object is determined by the business action that is defined in the Select Business Action parameter within the Business Action Mapping plugin. This business action is manually created and configured independently in the workbench.
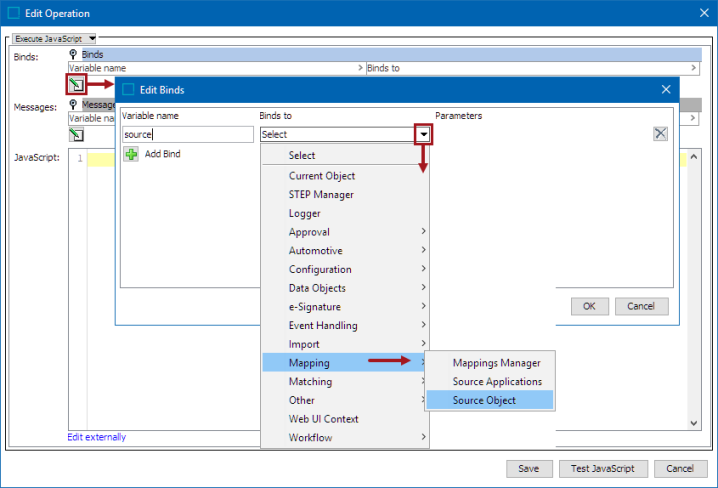
The business action can use the Source Object bind to gain access to the Source object. This bind is available within the 'Binds to' dropdown, as shown below.
Prerequisites
First, create a business action to define the Source node using Execute JavaScript > Add Bind > Mapping > Source Object. The Source Object bind provides access to the Source node. For information on accessing source object via the Source Object bind, refer to the Source Object Bind topic within the Resource Materials online help documentation
For more information on adding other binds, refer to JavaScript Binds in the Resource Materials online help documentation.
Configuration
Only one business action can be configured in the mapping plugin. To execute multiple business actions, add multiple Business Action Mapping plugins to the Mapper Configuration setup entity.
Note: A setup entity definition can be exported as comments and submitted to an external source control system for comparison purposes. For details, refer to the Configuration Management documentation.
To configure the Business Action Mapping plugin, follow these steps:
-
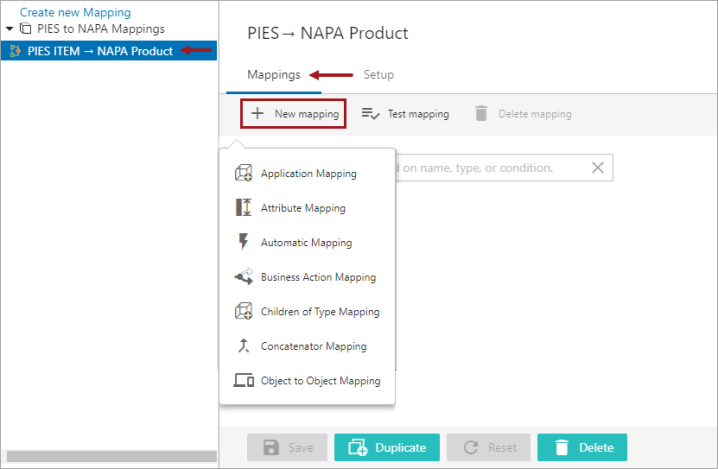
With the required Mapper Configuration selected, click on the New mapping option that is available within the Mappings tab of the Onboarding Mappings Details screen.
-
Select Business Action Mapping and a screen is displayed prompting the user to further configure the plugin (as shown below).
-
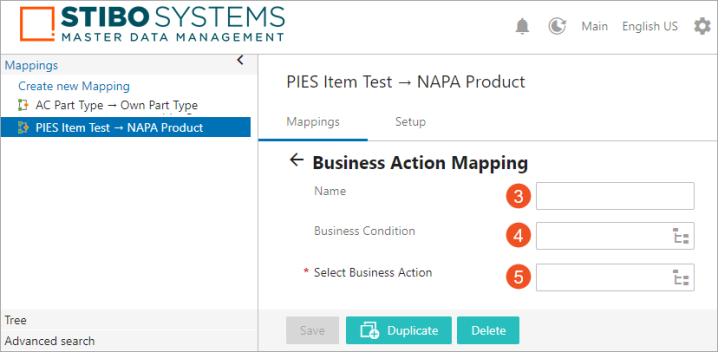
In the Name parameter, type in a suitable name. This should be a unique name that clearly describes the mapping functionality.
-
In the optional Business Condition parameter, populate a business condition that defines to run the mapping plugin only on the object if the condition is true.
-
In the 'Select Business Action' parameter, type in the initial letters of the business action name or use the node picker to select and populate the desired business action. The 'Select Business Action' parameter allows the specified business action to run on the Source objects.
-
Click Save to save the changes. The newly added Business Action Mapping will be listed as shown below.
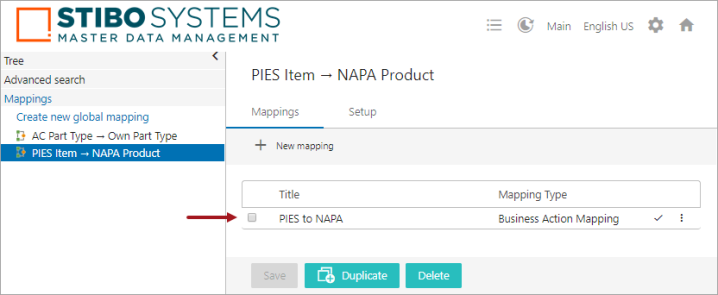
The health of the Business Action Mapping plugin is displayed next to each Mapping plugin. The user has the flexibility to disable, delete, or rearrange the listing order of the Mapping plugins. The check mark displayed in the image above indicates that the mapping was successful.
-
If multiple business actions are required, repeat the steps above to add multiple Business Action Mapping plugins to the Mapper Configuration setup entity.