On the Transformation Overview dialog, the user has the flexibility to add, edit, delete, or rearrange the listing order of the transformations. When there are multiple transformations listed, the order of execution of each transformation is based on the order in which it is listed within the Transformation Overview dialog.
Following are the two ways that the Transformation Overview dialog can be accessed in the Web UI:
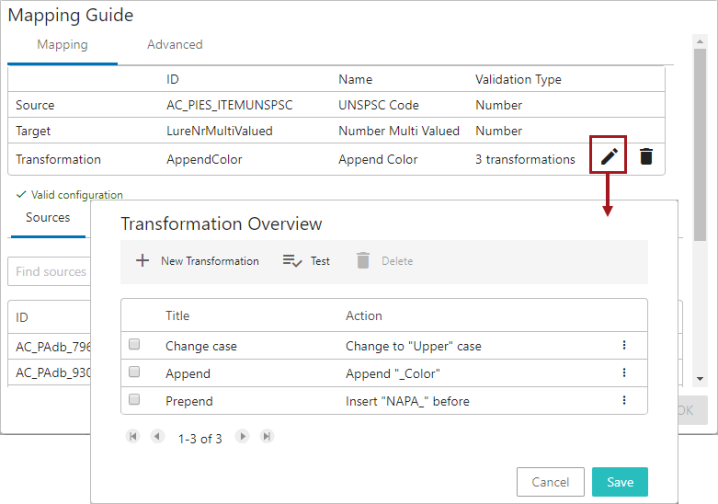
- Through the Mapping Guide window by clicking the edit button (
 ) for the attribute transformation.
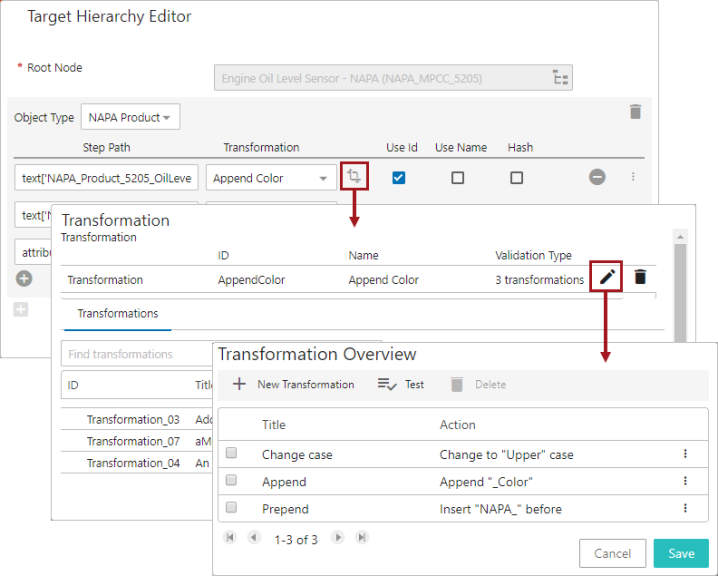
- Through the Transformation Hierarchy Editor window by clicking the 'Select and modify transformation' icon (
 ), and then clicking the edit button () for the attribute transformation.
In the following image, the various functionalities that are available in the Transformation Overview dialog are numbered.
In the image below, the attribute transformation is configured to include multiple transformations. Each of the transformation is displayed as rows.
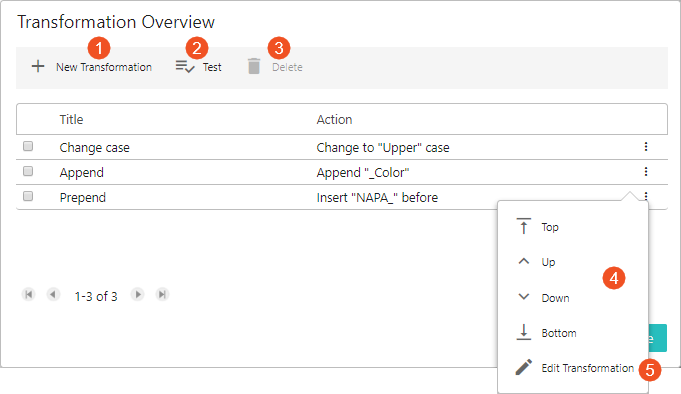
The available modifications defined below include:
-
Add a new transformation to the attribute transformation
-
Test the result of the attribute transformation
-
Delete an existing transformation
-
Change the listing order of the transformation
-
Edit an existing transformation
Add a transformation
Adding a set of transformations to the attribute transformation will make a rule, and when applied in the Mapping plugin, it will affect the Target object name / ID / attribute value as defined within each of the transformations.
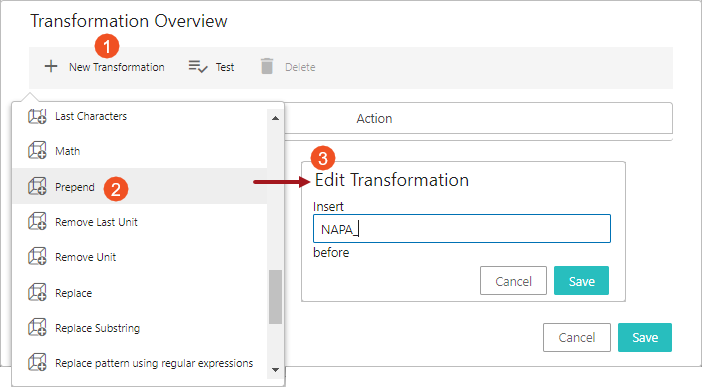
- Click on the New Transformation button to display the list of transformations available.
- Select the relevant Transformation. If the selected Transformation requires any further configuration, then the Edit Transformation dialog will display.
- Define the transformation and click Save to save and close the Edit Transformation dialog.
The selected transformation is listed in the Transformation Overview dialog. For a description of the available transformations, refer to the Transformations topic in the Resource Materials online help documentation.
Test an Attribute Transformation
Details on how to test an attribute transformation configured in a Mapping plugin is explained in the Testing Attribute Transformations Configured in Mapping Plugins topic.
Delete a Transformation
Deleting a transformation will no longer display nor execute the transformation in the selected attribute transformation. It must only be deleted when it is no longer required. Deletion made through the Mapping Guide window impacts every other place where this transformation is applied / used.
- In the Transformation Overview dialog, select the checkbox that is available on the left of the transformation that is intended to be deleted. This makes the Delete button (
 ) visible in the toolbar.
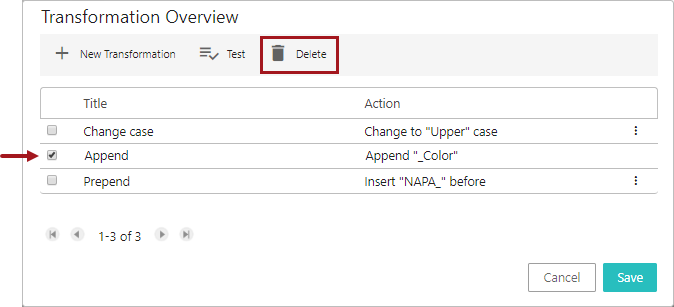
- Click the Delete button. This removes the selected transformation(s) from the Transformation Overview dialog in Web UI and also removes the functionalities defined in that particular transformation.
- Click the Save button to confirm that the transformation row should be deleted.
Change the Order of the Transformations
When there are multiple transformations available within the attribute transformation, the transformations are applied in the order in which they are listed within the Transformation Overview dialog. Users can rearrange the order of the transformation as defined below.
- For the selected attribute transformation, access the Transformation Overview dialog.
- Click the three-dotted icon (
 ) that is available in the right of the transformation to display the rearranging dialog. The user can select the Top, Up, Down, or Bottom button to rearrange the transformation accordingly.
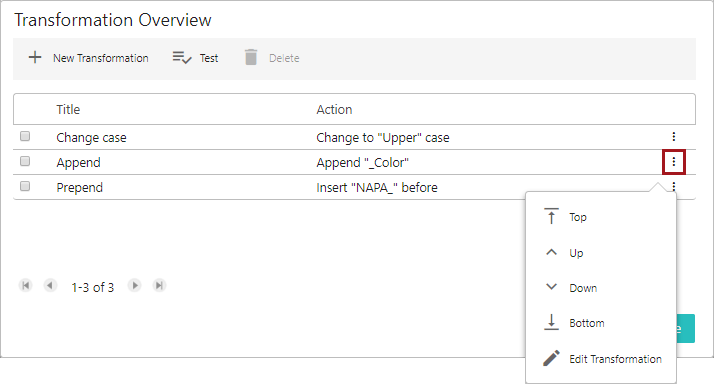
Edit an Existing Transformation
Users can edit an existing transformations through the Transformation Overview dialog. Below is the procedure to edit an existing transformation.
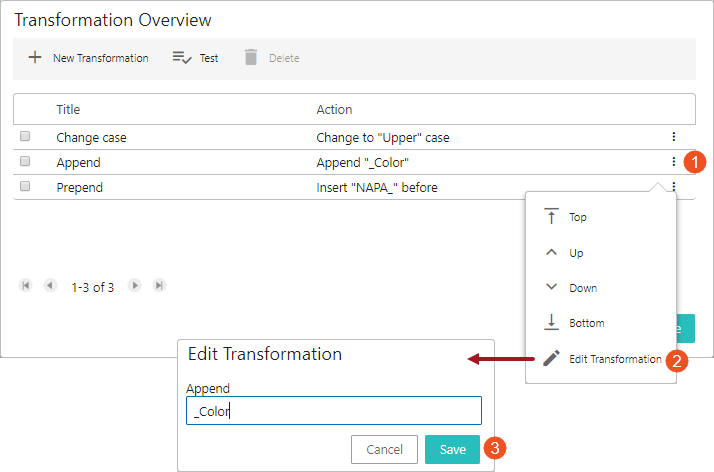
- For the selected attribute transformation, access the Transformation Overview dialog, and click the three-dotted icon (
 ) that is available in the right of the transformation to display the rearranging dialog.
 - Click the Edit Transformation button to open the Edit Transformation dialog.
- Edit the transformation as needed and click Save to save and close the Edit Transformation dialog.