The Attribute Mapping plugin will copy attribute values from the source object to the target object. It is configured on the Onboarding Mappings Details Screen for the selected Mapper Configuration. The settings available in this plugin allow the user to define what the Mapper Configuration should do with the attribute values.
Note: All settings are not necessary for all attributes. The specific combinations chosen are dependent on the unique requirements for the attribute being configured. The settings contained within this plugin can include transformations. The plugin can be configured to either Onboard / Offboard the data or in some cases can be configured to work along with transformations too.
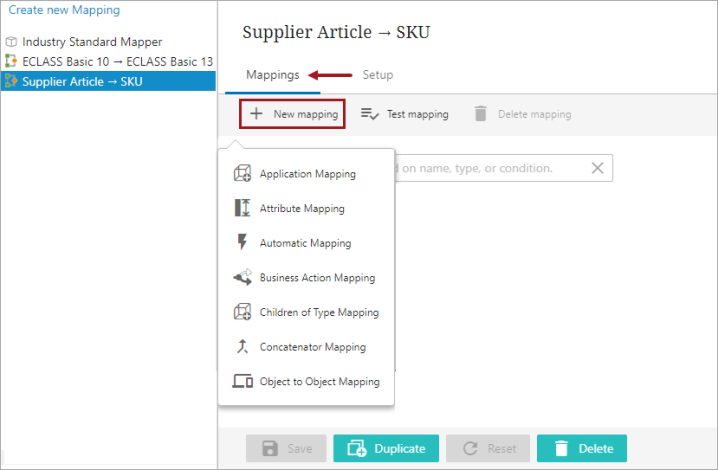
To configure the Attribute Mapping plugin, follow these steps.
-
With the required Mapper Configuration selected, click on New mapping available within the Mappings tab of the Onboarding Mappings Details screen.
-
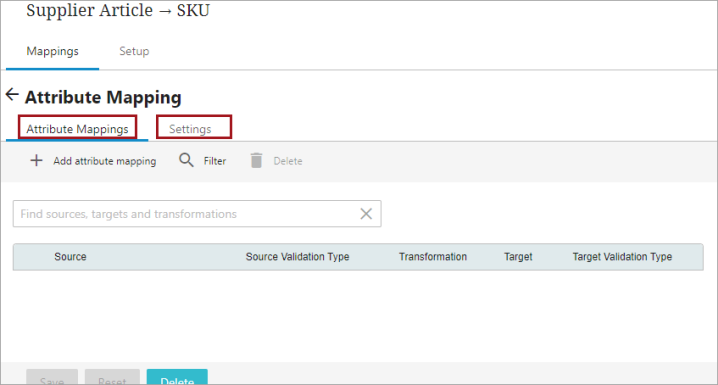
Select Attribute Mapping option, and a new screen is displayed with the following two tabs:
-
Attribute Mappings: This tab includes options that allows users to establish a mapping relationship. Details pertaining to the parameters available within this tab page is explained in the later section of this topic.
-
Settings: This tab contains few basic parameters that requires to be populated before the user tries to build a mapping relationship in the Attribute Mappings tab. Details pertaining to the parameters available within this tab page is explained in the later section of this topic.
-
-
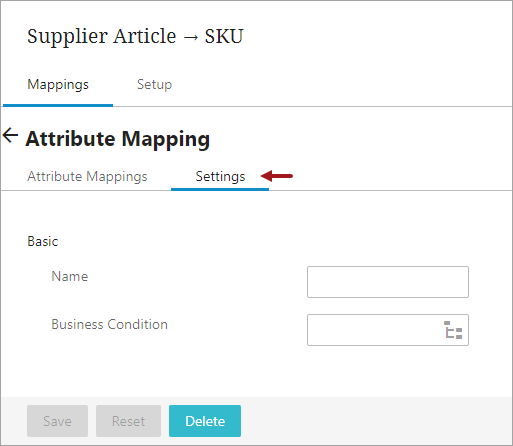
Within the Settings tab, as shown in the screenshot below, populate the following parameters:
-
Name: Type in a suitable name next to this field. This could be any unique name that clearly describes the mapping functionality.
-
Business Condition: The Business Condition parameter allows users to select a business condition. The selected business condition runs the mapper plugin only on the object if the condition is true.
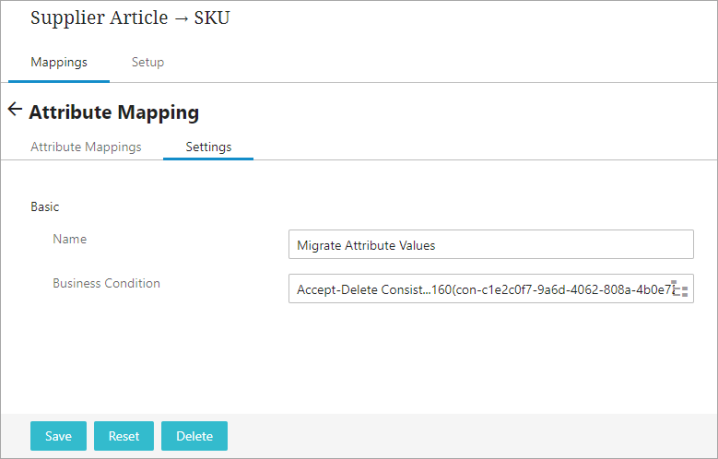
Below is an example of how the Settings tab within the Attribute Mapping plugin is configured in the Web UI.
-
-
After populating all the required parameters within the Settings tab, navigate to the Attribute Mappings tab. and click on the 'Add attribute mapping' button.
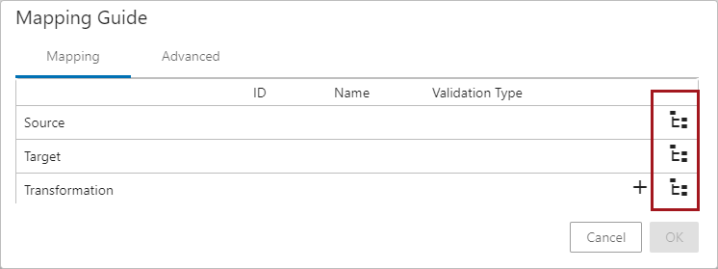
Upon clicking the 'Add attribute mapping' button, the Mapping Guide window will display, as shown in the screenshot below. This window comprises of the following two tabs:
-
Mapping: This tab comprises of the fundamental parameters that are required for the Attribute Mapping plugin. This involves populating the Source and Target fields along with the attribute transformations if required.
-
Advanced: The parameters available within this tab allows users to perform some advanced transformation functionalities when required. The functionalities in this tab are mainly designed to handle multivalued source attributes. The options available within this tab are explained in the later section of this topic.

Note: It is possible in the Mapping Guide window to display the regular Node Pickers (as shown below) instead of the typeahead field. In order to use the Node Pickers in the Mapping Guide window, users need to set the following property in the sharedconfig.properties file: Mapper.MappingGuideUseStandardComponents=true.
-
-
Select the Sources tab, then click on the Search field and begin typing the initial letters of the attribute name or ID. This action triggers a dropdown of typeahead search results, displaying the attributes of the Source object available in the system. From the list of results displayed below the search bar, select the desired attribute.
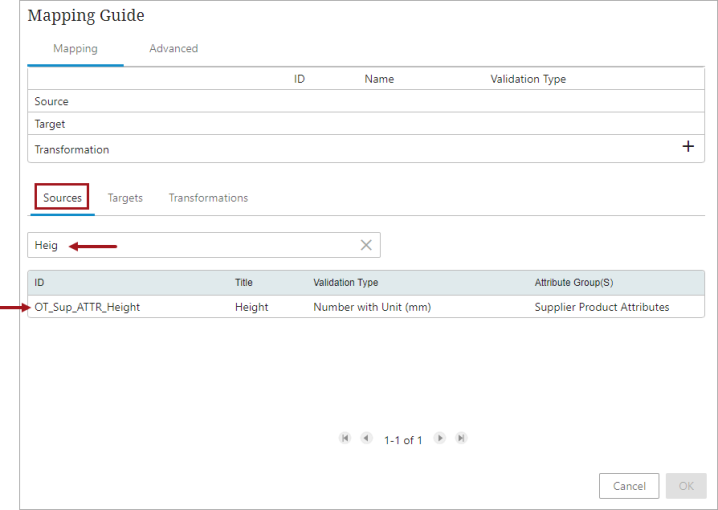
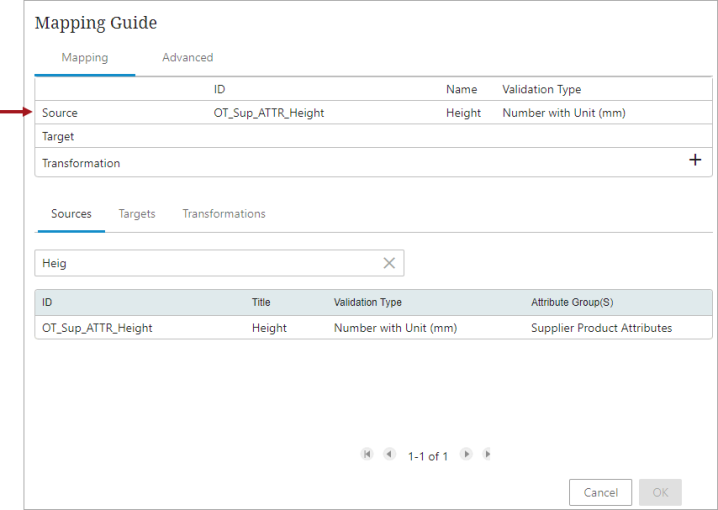
After selecting, the chosen attribute will be automatically filled in the Source field(as shown below).
-
Further, ensure that the Targets tab is selected. Then, click on the Search field and begin typing the initial letters of the attribute name or ID. This initiates a search for the attribute from the Target object. From the list of results displayed below the search bar, select the desired attribute.
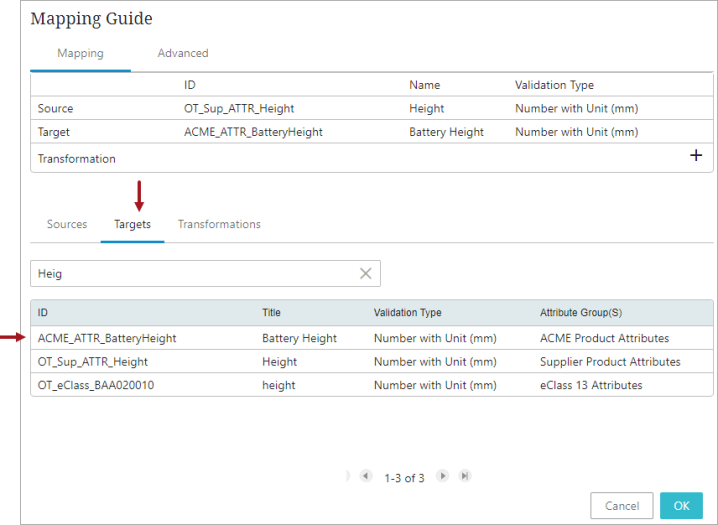
After selecting, the chosen attribute will be automatically filled in the Source field(as shown below).

After the source and target attributes are defined, the system evaluates the validity match between the source and the target attributes. A hyperlink text explaining the reason for the validity match / mismatch gets displayed. Clicking on the hyperlink will open the 'Detailed Information' dialog and displays the validity match / mismatch information of the attribute mapping. Below is an example of a validation mismatch between the source and the target attribute displayed in the 'Detailed Information' dialog:
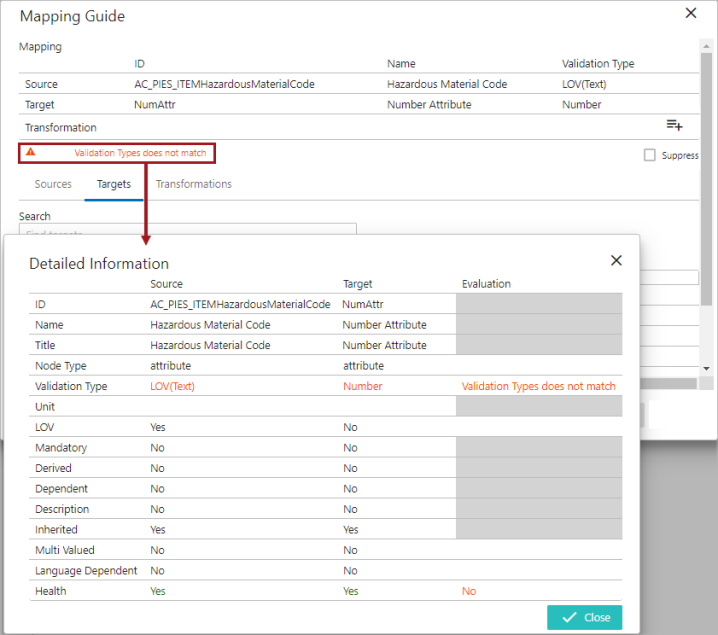
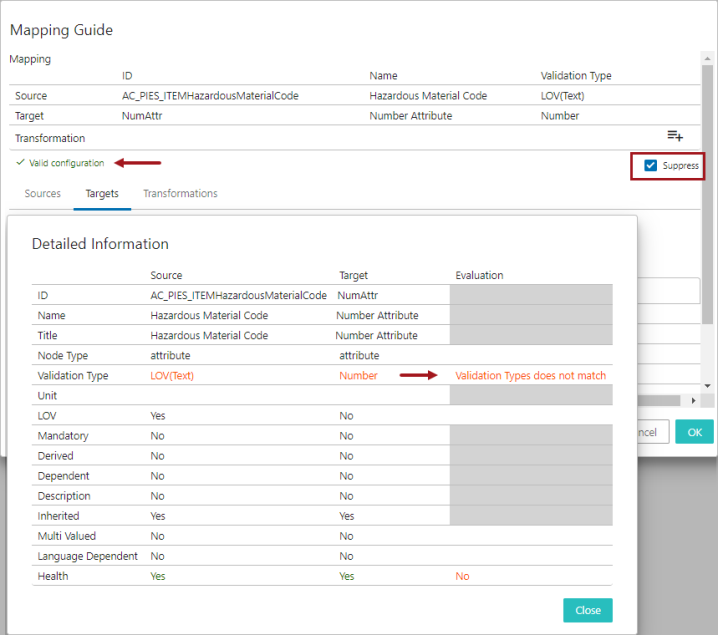
The user can suppress the validation mismatch warning message by clicking on the 'Suppress' checkbox in the Mapping Guide window. Selecting the 'Suppress' checkbox will only remove the data type mismatch warnings displayed on the Mapping Guide window and does not resolve the mismatch irregularities.
-
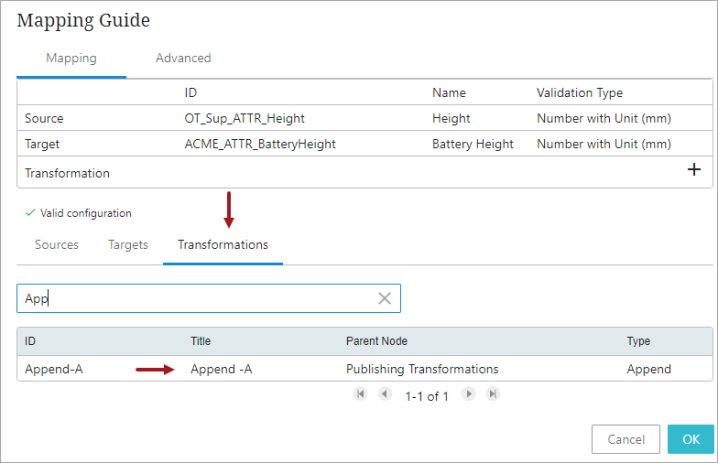
If any transformations are required, users can either utilize an existing attribute transformation already present in the system or create a new one by clicking on the 'Create new transformation' icon (
 ).
). To configure an existing attribute transformation, users should select a pre-existing attribute transformation from the list available in the 'Transformations' tab, which is displayed in the lower half of the window (as shown below).
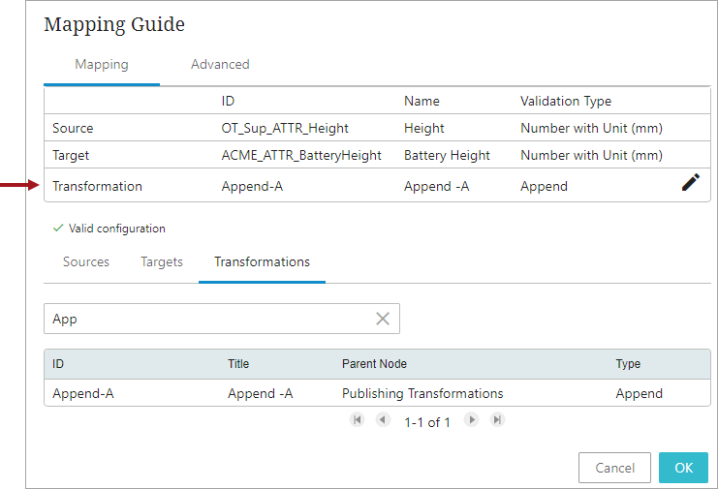
The selected transformation will be populated in the Transformation field (as shown below).
In case the required attribute transformation is not available in the system, then clicking on the 'Create new transformation' icon (
) available within the Transformation field will open the Transformation Overview window where the user can create a new attribute transformation. Details about how to create and configure an attribute transformation are explained in a separate topic. For details about creating an attribute transformation standing on a Mapping Guide window, refer to Creating Attribute Transformations Through Mapping Guide Window topic within this guide. The populated transformation can be edited / removed by clicking the edit icon (
 ) in the Transformation field.
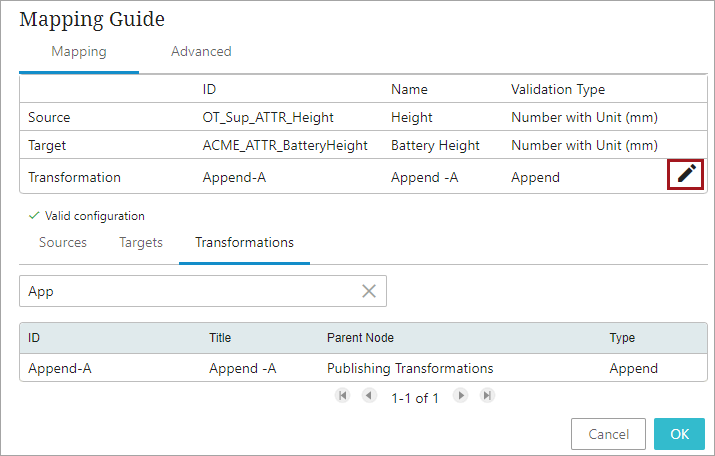
Note: Deleting an attribute transformation from the Mapping Guide window means removing it from the current mapping setup; however, editing it impacts all of the other mappings that have used the particular attribute transformation. Users are advised to be cautious before editing the attribute transformation. The Mapping Guide in the Web UI does not analyze if the transformation is applied to any other mapping.
-
After completing all the required parameters within the Mapping tab, users should navigate to the Advanced tab only if the source is a multi-valued attribute. If the source is not multi-valued, this step can be ignored. Details pertaining to the Advanced tab is described in the later section of this topic.
-
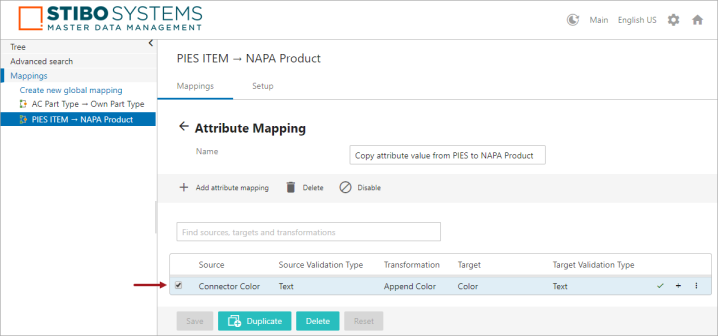
Click OK to close the Mapping Guide window and then click Save to save the changes. The newly added attribute mapper row will be listed as shown below. To edit the attribute mapping selections, click on the row and it will open up the Mapping Guide window in order to make edits.
- Repeat the above steps 4 to 8 to add more attribute mapping rows for the same plugin.
Important: Users must save the changes before exiting the Mapper Configuration. If the user fails to click Save, then the mapping will be lost once the user leaves the Mapper Configuration.
User can add any number of mapping rows in the mapping plugin. When there are multiple mapper rows available within the mapping plugin, the order of execution of each mapper row is based on the order in which it is listed within the mapping plugin.
The health of the mapper row is displayed next to each mapper row. Users can also add some additional information describing each of the mapper rows. The user has the flexibility to disable, delete, or rearrange the listing order of the mapper rows. For more information on handling the mapper rows, refer to the topic Modifying Mapper Rows on the Onboarding Mapping Details Screen within this guide.
Handling Multivalued Source Attributes in Attribute Mapping
The Mapping Guide window has the Advanced tab that allows users to perform some advanced transformation functionalities when required. The functionalities in this tab are mainly designed to handle multivalued source attributes.
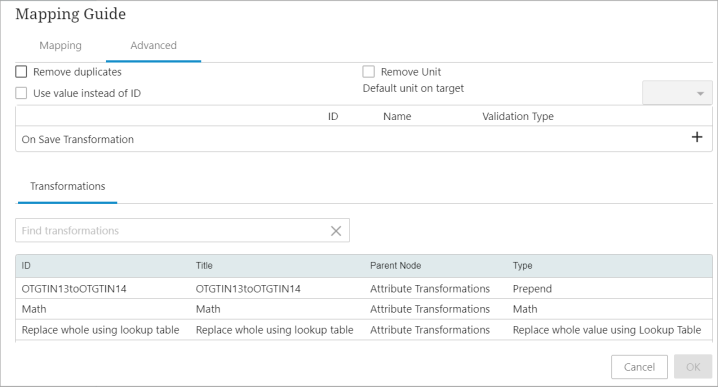
While the attribute transformation configured in the Mapping tab is applied to the values of the source attribute, the attribute transformation configured in the Advanced tab will be applied to the intermittent string that gets created during the transition of data from the source attribute to the target attribute.
This allows to simplify more complex mapping relationships between source and target attributes. When configured, the Attribute Mapping plugin can handle a multi-valued source attribute and transform the values before populating them into a single-valued target attribute. In this case, the system can extract a specific value from a string of multiple values and apply additional transformations before the final value is populated in the target attribute.
For example, consider that data is being onboarded into a single-valued target attribute (named 'Body Color') from a multivalued source attribute (Color) with an attribute transformation that changes the value from the upper case to the lower case. The source attribute Color has three values, RED, BLUE, and BLACK. If the attribute transformation was set in the Transformation field of the Mapping tab, the target attribute Body Color would be populated with a value 'black' (because the target attribute can accommodate only one value).
However, before it populates this value in the target attribute, it is to be known that in the background, the system creates an intermittent string called 'red<multisep/>blue<multisep/>black' and extracts only the value 'black' out of this string to populate on the target attribute.
The Transformation field in the Advanced tab helps to configure and apply another attribute transformation on this string, and users can transform and retrieve the desired data from this string to be populated in the target attribute value.
For example, if the On Save Transformation field is populated with an attribute transformation that replaces the '<multisep/>' substring into the hyphen '-', then the final value in the target attribute will be populated as 'red-blue-black'.
Along with the functionality described above, the Advanced tab can also be used for the following:
-
Ensure that no duplicate values are populated in the target attribute by selecting the 'Remove duplicates' checkbox.
-
Determine if the value of a LOV or the ID of the LOV value is to be populated in the target attributes using the 'Use value instead of ID' checkbox.
-
Utilize the 'Remove unit' parameter to remove any units retrieved from the source attribute. This parameter ensures that units are stripped from the source attribute before being assigned to the target attribute.
-
Specify the desired unit for the target attribute using the 'Default unit on target' parameter. This parameter allows you to assign a new unit to the target attribute