A change package is a container to store a set of system configurations for migration to another system. When a change package has been created, it is empty until items have been added to it. When objects have been added, the system then tracks if subsequent changes occur on those items. Information on the change package informs the user if an item in the change package is up to date compared to the current system configuration using color coding. Users can then resolve discrepancies in an open change package if desired. Details for working with open change packages are described below.
After editing a change package but before exporting it, you must finalize (seal) the package as defined in the Finalizing a Change Package topic.
Users in Change Packages
When users and/or user groups are added to a change package, passwords for the users are not included. Since creating a new user requires a password, new users are created with a temporary password which must be reset manually when passwords are maintained in STEP. If the user is a service account that will never be used to log into STEP, or if users are managed by an external system, manually resetting the temporary passwords is not necessary. Changes to existing users can be made using change packages; but passwords can only be changed by the user or an administrator.
Note: When changing a user from one assigned group to another, the user is added to the new group, but must be manually removed from the original group.
Set the Operation Mode
The Operation Mode parameter determines how the dependency analysis functions for the change package.
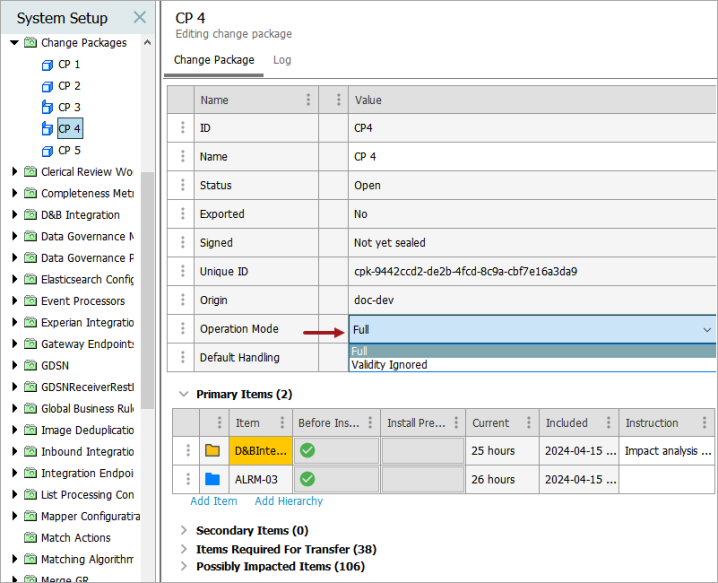
Set the Operation Mode as follows:
-
Full: This default setting means all objects that are manually added to the change package will, in turn, have all of their associated items included in the change package. This automated inclusion pulls in not only items that the object touches (references, workflows, etc.), but also objects touched by those items. For example, if an attribute is valid on two object types, each of those two object types is also added to the package.
-
Validity Ignored: This setting means the change package ignores associations made as a result of valid attributes, object types, and reference types when the dependency analysis is made. For example, when the user adds an attribute in this mode, the object types and references on which the attribute is valid are not automatically added as they are in 'Full' mode.
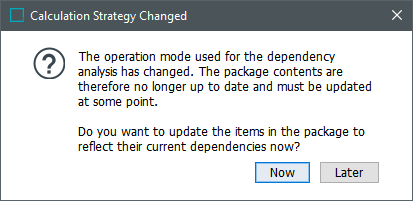
Changing the operation mode displays a prompt to run the dependency analysis. The analysis can be run at the time of the prompt or later.
Set the Default Handling
The selection in the Default Handling parameter determines the setting made in the Handling column as items are added to the change package. The items included in the Items Required For Transfer and Possibly Impacted Items sections should be reviewed for promotion to the Primary Items section if they are to be included in the Impact Analysis (otherwise, these sections are ignored by the Impact Analysis process).
Note: Ideally, set the intended Default Handling before adding items to set the Handling appropriately when initially adding items. When you need to change the Handling parameter for multiple items, you can copy / paste a setting for multiple rows, but the process may take additional time depending on the number of items being updated.
When adding a Primary item, the system automatically identifies other items that are required for the selected item to be installed or that will be affected by changes to the selected item.
The handling specifies how the system should manage these extra items.
-
Analysis and Installation: The additional items are transferred to the target system and installed in the same way as the Primary Items, except that these items are automatically added to the change package by the system and are not manually added. This can cause significant changes on the target system because of the additional items.
-
Analysis Only: Items Required For Transfer with this setting should be analyzed by the change package owner and possibly promoted to the Primary Items section. Analysis Only items are ignored during Impact Analysis and installation. In most cases, this option is the preferred choice. Analysis Only is the default and is the only option when using change packages with Git.
Add Items to a Change Package
Objects can be added to the package using drag-and-drop for most objects, or one of the links below the Primary Items section. Support for objects in change packages is defined in the Change Package Object Support topic.
For example, with drag-and-drop, add only the specific items selected (no children) which is the same functionality as using the Add Item link. With the Add Hierarchy link, add the selected item that supports hierarchies as a primary object and all of the children as secondary objects.
Note: The Add Hierarchy functionality is not intended to move product or classification hierarchies; therefore, a limited number of objects support adding as a hierarchy, such as attribute groups, collection groups, collections, etc.
-
Choose a method to add items:
-
Drag-and-drop – lock the editor by clicking the pushpin button (
 ) on the right side of the editor, and then multi-select items or select an individual item from the System Setup or Tree tab and drag-and-drop them in the table header area between the Primary Items section and the Add Item link. When objects have been added, click the pushpin button once more to enable the editor.
Drag-and-drop is not supported for a group of items with their children populating the Secondary Items section; instead, use the Add Hierarchy link.
Note: Attempting to drag-and-drop an invalid object is not allowed. On the dialogs, selecting an invalid object type reports the issue in red text at the bottom of the dialog and the Select button is not enabled.
-
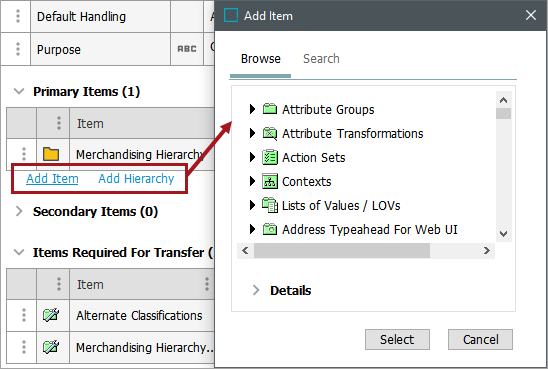
Add Item – click the link to open the Add Item dialog, select one or more primary items, and click the Select button.
-
Add Hierarchy – click link to open the Add Hierarchy dialog, select one or more primary items, and click the Select button.
-
Promote to primary – when default handling is set to Analysis Only, relevant objects added to the Items Required for Transfer and the Possibly Impacted Items sections can be promoted to the Primary section for installation.
-
From another change package – drag-and-drop a change package onto the Primary Items table of another change package to combine items from multiple change packages.
For example, change package A has 12 Primary Items, where one was added as a hierarchy, resulting in 20 Secondary Items and 15 Items Required for Transfer with the 'Analyze and Install' Handling instruction. Change package B has no Primary Items and a Default Handling setting of 'Analyze Only'. Dragging change package A and dropping it onto the Primary Items table of change package B results in:
-
12 Primary Items are added
-
0 Secondary Items are added
-
the Items Required for Transfer list is updated based on the current data, which may differ from the original 15 items in change package A
-
the Handling parameter is set to 'Analyze Only' based on the Default Handling setting of change package B
The other sections of the change package being modified are updated based on the current state of the data; the Handling settings are updated based on the Default Handling on the change package. Items are only added to the Secondary Items section by manually using the Add Hierarchy option on the Primary Items section.
-
-
-
The Primary Items section is updated with the valid objects added to the change package.
-
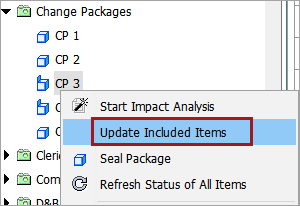
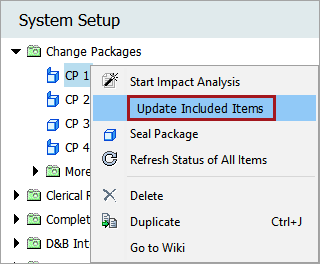
Right-click the change package and select Update Included Items to ensure an accurate report of the package dependencies.
Note: To allow for the addition of primary objects, full dependency calculations are only applied on demand rather than running a potentially complex analysis for each individual addition or removal of an object.
For more information on the items in the Primary Items section, refer to the Statuses and Discrepancies in Change Package Items topic.
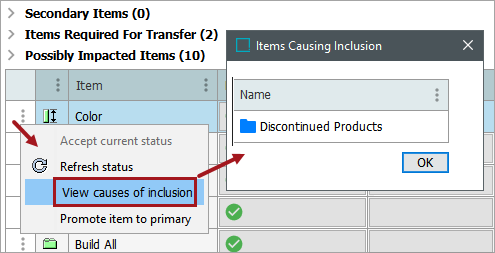
Reasons for Included Items
To understand the reason an item is included in a change package, right-click in the first column for the item and select the 'View causes of inclusion' option.
Auto-selected Objects
Items listed in the Items Required For Transfer and Possibly Impacted Items sections are ignored by the Impact Analysis and are not installed. Items in this section should be reviewed by the change package creator. For items that are needed on the target system, use the 'Promote to primary' option to include them in the Primary Items section.
Important: All items in these sections are ignored by the Impact Analysis and are not installed. Only items in the Primary Items section are installed on the target system.
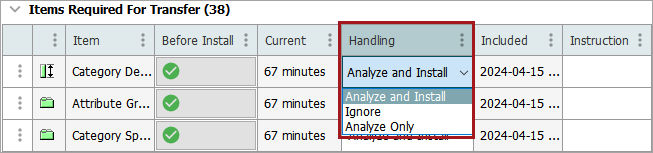
-
The Items Required For Transfer section includes items that should be reviewed for promotion to the Primary Items section for transfer with the change package.
The Ignore, Analyze and Install, and Analyze Only settings are manual ways to indicate how the items should be managed on the target system.
-
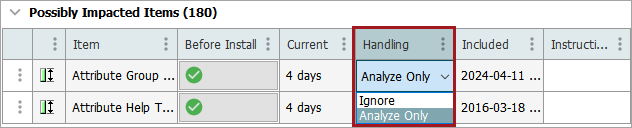
In the Possibly Impacted Items section includes items that should be reviewed for promotion to the Primary Items section for transfer with the change package:
The Ignore and Analyze Only settings are a manual way to indicate how the items should be managed on the target system.
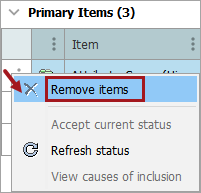
Remove Items from a Change Package
Only 'Primary Items' may be removed from a change package. Items are removed from the other sections based on their relationship to removed Primary Items.
-
Verify the change package is open. Items may only be removed from an open package.
-
In the Primary Items section, click the item row and select Remove items.
-
Right-click the change package and select the Update Included Items option. This ensures an accurate report of the dependencies in the package. Full dependency calculations are only applied on demand.