Azure Vision integration is used to extract detailed information from images, including keywords, captions, and text identification. Organizations can utilize this information in order to optimize search engine results, identify similar products based on linked images, enrich product descriptions and attributions based on image content, and provide richer product information to customers.
Important: The use of Azure Vision integration requires customers to independently obtain an API key through Azure.
Getting Started with Azure Vision
Your Azure administrator will need to deploy a Computer Vision instance and provide you with the endpoint URL and the API key associated with the URL. The URL will be used in the REST Gateway Integration Endpoint, and the API key will be used in the Gateway Integration Authentication function.
Additionally, you will need an API version of the Computer Vision instance for the Gateway Integration Authentication function. Search the web for an Azure Computer Vision API version. It is recommended not to use preview versions. For example the API version could be the following
2024-02-01
After you have acquired an API key through Azure, and you have installed the necessary license and components on your STEP system, the AI Setup group displays in the System Setup tab.
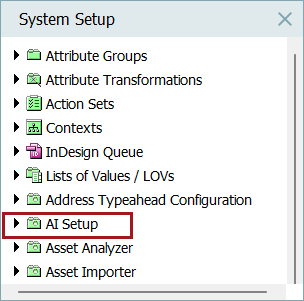
Follow the steps below to get familiar with the starter package provided for Azure Vision:
-
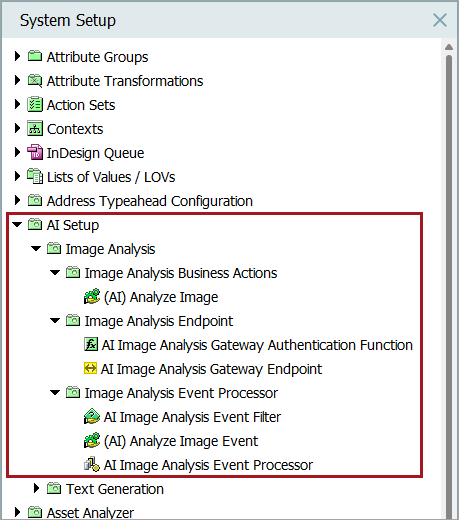
Expand the AI Setup folder to display the folders below.
-
Expand the Image Analysis folder and its subsequent folders. Each of these subfolders together contain, business rules, a Generation Gateway Endpoint, an authentication function for the generation gateway endpoint, and an Event Processor.
-
Starting with the Image Analysis Endpoint folder, configure a REST AI Image Analysis Gateway Endpoint as needed. For more information on how to configure Generation Gateway Endpoints, refer to the Configuring a Gateway Integration Endpoint topic in the Data Exchange documentation.
For this example, the following REST Generation Gateway Endpoint was configured:
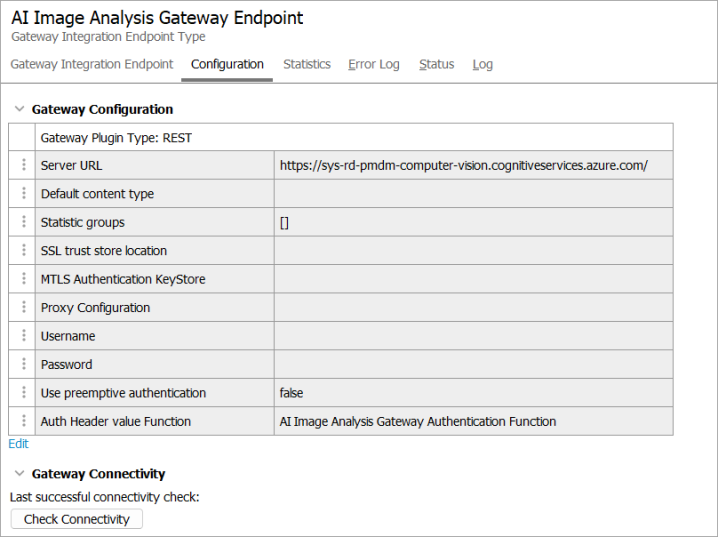
Important: Should additional Azure Vision regions need to be configured, each one requires its own Generation Gateway Integration Endpoint and corresponding Generation Gateway Authentication Function.
-
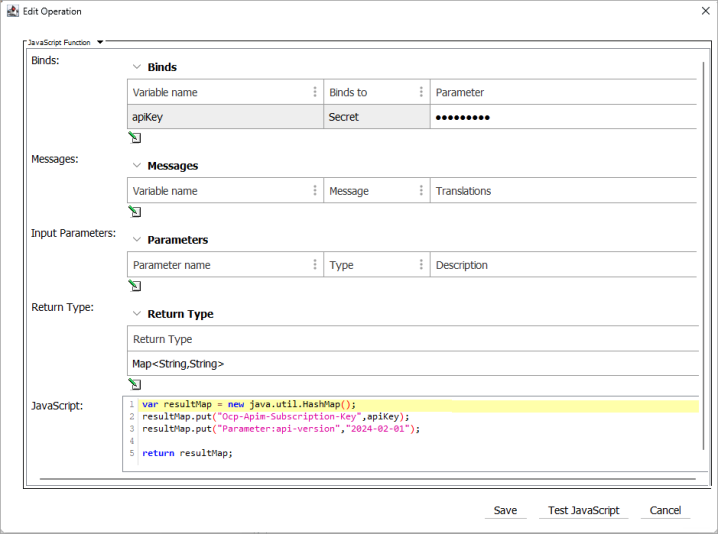
Configure the AI Image Analysis Gateway Authentication Function.
-
Update the secret bind, in this example the variable is called 'apiKey,' with your Azure Vision API key
-
Ensure that the return type is set to Map<String, String>
Important: You need to put Parameter: in front of the key API-version.
In the example below, the following JavaScript Function was created:
 Copy
Copyvar resultMap = new java.util.HashMap();
resultMap.put("Ocp-Apim-Subscription-Key",apiKey);
resultMap.put("Parameter:api-version","2024-02-01");
return resultMap;
-
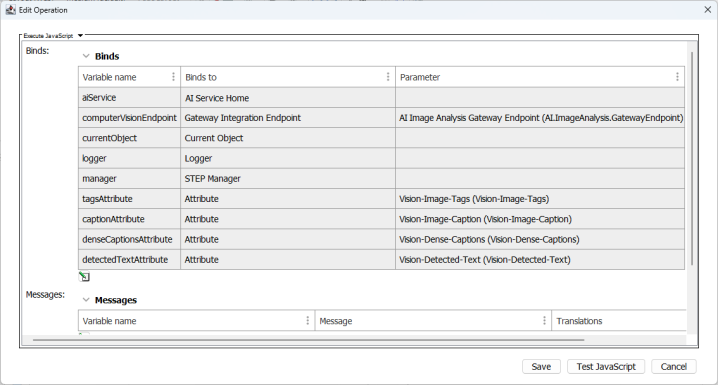
To make this example work, lastly, configure the Image Analysis Business Action. A bind must be made to the relevant gateway integration endpoint and attributes to produce the relevant tags, caption, description, and detected text.
The produced values will be stored in their matching attributes. For example, detected text will be stored within the Attribute bind that has the 'detectedTextAttribute' variable name.
 Copy
Copy// Analyze Image Action version 1.0 AI Image Analysis.
// NOTE: A bind must be made to the relevant gateway integration endpoint and attributes to produce the relevant tags, caption, description, and detected text.
// The produced values will be stored in their matching attributes. For example, detected text will be stored within the attribute with the bind that has the "detectedTextAttribute" variable name .
// Convenience function for replacing all values in a multi-valued attribute
function setMultiValue(asset, attribute, features, threshold) {
var value = asset.getValue(attribute.getID());
if (features == null) {
value.deleteCurrent();
} else {
var valueBuilder = value.replace();
for (var i = 0; i < features.size(); i++) {
var feature = features.get(i);
if (feature.getScore() > threshold) {
valueBuilder.addValue(feature.getContent());
} else {
logger.info("Ignoring feature \"" + feature.getContent() + "\" with score " + feature.getScore());
}
}
valueBuilder.apply();
}
};
// Convenience function for setting a value for single-valued attribute
function setSingleValue(asset, attribute, features) {
var value = asset.getValue(attribute.getID());
if (features == null || features.size() == 0) {
value.deleteCurrent();
} else {
value.setSimpleValue(features.get(0).getContent());
}
};
var result = aiService.buildAnalyzeImageRequest(computerVisionEndpoint, currentObject)
.withTags()
.withCaptions()
.withDenseCaptions()
.withDetectedText()
.execute();
// You may configure the caption attribute to be a single-valued attribute in this example.
setSingleValue(currentObject, captionAttribute, result.getCaptions());
// Each of these attributes is a multi-valued attribute so each result that exceeds the score threshold
// will be stored in the attribute value.
setMultiValue(currentObject, tagsAttribute, result.getTags(), 70);
setMultiValue(currentObject, denseCaptionsAttribute, result.getDenseCaptions(), 70);
setMultiValue(currentObject, detectedTextAttribute, result.getDetectedText(), 20);
logger.info(result);
-
Event Processor
Event Processors allow for the collection of events to be logically processed, and actions automatically performed, based upon each event processor's specific configuration. For example, organizations can use event processors to process events via business rules asynchronous in the background, if desired, when working with Azure Vision. For more information on how to configure and use event processors, refer to the Event Processors topic in the System Setup documentation. An example event processor has been provided to create a starting point.
-
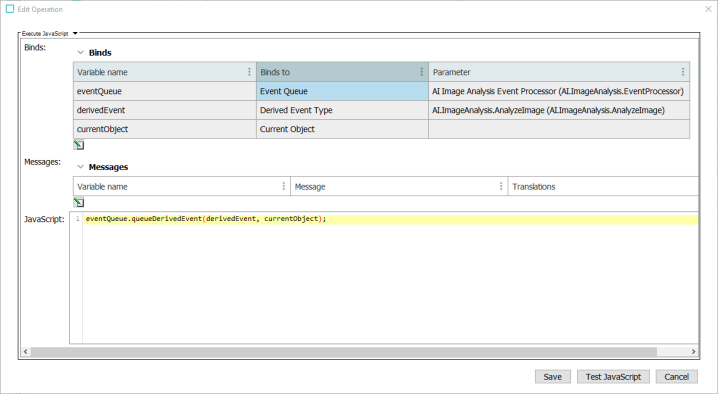
This example business rule ensures that the event gets picked up by the Azure Vision event processor.
 Copy
CopyeventQueue.queueDerivedEvent(derivedEvent, currentObject);