Translated Web UIs can be accessed in one of two ways: via the Locale selector on the login page, or once logged into Web UI, going to the Select Locale section in the User Settings menu on the Global Navigation Panel. There are thirteen locales that come standard with each Web UI: Danish, German, English, Spanish, French, Italian, Norwegian, Portuguese, Finnish, Swedish, Chinese (simplified), Japanese, and Korean. Both locale access options are described in further detail below.
For more information on Localization or using the Localization Tool, refer to the Localization topic and the Localization Tool topic in this Administration Portal documentation.
Note: A property can be added to the sharedconfig.properties file to ensure a specific locale displays even if the browser prefers a different language. For example, to force display of the English locale, the WebUI.OverrideBrowserPreferredLocale=en property can be set. Setting the locale via the Login Screen's Locale selector or the Global Navigation Panel will overrule this property.
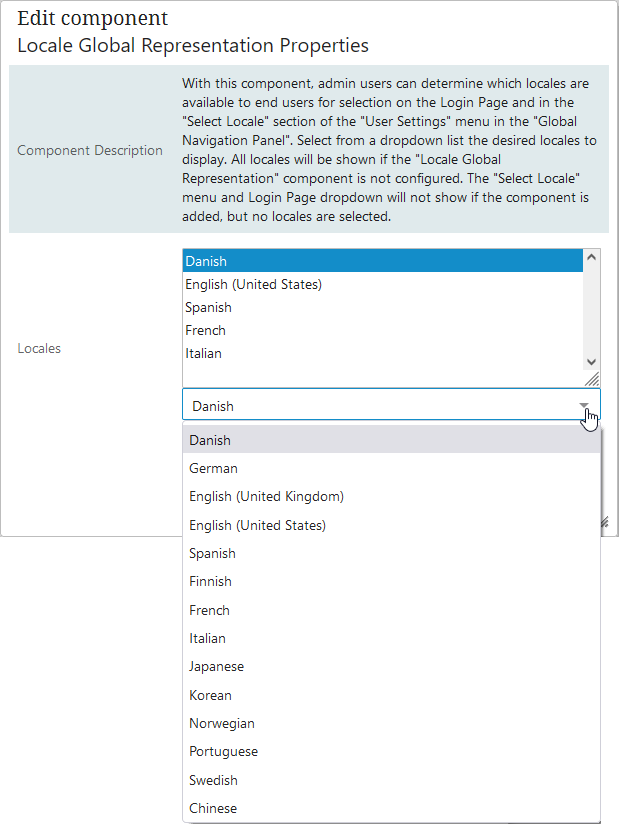
If only a select few locales need to be shown, the Locale Global Representation component can be configured to limit the available locales on the Web UI Login Screen and on the Select Locale section of the User Settings menu on the Global Navigation Panel. To do so, follow the directions outlined below:
-
Log into Web UI.
-
Go to --[MAIN]-- > Global Representation > and add the Locale Global Representation component.
-
Once added, double click on Locale Global Representation component to open the Locale Global Representation Properties.
-
Add the desired locales from the dropdown list, and click Save.

Important: If the Locale Global Representation component is added, but no locales are added to the component, the system will not display the Locale dropdown on the Login Screen, and it will not display any locales on the Select Locale section of the User Settings menu in the Global Navigation Panel. If the Locale Global Representation component is not added, all thirteen locales will display.
Backward Compatibility
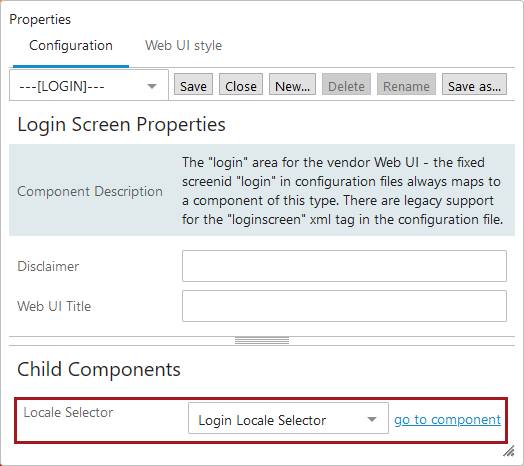
For backward compatibility in older STEP systems, the Locale Selector child component on the Login Screen will remain ONLY if it was configured prior to 10.3, and will behave in the following ways:
-
If the Locale Selector child component and the Locale Global Representation component are BOTH added, the Locale Global Representation component and its behaviors will take precedence.
-
If the Locale Selector child component is added and configured, but the Global Representation component is NOT added, then the Locale dropdown on the login screen will display the configured locales, but the Select Locale section of the User Settings menu in the Global Navigation Panel will display all thirteen locales.
-
If the Locale Selector child component is selected but no locale values have been configured, and the Locale Global Representation is NOT added, then both the Locale dropdown on the login page and the Select Locale section of the User Settings menu in the Global Navigation Panel will display all thirteen locales.

Login Screen Dropdown Locale
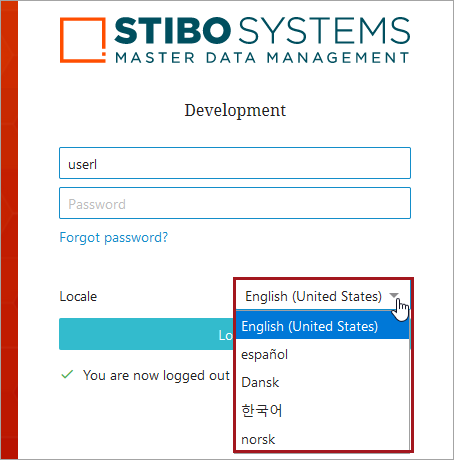
To select a particular locale on the Login Screen, select the dropdown menu from the Locale parameter and enter in user login credentials. Click Login.

Select Locale via the Global Navigation Panel
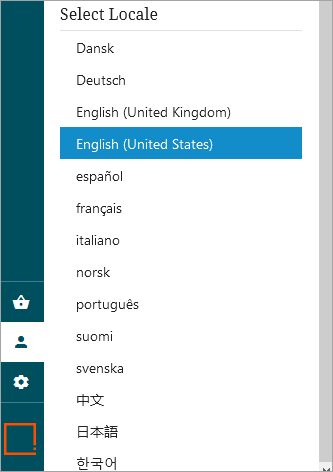
Users are able to select locale through the Global Navigation Panel. This way of selecting locale enables users who normally bypass the Web UI login screen, such as for systems configured with Single Sign On (SSO), to select a locale different from the browser’s preferred language. The selected locale will be highlighted, and each time a new locale is selected, the Web UI will refresh, signaling that the new locale has taken effect.
The locale selection under the Select Locale section of the User Settings menu in the Global Navigation Panel will display all thirteen translations as options, unless otherwise configured in the Web UI designer to only display a select few.
To access the locale selection in the Web UI, follow the directions below:
-
In Web UI, go to the Global Navigation Panel.
-
Click on User Settings.
-
Scrolling down to the Select Locale section of the User Settings column and select the desired locale.
