The Workflow Visualization component allows you to visually track objects in various workflows by defining a group of STEP workflow states (from one or more workflows) into one workflow visualization work process step. Once these process steps are configured, you can view an object's step-by-step progression on the screen. This can help in understanding, at a glance, the overall status of an object, instead of having to review every workflow the object is in.
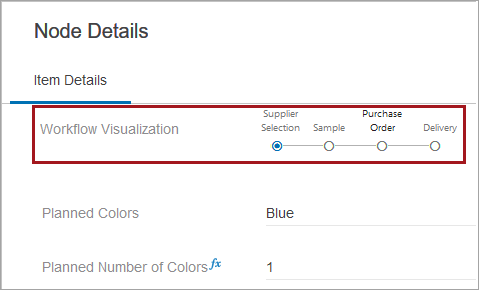
The Workflow Visualization component, which is applied to a Node Editor on a Node Details screen, is highly configurable, making it easy to display the status of an item, according to company needs. Refer to the sections below for configuration.
Configuring Workflow Visualization
This component is intended to be used on objects or tasks that will enter into multiple workflows at one time. To configure the Workflow Visualization component for an object, follow these steps:
- In Web UI, open the designer and navigate to the desired Node Editor Properties. Typically, this will be a Node Editor configured to view and provide details about the desired objects.
- On the Node Editor Properties go to Child Components > Rows > add a Workflow Visualization component.
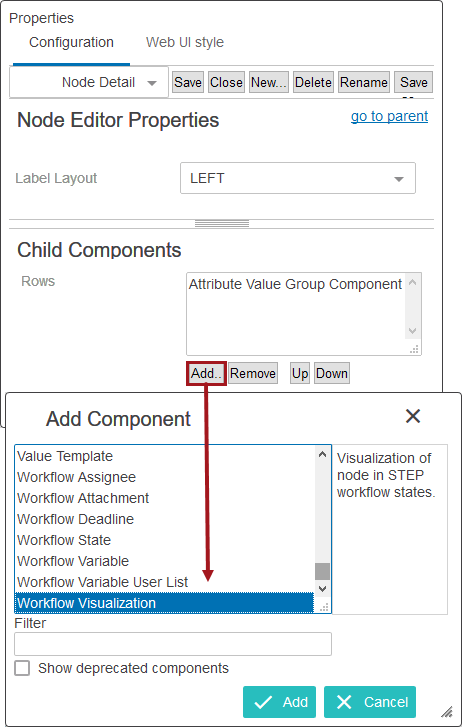
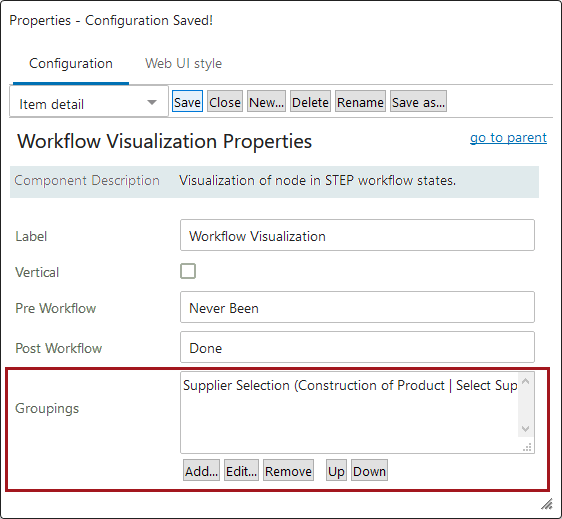
- Double click on the newly added Workflow Visualization component to navigate to Workflow Visualization Properties. The fields are defined below.
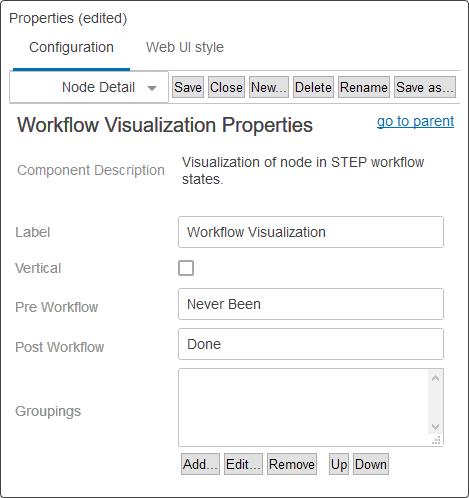
- Label -Displays as the workflow visualization label.
- Vertical - When checked, displays the workflow visualization vertically instead of horizontally.
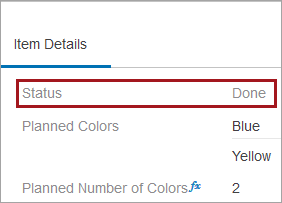
- Pre Workflow - Displays in place of the workflow visualization tracker if the viewed object has not been initiated into any mapped workflow visualization work process steps.

- Post Workflow - Displays in place of the workflow visualization tracker if the viewed object has exited all mapped workflow visualization work process steps.
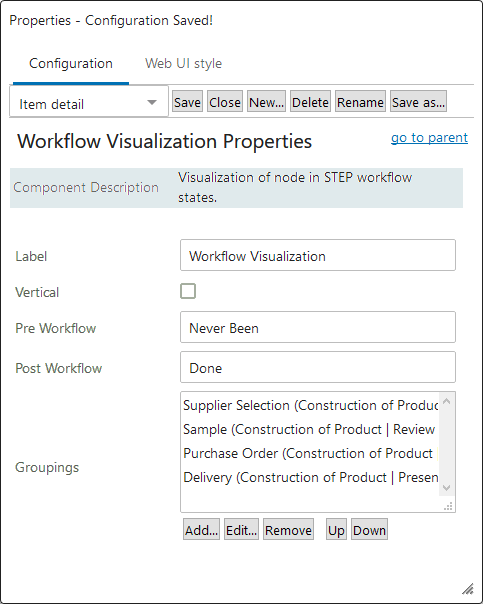
- Groupings - Field to configure mappings from workflow states to workflow visualization work process steps.
Configuring Groupings
To map states from various workflows to one workflow visualization work process step, follow the directions below:
- In the Groupings field, click the Add button to open the Workflow Visualization Groupings Properties.
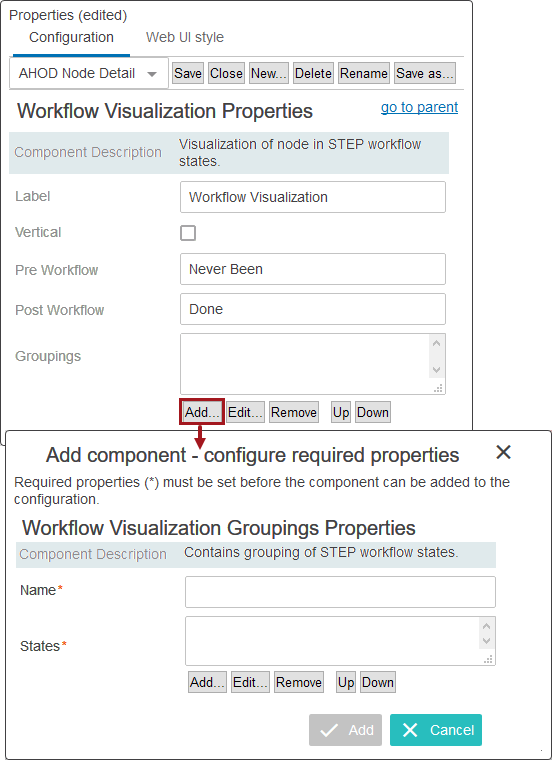
- First enter in a name for the workflow visualization work process step, then in the States field, click the Add button.
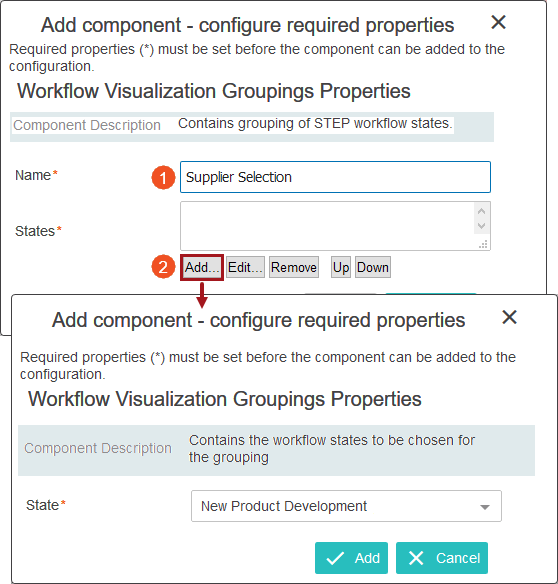
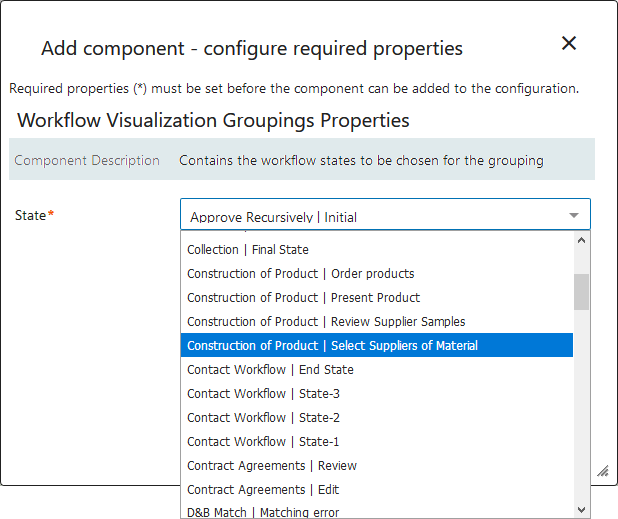
- All valid workflows and their respective states are visible in the dropdown menu 'State.' Select the desired workflow state, and click Add.
- Continue to add as many states from various workflows as needed. When finished, click the Add button on the Workflow Visualization Grouping Properties.
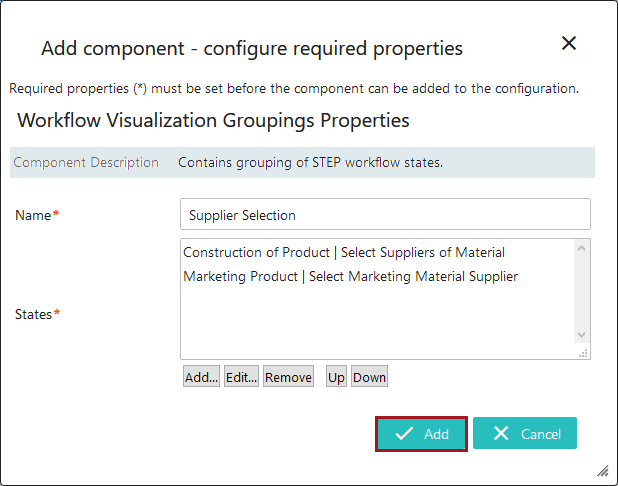
The first work process step for the workflow visualization is now complete.
Note: When creating work process steps for workflow visualization, it is a recommended practice to use only workflows that are valid for the same object type.
- Repeat steps one through four to add as many workflow visualization work process steps as needed. Work process step are displayed in the Web UI in the sequence configured in the designer. If the order needs to be altered, use the Up and Down buttons.
- When all needed work process steps are finished, click Save and Close.
If configured correctly, clicking on an object displaying on a Node Details screen in which the workflow visualization has been configured will display the configured workflow visualization tracker.
Refer to the Using Workflow Visualization topic in this documentation for an example here.
Note: It is recommended practice to create workflows strategically before mapping any states to workflow visualization work process steps. If a particular state does not require mapping to a workflow visualization work process step, it may be best to include that state in a cluster, and map the cluster to a workflow visualization work process step. This is due to the fact that if one or more states in the relevant workflows are unmapped, the user risks a false data reading. For any workflow state not mapped to a workflow visualization work process step, when an object enters this state, the workflow visualization will display as if it is completed and show the default label or manually-entered text set in the Post Workflow parameter field of the Web UI designer instead of the workflow visualization tracker. Then once the object enters into a workflow state that is mapped to a work process step, the workflow visualization will once again display the object in a work process step in the workflow visualization tracker. To aid in avoiding this, workflow designers should consider using cluster states. For more on creating workflows and cluster states, refer to the Creating A Workflow topic in this documentation here.