When you have created at least one column type and one row type, you can define the table group type and table type itself. The process is similar to creating row types or column types. After creating the table type and giving it at least one legal row type and one legal column type, you can start using it to create tables in the Tree.
Instructions on how to create legal row and column types are covered in this topic. For information on how to use a table type to build a table, refer to the Creating Tables topic in this guide
Note: The following instructions assume that you have not set an ID or name pattern on the Table Type Group (ID = table type group) or Table Type (ID = table type) object types, located under System Setup > Object Types and Structures > Basic Object Types > Table Type Group. To have these IDs and/or names autogenerate, follow the instructions provided in the Autogenerate using Name Pattern and ID Pattern topic in the System Setup documentation here.
Defining Table Type Groups
- In System Setup, go to Table > Table Types, then right-click and select Create Table Type Group.
- In the New Table Type Group dialog, enter an ID and Name for your table type group, then click Create.
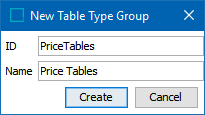
- The dialog closes and the table type group is created.
- If you need to delete the table type group, right-click it and select Delete. If the table type group contains a table type, the table type must be deleted first.
Defining Table Types
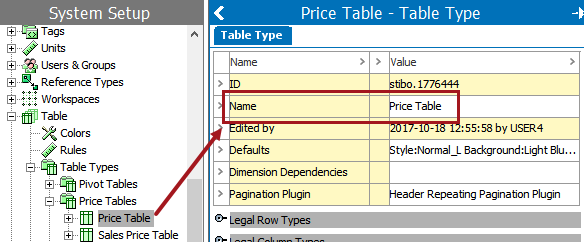
- In System Setup, navigate to the desired table type group, then right-click and select Create Table Type.
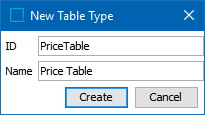
- In the New Table Type dialog, enter an ID and Name for your table type, then click Create.
Note: The ID for table types has a limit of 33 characters and cannot end with a '$.' For row and column types, the ID has the usual restriction of 40 characters.
- The dialog closes and the table type is created.
- The table type is ready for use, through in most cases table type settings and formatting definitions will need to be applied. Refer to the Configuring Settings for Table Types and Tables topic (here) for more information.
- If you need to delete the table type, right-click it and select Delete.
Modifying the Table Type Name
After the table type is created, you can modify the name by entering a new name in the Name field on the Table Type tab.
Defaults
Table type settings and formatting definitions, such as text alignment and background color, are applied under Defaults. Refer to the Configuring Settings for Table Types and Tables topic (here) for more information.
Dimension Dependencies
Table types can be made dimension dependent if there is free text content within the table that needs to be translated and/or appear differently in different countries. Since free text only exists within tables (and is not tied to attribute values), the only way to enable free text content to appear differently in different contexts is to make the table type dimension dependent.
Note: Attributes used in a table can be dimension dependent even if the table type itself is not. Dimension-dependent attributes will display different values for different contexts automatically when the table is viewed in a different context.
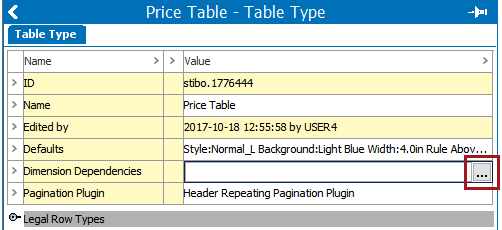
To make a table dimension dependent:
- Double-click inside the Dimension Dependencies field, then click the ellipsis button (
 ).
).
- In the Select Dimension Dependencies dialog, check the applicable Dimension checkbox. The number of available checkboxes is determined by the number of dimensions that have been created in System Setup.
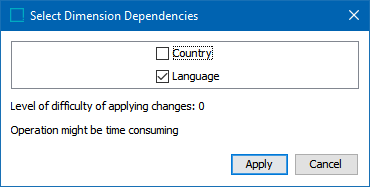
- Click Apply to complete. The table type is now dimension dependent.
Dimension-Dependent Table Type Example
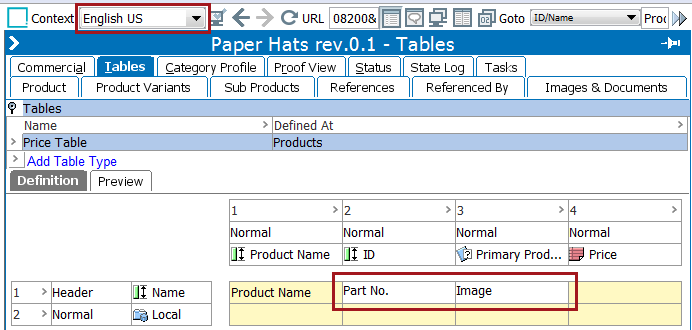
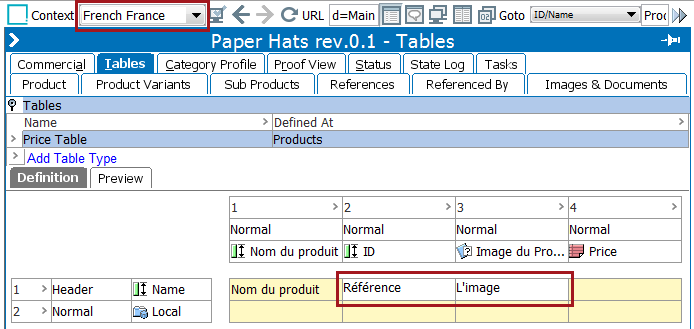
The following two screenshots show a dimension-dependent table type in two different Contexts.
- Example with English Free Text values displayed in an English-language Context:
- Example with French Free Text values displayed in a French-language Context:
Pagination Plugin
The Pagination Plugin field is where the Header Repeating Pagination Plugin is selected. To choose this plugin:
- On the table type tab, click in the Pagination Plugin field and select Header Repeating Pagination Plugin. ('None' will appear as the default selection.)
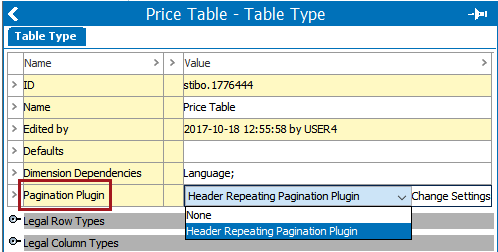
- Click on Change Settings. The Header Repeating Pagination Plugin displays.
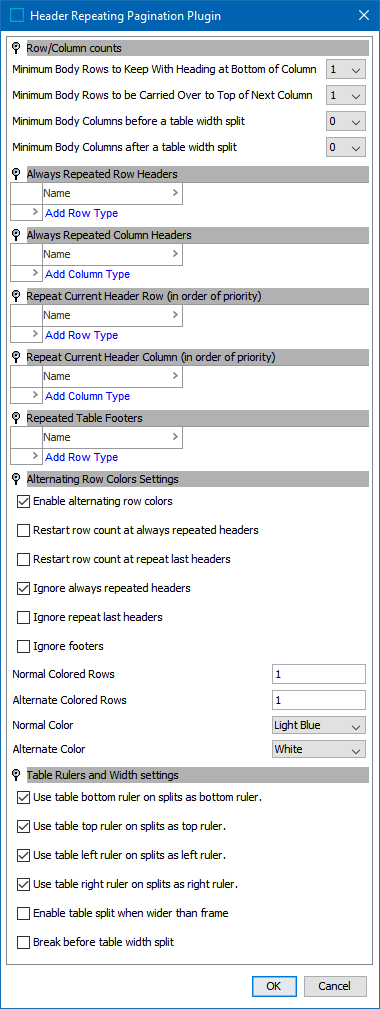
Instructions on how to configure the Header Repeating Pagination Plugin are not covered in this topic. For information, refer to the Header Repeating Pagination Plugin topic in this guide
Legal Row Types
Every table type must contain at least one legal (valid) row type before the table type can be used to create tables in the product or classification hierarchies.
The following steps explain how to add a legal row type to a table type.
- On the Table Type tab, expand the Legal Row Types flipper and click Add Row Type.
- In the Select Row Type dialog, click the Browse tab to navigate to the desired row type(s), then click Select. Row types may be multi-selected by holding down Shift or Ctrl when making selections.
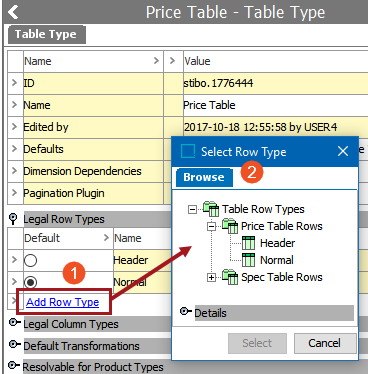
- The row types are now legal for the table type.
Removing a Row Type
To remove a row type so it is no longer legal, follow these steps:
- On the Table Type tab, expand the Legal Row Types flipper.
- Right-click on the arrow to the left of the row type that you would like to remove, then select Remove Row Type.
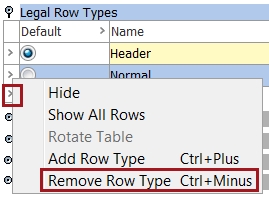
- The row type is now removed.
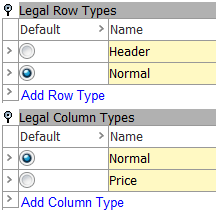
Legal Column Types
Every table type must contain at least one legal (valid) column type before the table type can be used to create tables in the product and/or classification hierarchies.
The following steps explain how to add a legal column type to a table type.
- On the Table Type tab, expand the Legal Column Types flipper and click Add Column Type.
- In the Select Column Type dialog, click the Browse tab to navigate to the desired column type(s), then click Select. Column types may be multi-selected by holding down Shift or Ctrl when making selections.
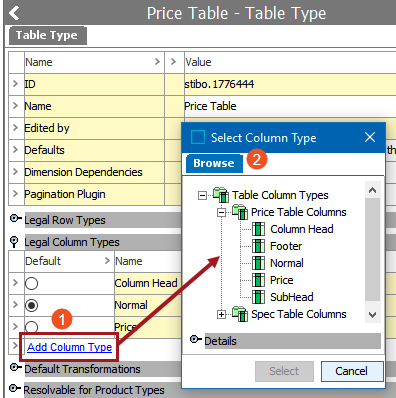
- The column types are now legal for the table type.
Removing a Column Type
To remove (unlegalize) a column type, do the following:
- On the Table Type tab, expand the Legal Column Types flipper.
- Right-click on the arrow to the left of the column type that you would like to remove, then select Remove Column Type.
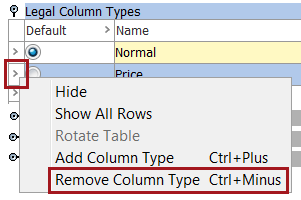
- The column type is now removed.
Default Row and Column Types
If more than one row type or column type is added, a default type must be specified for each. Default column types are required to use the Create Table From Clipboard option.
Tables created using Create Table From Clipboard are 'pasted' from an external application such as Excel. Since no prompt appears that asks you to choose which row or column types to use, the system will build the table using the specified default row and column types.
To define a default row type or column type, click the radio button next to the preferred row type and column type. The default type can be overridden in the table if needed.
Refer to the Creating Tables From the Clipboard topic in this guide
Default Transformations
Transformations that apply to every table created from a table type are selected from the Default Transformations area. To apply a default transformation to the table type, follow these steps:
- On the Table Type tab, expand the Default Transformations flipper and click Add Transformation.
- In the Select Transformation dialog, navigate to the relevant transformation, then click OK.
![]()
- Repeat these steps to add additional transformations.
Descriptions of these transformations and instructions on how to configure them are not included in this topic. Refer to the Table Transformations topic of this guide
Resolvable for Product Types and Classification Types
All table types must be made resolvable for at least one product, classification, or product-override object type before the table type can be used to create tables in the Tree. 'Resolvable' essentially means the same thing as 'valid.' Though a table can be built at a higher level in the product or classification hierarchy to take advantage of inheritance, the table cannot be previewed or mounted in InDesign on any object where it has not been made resolvable (valid). To make object types valid for table types, follow these steps:
- On the Table Type tab, expand the Resolvable for Product Types and/or Resolvable for Classification Type flipper.
- Check the box(es) for the product type(s) and/or classification type(s) where the table should be resolvable.