User List Screen
The User List screen enables administrative users with the relevant privileges to view all users configured on a given system, as well as related metadata about those users based on how the screen is configured.
Prerequisites
It is expected that anyone configuring the User List screen component is familiar with the Web UI designer as basic concepts for working with the designer are not covered in this section. In addition, the user must have appropriate privileges to access the designer. Additional information regarding these privileges can be found in the Designer Access section of the Web User Interfaces documentation here.
Adding a User List screen
There are a number of ways to enable access to the User List screen, depending on the level of configuration your requirements demand.
If no steps are taken, a default User List screen will be available using the standard method, via the 'Show All Users' button under 'User Settings.'
Important: The default User List screen does not allow for management of metadata attributes or toolbar actions.
If users require that a User List screen be accessible on the Web UI homepage via a 'Links' widget, or via a 'Links' component on the Global Navigation Panel, then a 'User List Link' component can be used. Available in both the 'Links' widget and the 'Links' component in the Global Navigation Panel, the 'User List Link' provides quick access to a default User List screen, or a User List screen configured via the 'User List Global Representation' component.
Note: The User List screen available when creating a new screen does not allow for configuration beyond the defaults (described below) aside from naming the screen.
For more information on creating screens, refer to the Designer Configuration Tab topic in the Web User Interfaces documentation here.
For more information on configuring a Links widget, refer to the Links Widget topic in the Web User Interfaces documentation here.
If users require a configured User List screen with additional toolbar action buttons and attribute columns beyond what is provided by default, then a third method must be used. The steps for this method are described below:
-
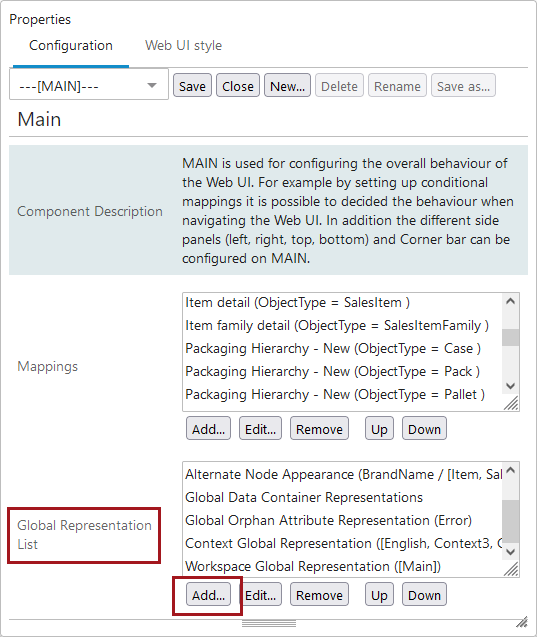
In the designer, on --[MAIN]--, scroll down to the 'Global Representation List' parameter. Click the 'Add...' button.
-
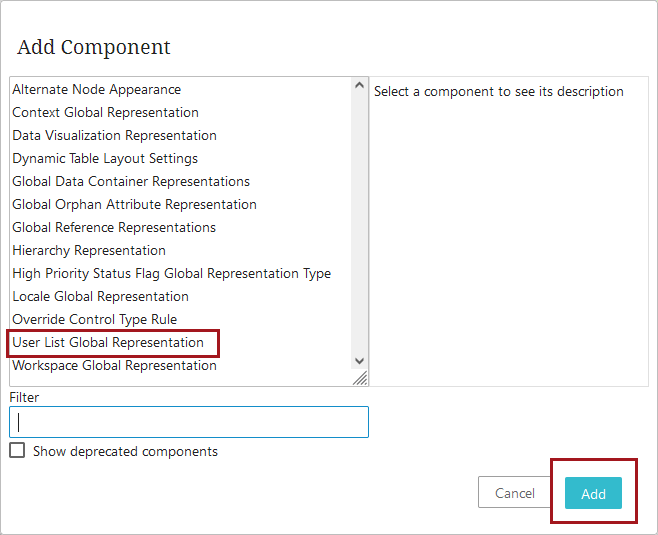
From the list that displays in the 'Add Component' dialog, select 'User List Global Representation' and click the 'Add' button.
-
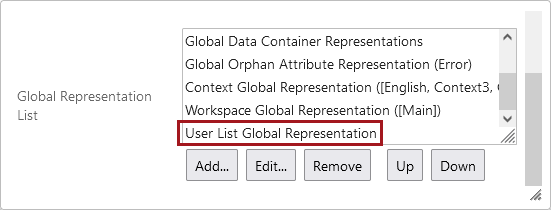
To configure the screen, double-click the new component, which can be found at the bottom of the 'Global Representation List' field. Or simply select the component, and click 'Edit...'.
-
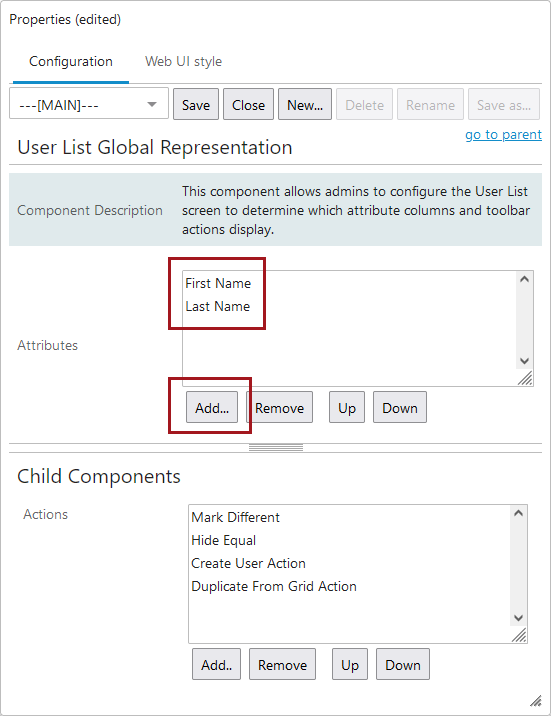
In the 'Attributes' field, add any additional attributes that should display as columns in the User List table. For example, if users' first and last names are important to how your user list is ordered, you can add those columns to the table.
-
In the 'Actions' field, four buttons are configured by default: 'Mark Different,' 'Hide Equal,' 'Create User Action,' and 'Duplicate from Grid Action.' In addition, users can also add two additional buttons—'Delete User Action' and 'Run Business Action.'
Because system users cannot be stored as individual objects, User List screens are not mapped in the same way object-supporting screens are. For that reason, rather than clicking on an object and being directed to a screen the admin user has mapped, the User List screen is accessed via a direct link in the Web UI. Configuring a User List screen as a direct link in a Links homepage widget, for example, is a typical use case for this screen.
Using the User List screen
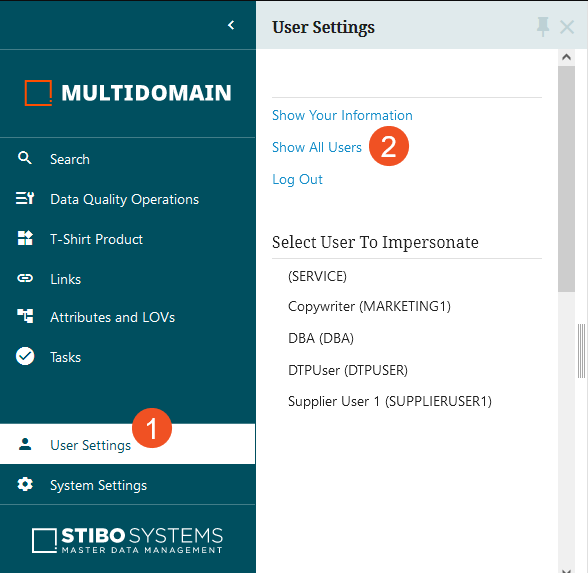
Whether the User List screen is configured or displays in its default configuration, it is always accessible by first clicking 'User Settings' near the bottom of the Global Navigation Panel, and then 'Show All Users' near the top of the 'User Settings' column.
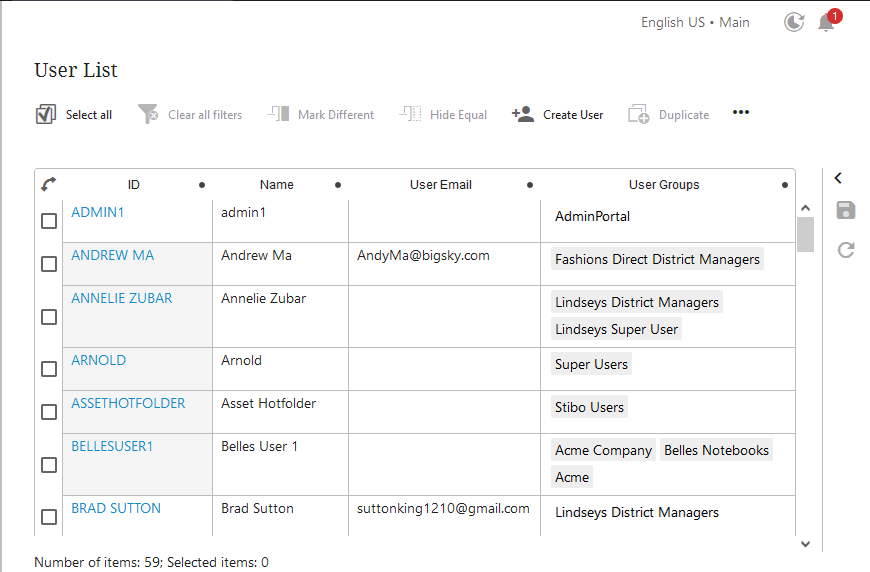
The User List screen displays a list of all users configured on a given system, dependent on the logged-in user's privileges. If the list is longer than can be accommodated in the browser window, a scroll bar on the right allows users to access the full list.
The list of system users are shown with four columns of data:
- ID: Displays the user ID
- Name: Displays the user name
- User Email: Displays the email address configured for that user
- User Groups: Displays the user groups to which the user belongs
Note: To prevent memory and performance issues, the maximum number of users displayed in the User List screen is 10,000. This maximum can be amended to be less than 10,000 via the Portal.MaxResultCount config property; this property can be set on the server by advanced users or by Stibo Systems technical support. Once the number of users exceeds the configured maximum (though the maximum cannot be set to a number above 10,000), the sorting and filtering functionality in the User List Screen is disabled. To search for users when the maximum has been exceeded, users should access the Advanced Search screen and apply search criteria that narrows the returned list of users to a number less than 10,000. As an example of how to accomplish this, users can deploy the 'Search from List' criterion and paste in a list of user IDs or Names to search. Or users can deploy the 'Object type' search criterion, set the value to 'User', and add the 'Name, ID and Attribute value search' criterion to narrow down the list. For more information on the Advanced Search screen, refer to the Advanced Search topic, also in the Web User Interfaces documentation here.
The columns in this table can be sorted or filtered by clicking anywhere in the column header.
For more on sorting and filtering in Web UI tables, refer to the 'Enable Filtering' section of the Node List Component topic here.
At the top of the screen, as shown in the screenshot above, is a 'Create User' button. Display of this button is dependent on the privileges assigned to the logged-in user. If appropriately privileged, clicking the 'Create User' button brings up a 'Create User' window (shown below) that enables the logged-in user to create a new user profile with access to the system.
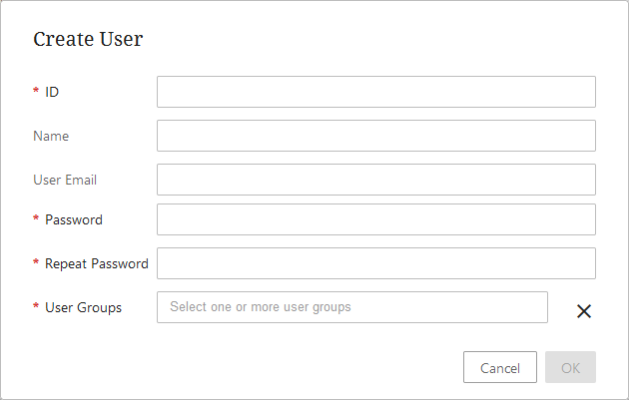
The 'Create User' window contains six parameters, four of which are mandatory, to create a new user profile.
- ID - Enter the ID for the new user.
- Name - The ID will automatically populate the 'Name' field once the ID has been entered and the cursor is placed outside of the ID field. If the user name must be different than the ID, add a unique name value in this field.
- User Email - Enter the email address for the new user. This email address will be used by the user when initiating the 'Forgot password?' functionality on the login page.
- Password - Enter a password for the new user.
- Repeat Password - Enter the same password in this field as was entered in the 'Password' field. This lessens the chance that a password contains mistyped characters.
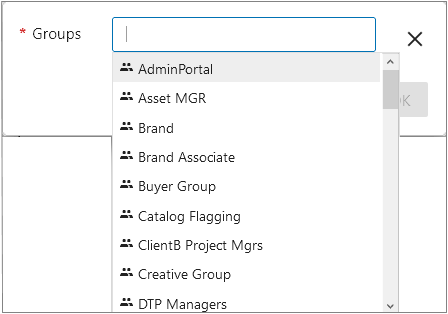
- Groups - Click into this field to view a list of all available user groups to which the new user can be assigned. Admins may select as many user groups for the new user as needed. Users must select at least one user group for this field.

Once all mandatory fields are filled out, click 'OK.' The new user profile is added to the system and will display in the User List screen. The newly created user will possess the privileges of the most privileged user group to which they are added.
Note: If the logged-in user creating a new user is a supplier- or vendor-user, they will only be able to add newly created users to the supplier / vendor-designated user groups to which they belong. When viewing the users on a system in the User List screen, they will view only the users belonging to the supplier / vendor user groups to which they belong; when they click into the 'Groups' field in the 'Create User' window, only the supplier / vendor user groups of which they are a part will display as selectable options.