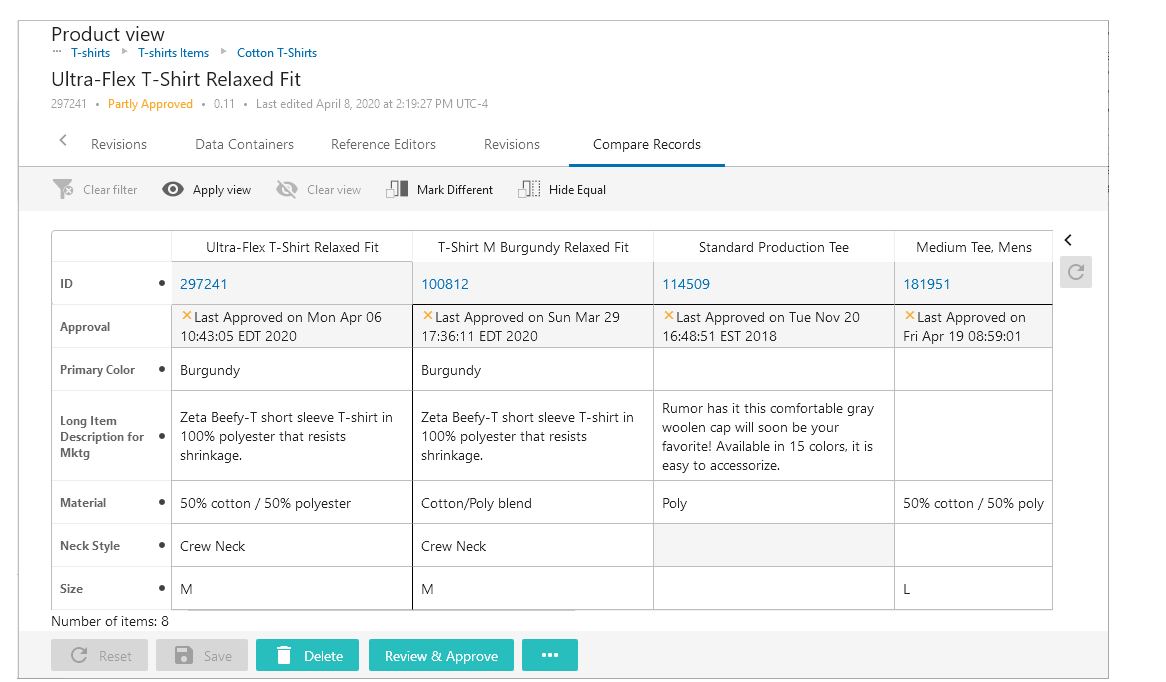
The Compare Records screen can be used to enable a one-screen view of a selected object and objects that either reference the selected object, or are referenced by the selected object. Many business cases can be supported with this screen, but of particular note are instances in which customers are matching and merging records to produce golden records. Using this screen, users can view the golden record, the enrichment record, and all records from which the golden and enrichment record were drawn. In the view provided with this screen, data stewards have the ability to view at-a-glance where specific data originated, and can make informed edits / updates to progress the object as desired.

As one example of this use case, a product steward is tasked with editing an internal data record for a t-shirt product. To do so, the steward must reference the various supplier records that auto-populate the internal data record. Because the internal data record updates the t-shirt product page on the website, the data steward must simultaneously reference the supplier and golden records to make informed changes to the internal data record, which in turn updates the website. Rather than requiring users to visit multiple screens to collate the needed data, the Compare Records screen gives the product steward an efficient way to compare and maintain the internal source record against the other contributing objects in a single screen.
Prerequisites
It is expected that anyone configuring the Compare Records screen is familiar with the Web UI Designer, as basic concepts for working with the designer are not covered in this section. In addition, the user must have appropriate privileges to access the designer. Additional information can be found in the Designer Access section of the Web User Interfaces documentation here.
Configuration
The process for creating a new screen is outlined in the Design Mode Basics topic in the Web User Interfaces documentation here.
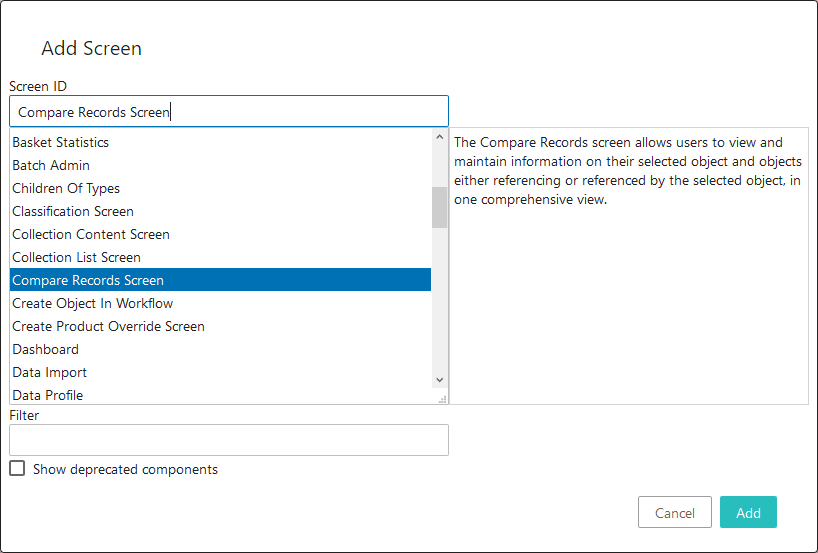
Select 'Compare Records Screen' as the screen type and add a Screen ID (as shown in the screenshot below).

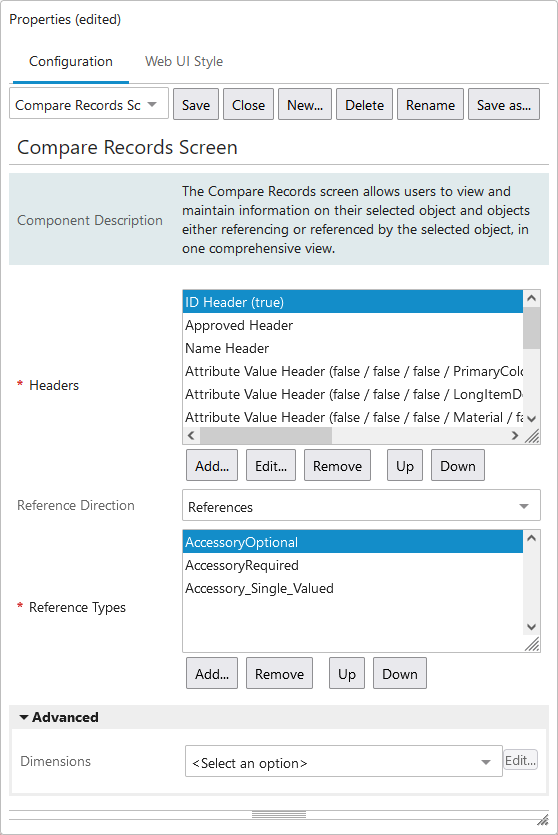
To set up the Compare Records screen, the parameters in the designer must be configured as described below.

Headers - This mandatory parameter determines which columns display in the table. Using the various header components, users can determine which data is brought into the table. For example, the Target or Metadata Reference Header allows users to bring information from the reference object, or metadata from the reference itself, directly into the table.
Reference Direction - Determines whether the objects displaying in the table are objects the selected object references, or objects that have referenced the selected object. ‘References’ will show target objects the selected object (source) references, while ‘Referenced by’ shows source objects that reference the selected object (target).
Reference Types - This mandatory header allows users to select the reference types, valid for the viewed object, that will bring the desired objects into the table.
Using the Compare Records screen
Additional information about how this screen can be used is listed below the screenshot.

By default, the Compare Records screen also supports auto-save, user configurable views, as well as the 'Hide Equal' and 'Mark Different' functionality.
The first column displays information specific to the selected item and is locked in place; users cannot scroll to the right and cause the column to scroll out of display. This is done to ensure the screen's efficacy as a comparison tool with emphasis placed on the selected object. For the same reason, the ability to flip the orientation of the table is also removed.
Users may use single-reference reference types and multi-reference reference types with this screen. However, when using the Target or Metadata Reference Header, only single-reference reference types are compatible.