The Publishing Web UI supports Revision Compare functionality for both actual pages and Flatplanner planned page spreads. This allows users to easily compare page revisions by highlighting where changes have occurred.
Revision Compare Toolbar
The 'Revision Compare' toolbar enables viewing of the latest page revision on the left half of the screen and a previous revision on the right. The previous revision to compare to can be selected from the 'Previous Revision' dropdown and differences can be highlighted by selecting the 'Show Differences' checkbox. This will result in the differences being highlighted on the latest revision while areas that have not changed are grayed out.
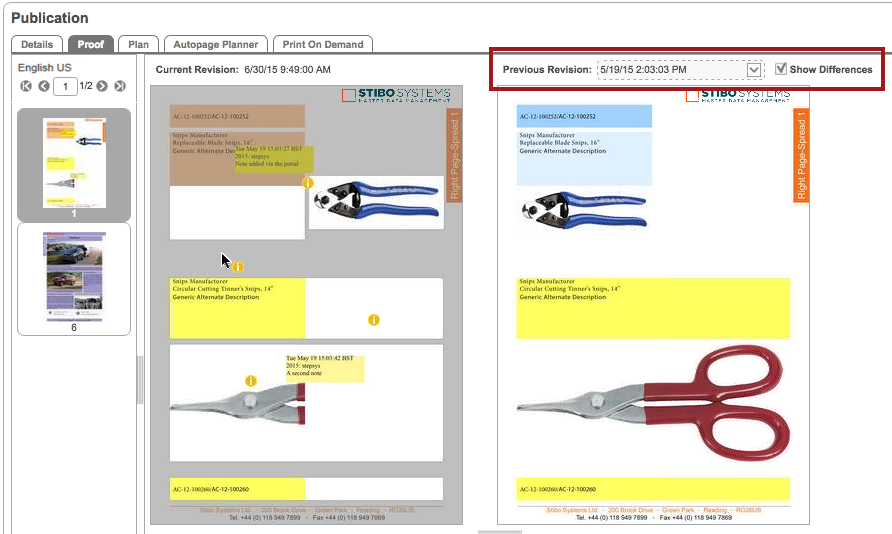
The system determines the differences between the two pages by looking at textual content changes and differences in space usage data. Text changes are highlighted whether the changes are made 'freehand' on mounted pages or if they originate from attribute value changes in STEP.
The Revision Compare functionality is available in the Publishing Web UI in the following components:
- Actual Page Revision Compare Proof
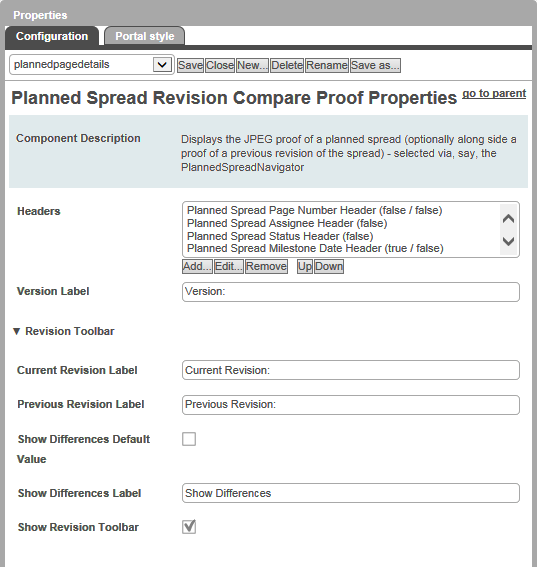
- Planned Spread Revision Compare Proof
- Planned Spread Revision Compare In Workflow
The Show Revision Toolbar option must be checked to enable the new functionality. If the box is not checked, the Revision Toolbar is not displayed and only the most recent page revision is visible.
For more information on Flatplanner planned page spreads and actual pages, refer to the Overview of the Flatplanner User Interface section of the Print Flatplanner documentation
Configuring Revision Compare Functionality on Actual Page
Adding a New Actual Page Screen
To add a new Actual Page screen type, follow the steps below:
- In the designer, click the New button in the action icon row.
- Choose Actual Page Screen from the screen list and type in a Screen ID. The screen ID should be something easily identifiable when it is time to configure the screen and/or set up screen mapping.
- Click Add.
Configuring Actual Page Screen Properties
Once the screen has been added, follow the steps below to configure the Actual Page Screen Properties.
- On the Actual Page Screen Properties go to Child Components > Main > Border Panel > click on go to component.
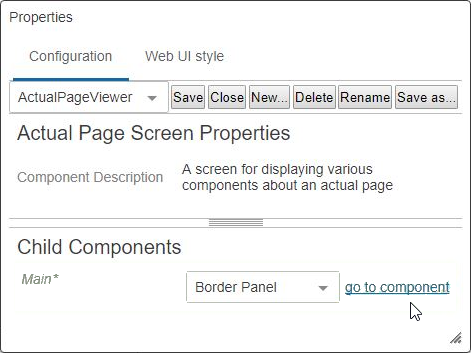
- In the Border Panel Properties, go to Child Components > Main > Actual Page Revision Compare Proof > click on go to component.
- On the Actual Page Revision Compare Proof Properties, there are a number of fields that can be filled out.
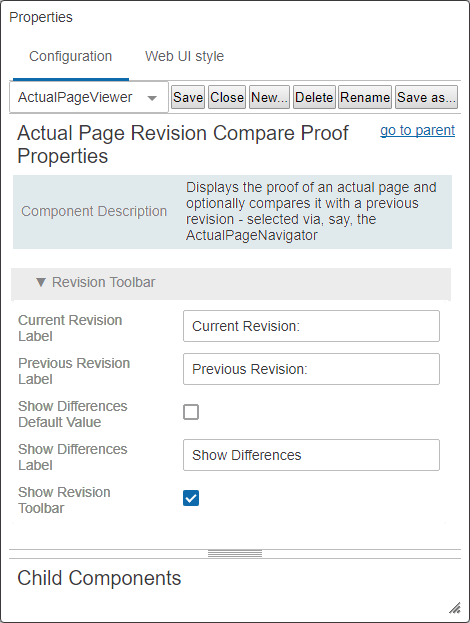
- Current Revision Label: This is the text that displays for the Current Revision Label on the Revision Toolbar.
- Previous Revision Label: This is the text that displays for the Previous Revision Selector Label on the Revision Toolbar.
- Show Difference Default Value: if this checkbox is selected, it will highlight the areas on the Current Revision where frame size / position or content differs from the selected Previous Revision. This is only applicable when the Show Revision Toolbar is set to True.
- Show Difference Label: This text displays for the Show Difference checkbox on the Revision Toolbar.
- Show Revision Toolbar: If set to true, the Revision toolbar will be shown. The Revision toolbar can be used to select a previous revision for comparing alongside the proof of the latest revision.
- When finished configuration, click the Save button in the designer.
Configuring Actual Page Navigator
To configure the Actual Page Navigator, follow the directions below:
- In the designer, click the New button.
- Choose Node Details from the screen list, and type in a screen ID. The screen ID should be something easily identifiable when it is time to configure the screen and/or set up screen mapping.
- Click Add.
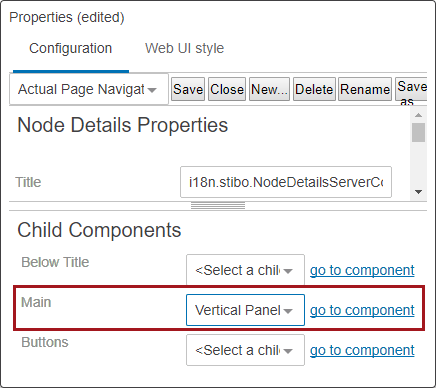
- In the node Details Properties go to Child Components > Main > Vertical Panel > go to component.
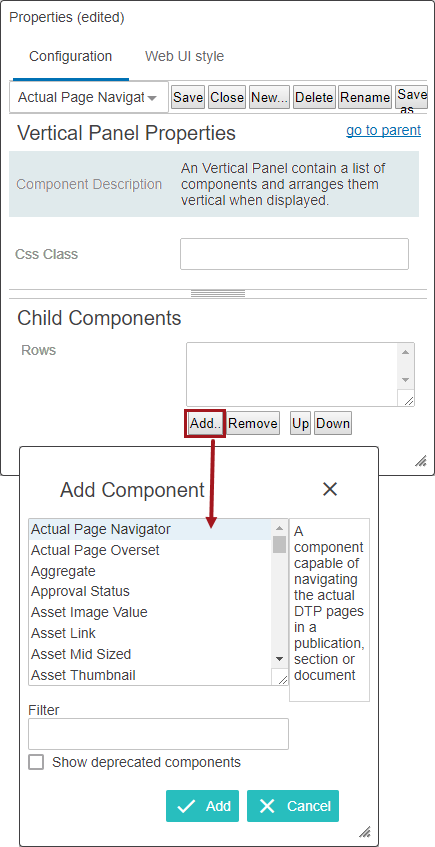
- In the Vertical Panel Properties > Child Components > click Add > select the Row field and choose Actual Page Navigator > click Add.
- In the Actual Page Navigator Properties for the Page Selection Screen field, select the Actual Page Screen created in the previous step.
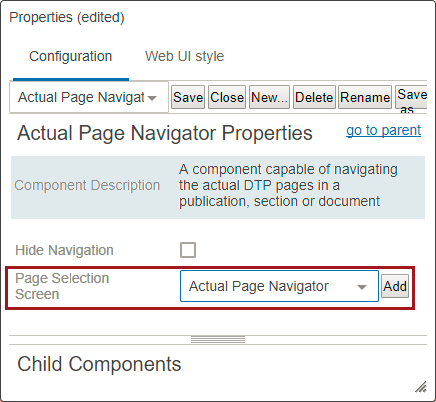
- Select the Hide Navigation checkbox if the Navigation panel is not required.
- Click the Save button in the designer.
- Click Close the designer when finished.
Considerations and Limitations
- As of STEP 7.4, the Actual Page Revision Compare Proof, Planned Spread Revision Compare Proof, and Planned Spread Revision Compare In Workflow Web UI components automatically replace the previous Actual Page Proof, Planned Spread Proof, and Planned Spread In Workflow components.
- Planned pages must be mounted in InDesign and saved back to STEP before the Revision Compare functionality is enabled. Content changes to unmounted planned pages, e.g., replacing the content of a Flatplan frame, will not be highlighted as revisions.
- Users who have both a Print Flatplanner and Web UI license may compare revisions of mounted pages both from the Planned Spread Navigator and from the Actual Page Navigator in the Web UI. Users with a standard Print Publisher (STEP’n’design) license can compare revisions of mounted pages from the Actual Page Navigator only.
- Though the Revision Compare feature highlights changes in textual content, this feature is primarily designed to highlight differences in space usage between the two revisions. It does not highlight changes in images, frame colors, paragraph styles, or layouts if the space usage remains the same.