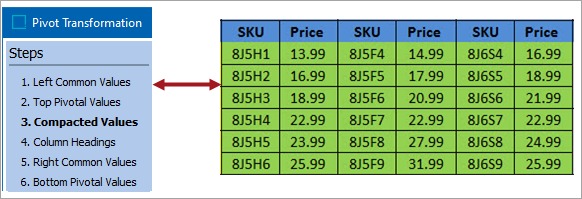
In Step 3, you choose which attributes you want to go into the compacted area. You must select at least one attribute. The method of selecting the attributes is the same as in the prior steps.
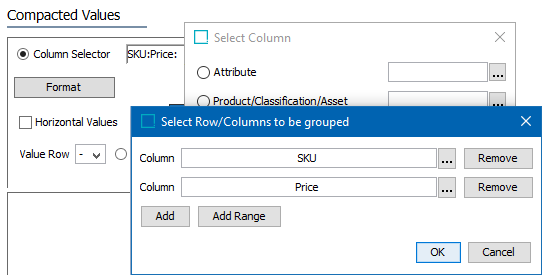
In the Table Guide example the column types of PartNo and Price were selected.
The Format screen dialog is similar to that shown in Step 1 and 2, except you can specify both Row and Column Types.
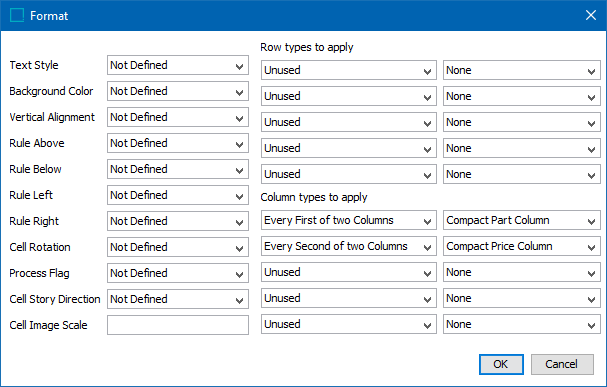
In the above setup each group of compact values will alternatively be assigned the Column Types of Compact Part Column and Compact Price Column. This matches the settings for the Table Guide, where the column types of Part No and Price were defined.
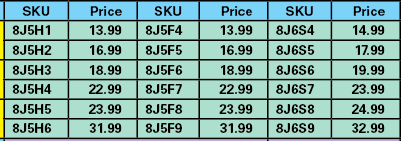
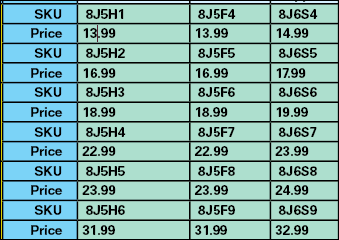
Also, in this step, you determine whether the compacted values will display within that area in a left-to-right manner (as shown in the Table Guide, Price columns next to the SKU columns) or whether the display will show in a top-to-bottom manner (SKU numbers displayed in one row, prices displayed on the next row). You can request the system to further compact this area if, say, all the prices in the first price column are the same as the prices in the second price column. For example, in the Table Guide you can view that all the prices for the HSS and Titanium products are the same, so further compaction is possible. This is accomplished by the Horizontal Values setting and its attendant options.
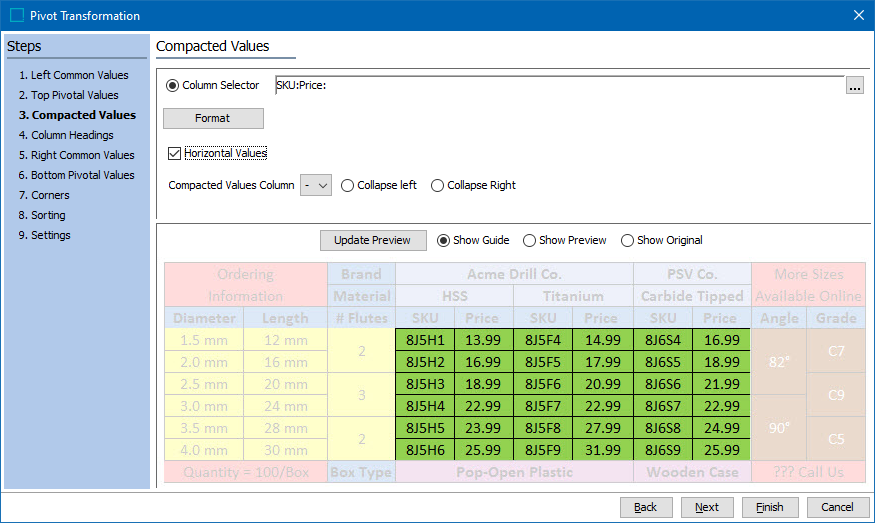
Effect of the Horizontal Values Setting
This is best shown by pictures. The following picture shows the effect on the display of cell contents within the Compacted Area as a result of selecting the Horizontal Values checkbox. Note that it matches the example of the Table Guide:
The following picture shows the effect on the display of cell contents within the Compacted Area as a result of deselecting the Horizontal Values checkbox:
Performing Further Consolidation within the Compacted Area
Consider the following:
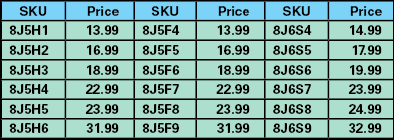
Note that the prices are the same in the first two compacted price columns.
Now review the following setting:
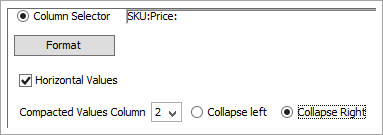
In the Column Selector, the column that held the prices was defined as the second column to compact. By using the setting for the Compacted Values Column (set to 2, referring to the Compact Price column), the transformation can then further consolidate the data, thus:
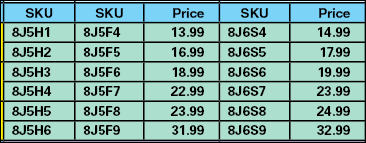
Note that in the setting, 'Collapse Right' was chosen. This indicates (in this case) that the column furthest to the right after the compaction should be used. If in this example 'Collapse Left' had been chosen, the price column would have been positioned between the column starting with part number 8J5H1 and the column starting with part number 8J5F4, since that would be the 'left-most' of the compacted price columns.
Also note that if you have more than just two attributes in the Compacted Area, you can compact those additional attribute values. As you enter a value for one Compacted Values Column the system will automatically add another blank entry for you to make your additional selection. Example:

Note: Merging the column headings of 'SKU' into one cell may be done by a subsequent standard transformation.