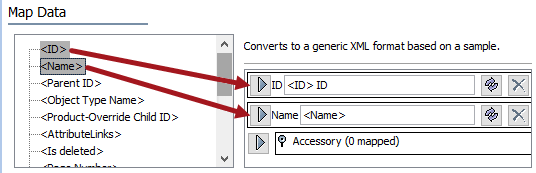
- Map ID and Name for Level 1.
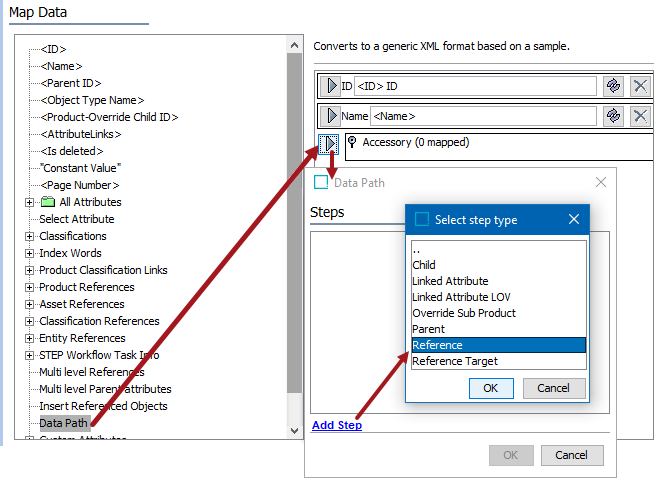
- Map Data Path to Accessory, click the Add Step link, select the Reference step type, and click OK.
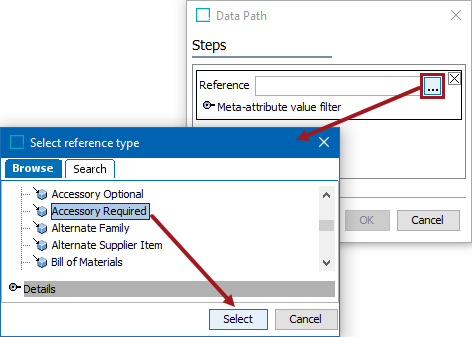
- On the Data Path dialog, click the ellipsis button (
 ), select AccessoryRequired reference type, and click the Select button.
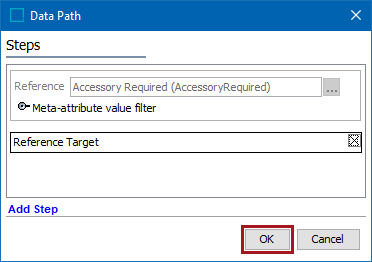
- Click the Add Step link, select Reference Target for Accessory and click OK.
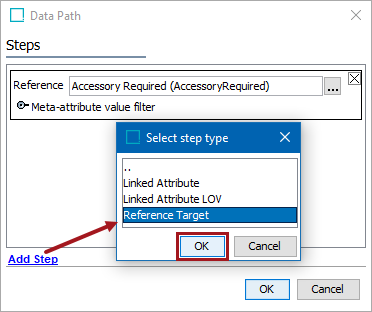
- Click OK to confirm the Reference and Reference Target Data Path fields for the Accessory.
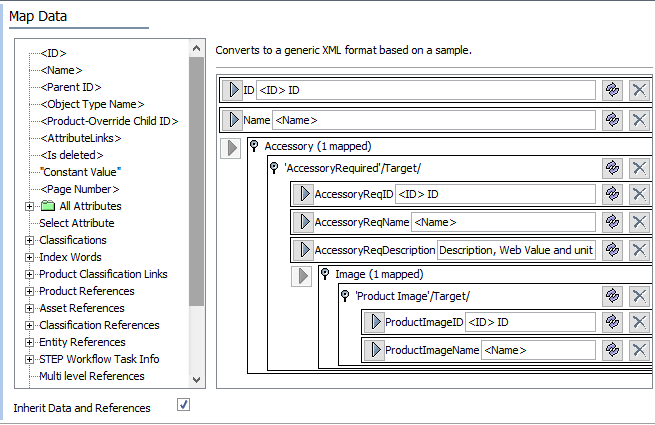
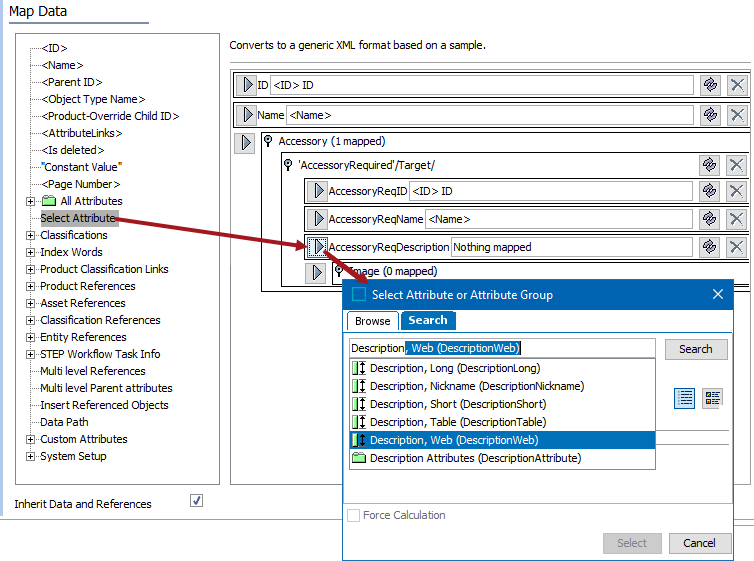
- Open the 'AccessoryRequired'/Target/ flipper to display the nested mapping options. Map ID and Name for the Level 2 products being exported.

- Use Select Attribute to map 'Description, Web' for Level 2 (products) and click the Select button.
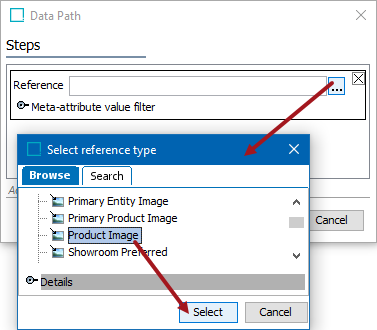
- Map Data Path to Image, click the Add Step link, select the Reference step type, and click OK.
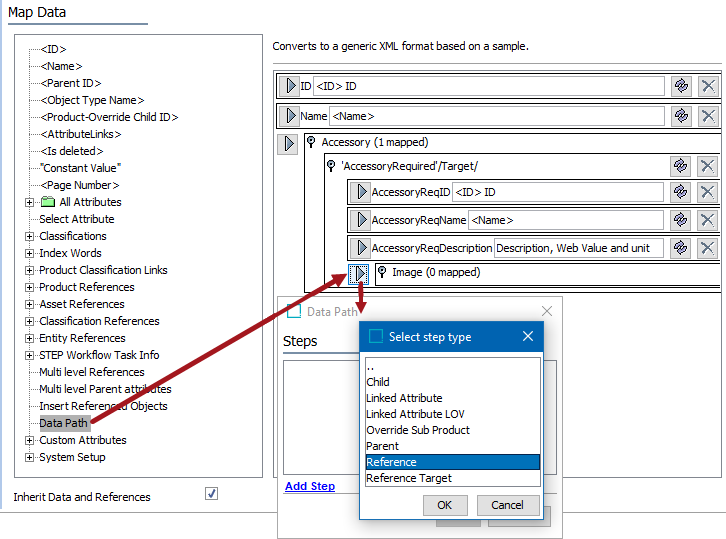
- On the Data Path dialog, click the ellipsis button (), select ProductImage reference type, and click the Select button.
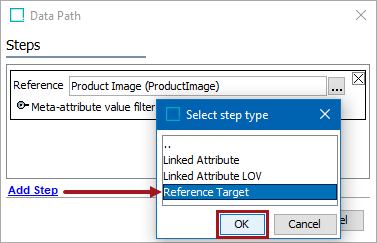
- Click the Add Step link, select Reference Target for Image and click OK.
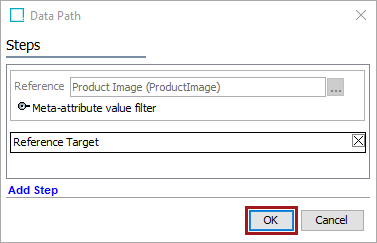
- Click OK to confirm the Reference and Reference Target for the Image.
- Open the 'ProductImage'/Target/ flipper to display the nested mapping options. Map ID and Name for Level 3 (images).
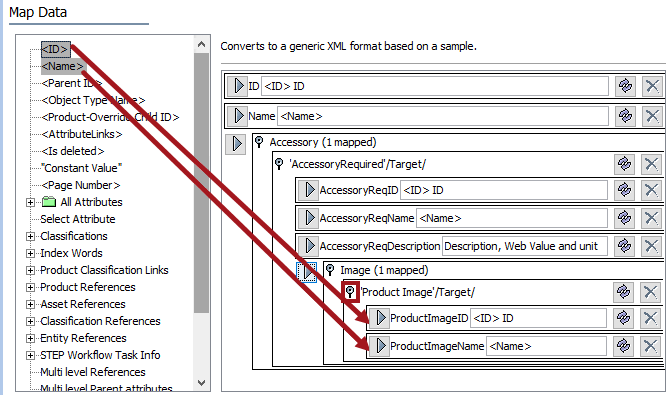
All mapping is complete.