Once initial setup is complete, metrics can be created.
For more information on initial setup steps, refer to the Initial Setup for Metrics section of this documentation here.
Creating a Metric Object
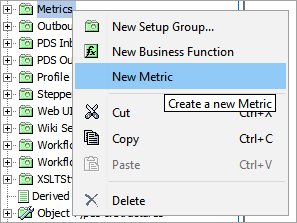
- In System Setup, right-click the Setup Group Root that holds metrics, and then click New Metric.

- Enter an ID and a Name for the metric, and then click create. The metric is added as a child below the selected Setup Group Root.
Configuring a Metric
Once the metric object has been created, a metric type must be specified and configured.
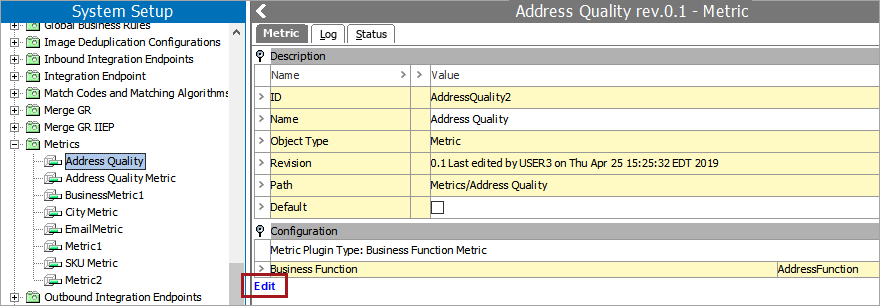
- Select the metric that you just created, and then, on the Metric tab, click Edit.

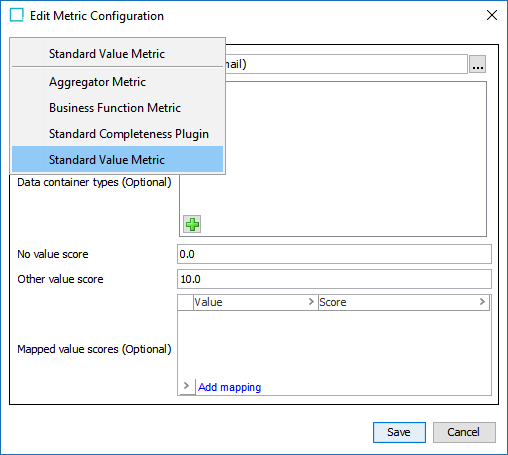
- In the Edit Metric Configuration editor, select the relevant metric type from the dropdown. Options include: Aggregator, Business Function, Completeness, and Value. Each metric type requires different configuration steps.

For more information on configuring an Aggregator Metric, refer to the Aggregator Metrics section of this documentation here.
For more information on configuring a Business Function Metric, refer to the Business Function Metrics section of this documentation here.
For more information on configuring a Completeness Metric, refer to the Completeness Metrics section of this documentation here.
For more information on configuring a Value Metric, refer to the Value Metrics section of this documentation here.
- Once the metric type has been specified and configured, click Save. You can view the configuration settings in the Configuration area of the Metric tab.

Set a Default Metric
When a metric is set as the default metric, the completeness meter shown on an object's editor tab displays the value from the default metric.
- In System Setup, expand the Setup Group Root that holds metrics, and then select the metric you want to apply as default.
- On the Metric tab, in the Description area, select Default.