The Data Validation 'Mandatory' bind allows running a JavaScript-based business condition that sets selected attributes and references as mandatory in the Web UI. A message can also be displayed in the Web UI to give the user more information about why the object is mandatory.
Note: This bind is not functional when used in a business condition on a workflow transition.
Important: Careful testing is recommended when using the Mandatory Bind.
-
When a mandatory parameter becomes hidden or read-only, the user may not be allowed or even recognize that a mandatory value is missing.
For general information about the Data Validation binds, refer to the Data Validation Binds topic here.
For objects with both the Mandatory and Read Only binds, the Mandatory message is displayed and the Read Only message follows.
I’ve taken out the sentences shown in RED below
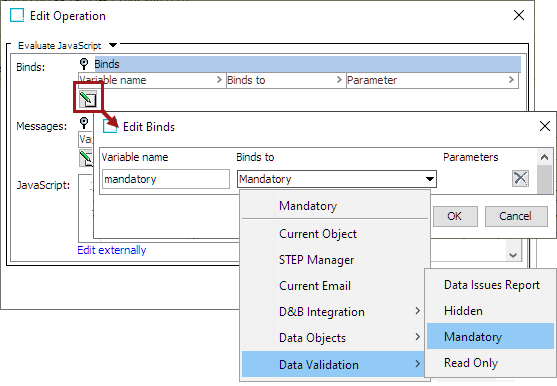
This bind is found within the 'Binds to' dropdown, as shown below.

Configuration
To use any bind:
-
Create a business rule as defined in the Creating a Business Rule, Function, or Library topic here.
-
Edit the business rule as defined in the Editing a Business Rule or Function topic here.
-
In the Edit Operation dialog, add the bind to a business rule, as defined in the Adding a Bind topic in the Reference Materials documentation here.
-
In the Edit Operation dialog, optionally add Messages, as defined in the Adding a Localized Business Rule Message topic here.
-
In the Edit Operation dialog, add JavaScript to call the bind.
Examples
The following JavaScript examples use the related bind(s).
Important: Example scripts should not be used as-is without thorough testing, including updating the script to match object and link types that exist on your system. JavaScript variable names are case-sensitive.
When a mandatory bind is included in a JavaScript business condition, a red asterisk displays for the object in the Web UI. If a custom message is included for the bind, the message is displayed only when no value exists for the mandatory object. If no custom message is provided, the standard message is displayed.
Mandatory attribute based on a value
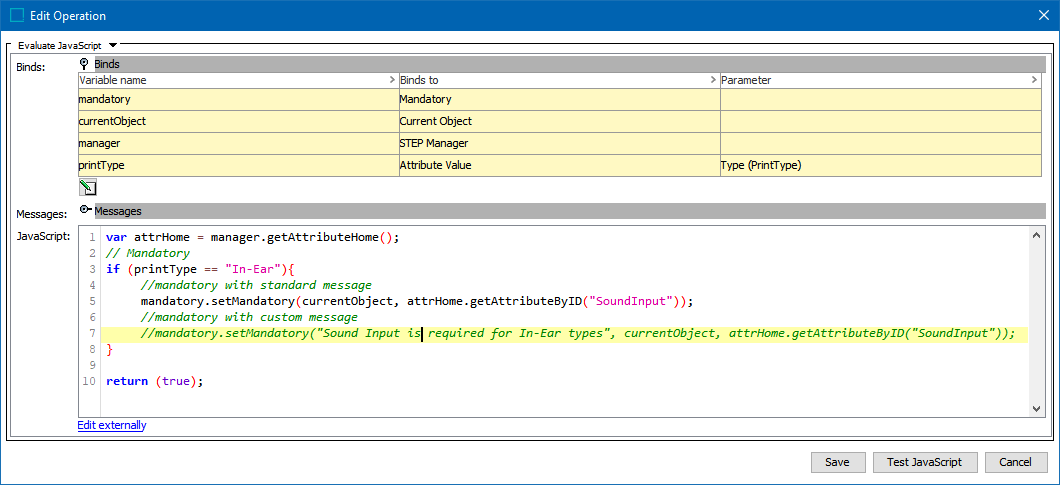
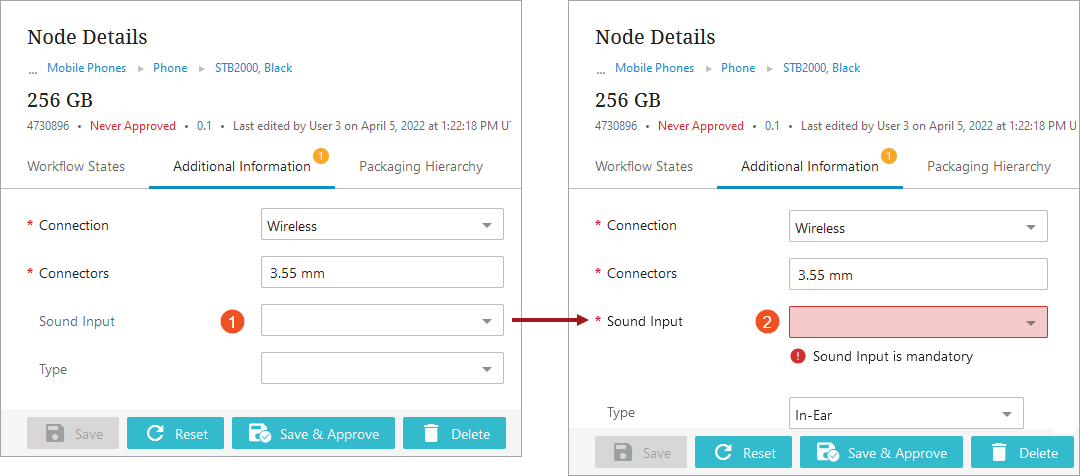
As an example, a Node Details screen is set up with a number of business conditions that apply validation to a series of attributes configured on that screen. One of those business conditions is configured to ensure that if the value of the attribute 'PrintType' is 'In-Ear,' then the attribute 'SoundInput' is set as Mandatory. If you click into the Mandatory field and click out without entering a value, you receive an error message and cannot save and continue until you have filled in the field.

var attrHome = manager.getAttributeHome();
// Mandatory
if (printType == "In-Ear"){
//mandatory with standard message
mandatory.setMandatory(currentObject, attrHome.getAttributeByID("SoundInput"));
//mandatory with custom message
//mandatory.setMandatory("Sound Input is required for In-Ear types", currentObject, attrHome.getAttributeByID("SoundInput"));
}
return (true); Note: To update validated attributes dynamically in the Web UI, business conditions applied via the legacy options for the Per Screen - Validation or the Main - Advanced must include an Attribute Value bind for each attribute that should be validated via the business condition. This bind is not required for Web UI validation using the preferred Global Representation List option since the Triggering Data Types parameter provides validation as values are changed. For details, refer to the Configuring Business Conditions in Web UI topic here.
In the example above, the method 'setMandatory' sets the 'SoundInput' attribute as Mandatory and prevents the user from leaving it empty. In this example, the standard message 'Sound Input is mandatory' is displayed on a Node Editor in a Web UI.

Add a custom message by including the message text ('Sound Input is required for In-Ear types') as the first element within the setMandatory method. The custom message is shown commented out on line 7 in the example JavaScript above.
In the Web UI Node Editor image below, the custom message is displayed:
