This section provides information about mounting planned pages and finalizing pages in InDesign when working with Print Flatplanner. It also contains a description of how to update planned pages and how to use a workflow when using Flatplanner.
This topic assumes the following:
- Products have already been linked to frames on Flatplanner planned pages
- You have already logged into the relevant STEP system from InDesign using the STEP'n'design plugin
Publication Versions
Before mounting pages, make sure that you are working in the correct publication version. The current version is displayed at the bottom of the STEP Publication View panel (e.g., 'Spring Wedding Catalog / English US').
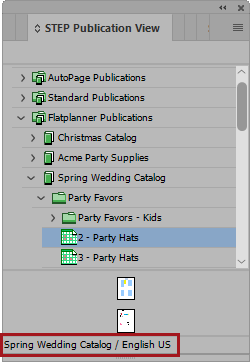
If you are not currently working in the correct version, you will need to change it to the correct one. To change your version:
- In InDesign, navigate to STEP > Change Version.
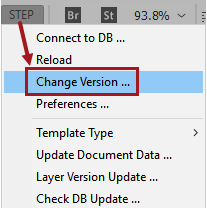
- In the Change Version dialog, navigate to the relevant publication and select the desired version, then click OK. The below screenshot shows an expanded publication with three versions.
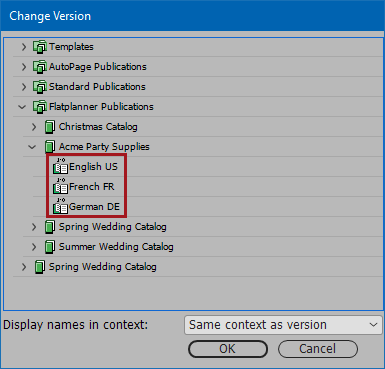
For more information on publication versions, refer to the Publication Versions topic in the Publication Hierarchy section of the Publisher (Adobe InDesign Integration) documentation here. For information on the 'Display names in context' option on the Change Version dialog, refer to the Description of the InDesign Interface topic in the Publisher (Adobe InDesign Integration) documentation here.
Mounting Planned Pages Using a Stored Publication Template
If using a publication template already stored in STEP, there is no need to have an InDesign document already open to mount your pages. In fact, there is no need to even have the templates saved on your local computer if you are solely using templates stored in STEP.
Follow these steps to mount a planned page in InDesign by using documents stored in STEP and not on your local computer.
Note: When using this method, you should mount the left side of a spread first (the even-numbered page), then the right side (odd-numbered) next.
- In InDesign, navigate to the STEP Publication View panel by navigating to Window > STEP Publication View from the InDesign application bar across the top of the InDesign interface.
- In the STEP Publication View panel, navigate to the even-numbered page that you would like to mount, then right-click and select Create document from plan. You can also access Create document from plan by clicking on the options dropdown menu in the upper right corner of the STEP Publication View panel.
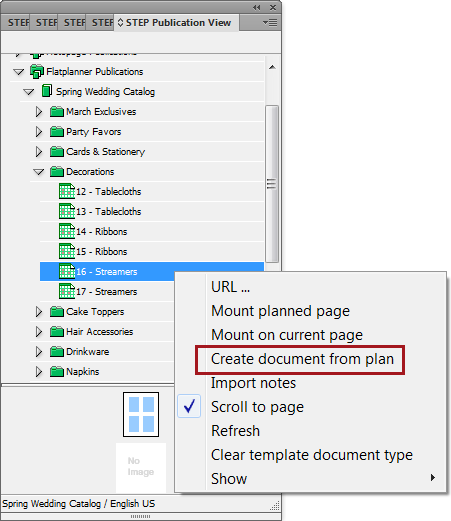
- In a few moments (depending on your system's speed), the InDesign page will generate in the background, then automatically open with the mounted Flatplanner content. This page (the even-numbered one) will be a single page.
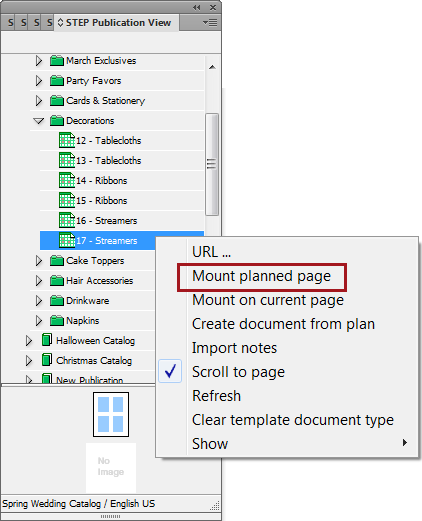
- To mount the second page in the spread, right-click on the next page (the odd-numbered page) in the STEP Publication View, then click Mount planned page.
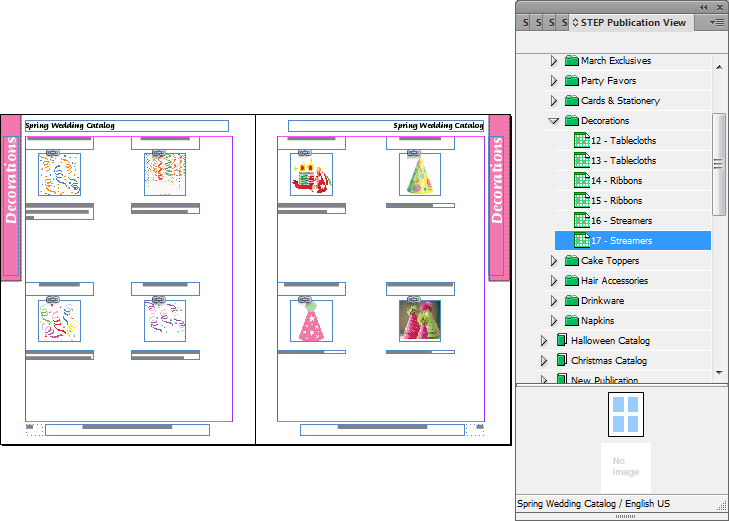
- In a few moments (depending on your system's speed), the second InDesign page in the spread will generate in the background, then automatically open as the right page of the spread, complete with its mounted Flatplanner content.
- Make additional changes to the document as needed. These changes could include adding standalone graphics, manually manipulating the layout of objects, or even dragging and dropping additional elements onto the page from the STEP Structure View or STEP Images panels. These manual page changes will be recognized by STEP after the document has been saved to the database, and the updated page layout can be reused on other pages by picking up the layout.
- Save the document locally on your computer, then save back to STEP in the same section where the plan is stored. The actual page will then be linked to the plan in STEP. Refer to the 'Saving the Mounted Spread to STEP' section later in this topic for instructions.
Mounting Planned Pages Using a Mounting Page
Even though a publication template is required to be stored in STEP in order to create publications and generate proof views, designers often choose to build pages using a document called a mounting page. A mounting page is not generated using Print Publisher, nor is it saved into STEP. However, it functions like a publication template in that it contains all the paragraph styles, swatches, background elements, etc., that would typically be included on a publication template.
Note: If you would like to mount metadata (description) attribute values from a publication, section, or planned page object onto your InDesign page, the associated Print Publisher tagging must be present on the publication template and/or page template(s) that are stored in STEP and linked to your publication. This information cannot be mounted to the InDesign page using a mounting page alone.
Follow these steps to mount a planned page in InDesign by using a mounting page that is saved on your local machine:
- With your mounting page open in InDesign, navigate to the STEP Publication View panel by navigating to Window > STEP Publication View from the InDesign application bar across the top of the InDesign interface.
- In the STEP Publication View panel, navigate to the page that you would like to mount.
- Select the InDesign page (left or right side of your mounting page) onto which you would like to mount the Flatplan.
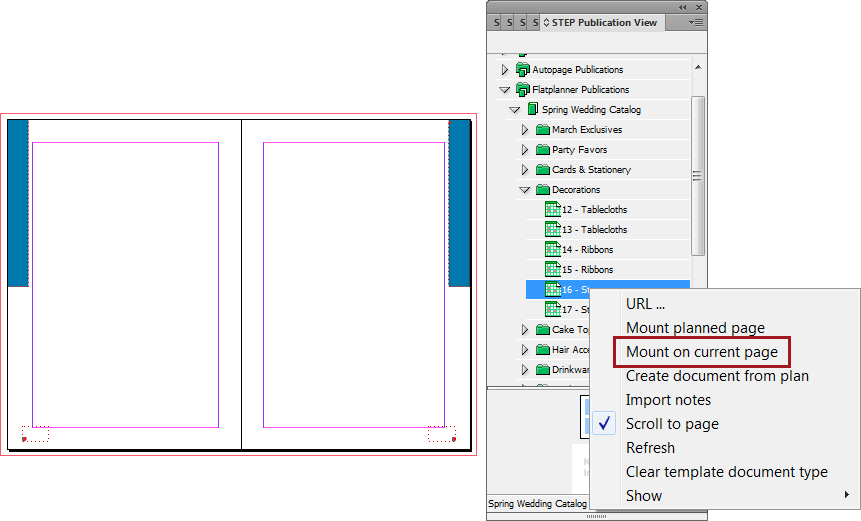
- Right-click your page in the STEP Publication View panel and select Mount on current page. You can also access Mount on current page by clicking on the options dropdown menu in the upper right corner of the STEP Publication View panel.
Note: If the Flatplan mounts on the incorrect page, navigate to the Pages panel in InDesign (Window > Pages) to ensure that the correct InDesign page is selected.
- Follow the same steps for the other side of your spread.
- Make additional changes to the document as needed. These changes could include adding standalone graphics, manually manipulating the layout of objects, or even dragging and dropping additional elements onto the page from the STEP Structure View or STEP Images panels.
- Save the document locally, then save it into STEP. Refer to the 'Saving the Mounted Spread to STEP' section later in this topic for instructions.
Mounting Planned Pages Using a STEP Workflow
Flatplanner workflows can be configured with built-in functionality to automatically mount planned pages using an InDesign server, which is linked to the STEP application server as a sidecar. When InDesign pages are automatically built by an InDesign server, the workflow tasks performed by DTP users of Flatplanner workflows include opening pre-mounted pages and making layout adjustments to them before saving back to STEP.
For more information on how to open pre-mounted pages in InDesign in conjunction with the Flatplanner workflow, as well as save these pages back to STEP once completed with the workflow task, refer to the Flatplanner Workflows documentation