Commercial data values can be exported from publications and sections in the Excel format by using standard Export Manager functionality. The export extracts commercial data information from the products that are mounted onto the InDesign pages that have been saved back to the publication. As long as the products are mounted onto the pages, the commercial data values will export; the commercial terms values themselves do not have to be mounted onto the pages.
Note: Only terms lists values are included in the export. Other information (min / max quantity, units, or start / end dates) is not included.
To export commercial data values from a publication or section:
- Right-click on the desired publication or section and select Export Data Below. The Export Manager wizard displays.
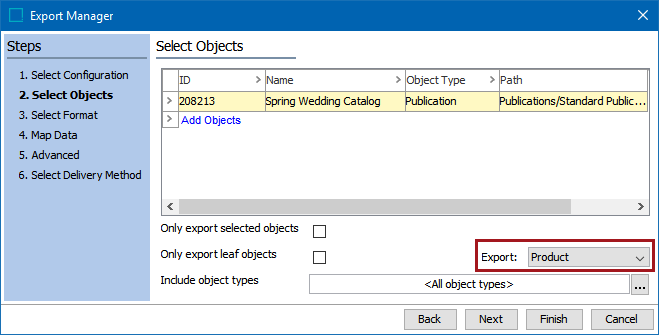
- In the Select Objects step, select Product in the 'Export' dropdown list. Click Next.
- On the Select Format screen, choose Excel.
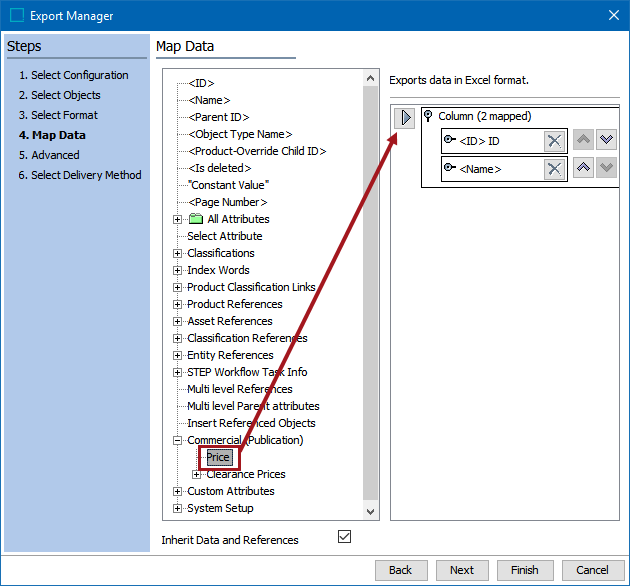
- On the Map Data screen, click on the relevant information that you want included in the export (for instance, <ID>), then click the arrow button in the right part of the window to add it to the list of data to be exported. At a minimum, you must map ID and a price column. Name is also recommended.
- To map the commercial data, expand Commercial (Publication). Select the relevant commercial data list (in this example, 'Price'), then click the mapping arrow to add it as a column in the Excel sheet.
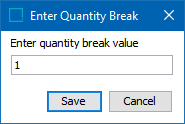
- In the Enter Quantity Break dialog that displays, enter the quantity break value (e.g., 1), then click Save.
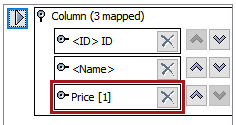
- The price value is mapped, followed by the break number in brackets, e.g., [1].
- To apply transformations on the column headers and values that display in the export, click the Price flipper to view the fields that allow transformations (
 ). When mapping a commercial value, the same transformations are available as for a product attribute, but the available aspects differ.
For more information on applying aspect transformations to outbound data, refer to the Aspect - Transform Outbound topic in the Data Exchange documentation here. For a broader overview on applying transformations to outbound data, refer to the Outbound Map Data - Transform topic in the Data Exchange documentation here.
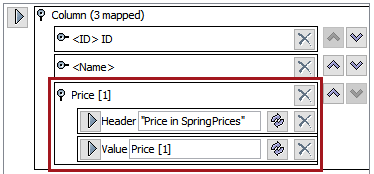
- Click the Header transformation button (
 ) to change the header that will display in the Excel export spreadsheet for the price value. In the Transformations dialog, enter the desired header in the Source field, then click Save.
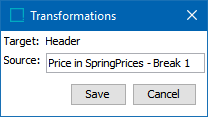
Note: If the header is not changed, then the header in the Excel sheet will be the same for all price breaks, e.g., 'Price in SpringPrices.' As such, it is recommended to customize the header for each break, for example, 'Price in SpringPrices - Break 1.'
- Click the transformation icon (
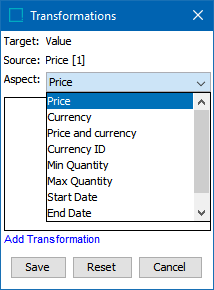
 ) next to the Value field if you want to apply a transformation to the values that display in the price columns. If changing the aspect, the following aspects are available:
- Price - default; the value field from the commercial list
- Currency - the unit from the commercial list
- Price and currency - both the value and the unit from the commercial list
- Currency ID - the ID of the unit from the commercial list
- Min Quantity - the Min. Quantity value from the commercial list
- Max Quantity - the Max. Quantity value from the commercial list
- Start Date - the Start Date value from the commercial list
- End Date - the End Date value from the commercial list
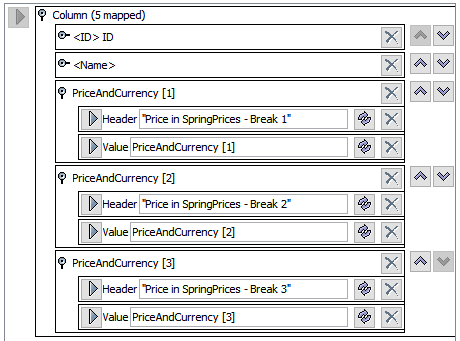
- Repeat the process to map values from additional price breaks. The following screenshot shows a sample mapping with ID, Name, and three price breaks with transformations applied:
- Click Next on the Map Data screen when finished.
- Options on the Advanced screen may be ignored, unless you are exporting other product data in addition to commercial terms values and you have special considerations. For information on the options available on this screen, refer to the Export Manager - Advanced section of the Data Exchange documentation here. Click Next.
- Select File on the Select Delivery Method screen, then click Finish.
- The export background process launches. Click on 'Go to process' to go to the process on the BGProcesses tab, then retrieve the file under the 'Result' flipper.
- If three price breaks are mapped, the resulting Excel file will resemble the below screenshot. This example shows values exported from products in a single terms list, with column C containing values from break 1, column D containing values from break 2, and column E containing values from break 3. (This example does not have any transformations applied to the values or the header.)
