In this Step you choose the attributes that you want the system to promote into the table headers, creating as many header rows as required. The procedure is very similar to Step 1 with the exception being the formatting options, where instead of Column Types you define the Row Types for the attributes that have been promoted into row headers.

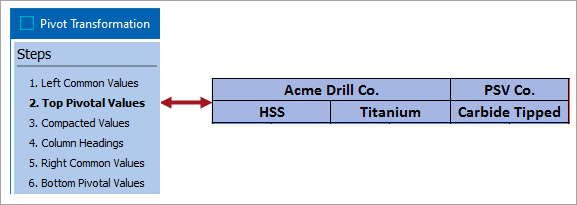
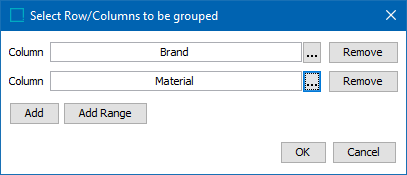
In the Table Guide, the Top Pivotal Values will be the attributes for Brand and Material.

The method of selecting the attributes is identical to that in Step 1. The above selection of the attributes Brand and Material correspond to the attributes shown in the Table Guide.
Format Button
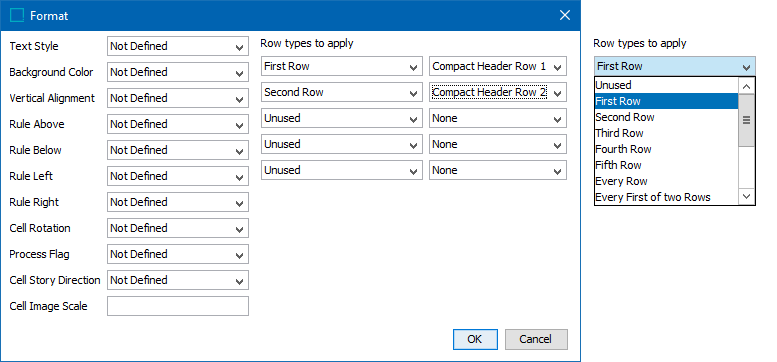
In Step 1 the functionality of the Format button was described in detail. You may refer back to that section here for further information. The only difference between the Format window presented and that in Step 1 is that you will select the Row Types for the attributes that you chose to be promoted into header rows. And the options in the 'Row Types to apply' will reflect row numbers, not column numbers. Refer to the following image for reference.

In the Table Guide example two different Row Types have been applied, corresponding to the two attributes Brand and Material that were selected to be promoted into row headers. This would allow for different fonts, point sizes, background colors, etc. to be applied to the attribute values in the header rows. If the two new header rows will have thew exact same specifications, there is no real benefit in assigning two different row types. Note that the row types that you specify may or may not be the same as that of the first row in the Table Definition, they could be completely different row types.

A reminder that in our sample table, the row type used for the column headers is 'Column Header Row'. This may or may not be the same row type that is desired for the additional header rows that are created by promoting attributes into those new rows.
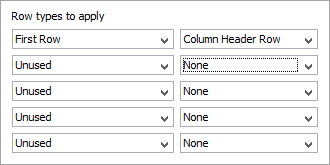
If the format specifications will be the same for all header rows, it is perfectly acceptable to apply the row type that is used in the Table Definition (in this case, 'Column Header Row') to all rows in the Top Pivotal Values, thus:

Note that you could also apply setups in the 'global override' area of the Format window. But that does not mean that you can leave the right side 'blank', since as a minimum you do need to tell the system that the rows are header rows and not normal rows. If the table is mounted to a page and the system needs to split the table, then it needs to know what the header rows are so that the appropriate row(s) can be carried over to the next column or page. So as a minimum you need to fill in at least one entry for the Row Types, and that Row Type should have its Header / Footer option set to set to Heading (1). That would be the standard setup.
Note that the options for the Bottom Pivotal Values in step 6 of the Wizard is identical to this one.