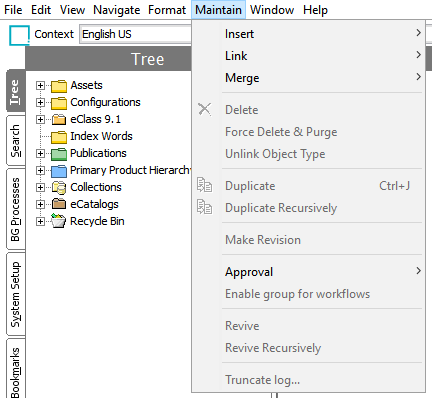
With STEP 8.1, a new storage model was added for non-LOV attribute values called Compact Value Storage (CVS). The benefits of this storage model are that less space is required for storage and that the reading and writing of values can be performed faster. The CVS model is automatically used for attributes created in STEP 8.1 and newer systems.
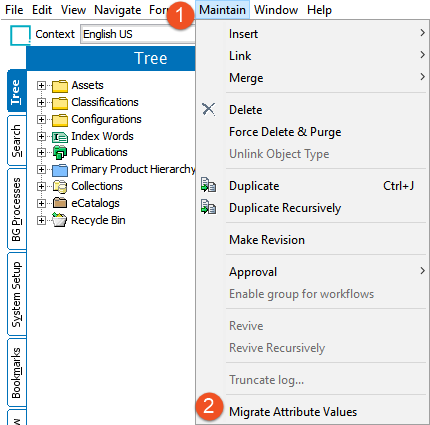
For those users who want to take advantage of CVS and need to migrate attribute values created on pre-8.1 STEP systems, there is a Migrate Attribute Values option in the Maintain menu of the workbench. Refer to the Technical Migration Details section below for a detailed explanation of what the migration process entails.
Prerequisites
The attribute value migration should be configured and run by an admin or super user who has knowledge about the system utilization. The user configuring and running the migration must have the setup action privilege 'Modify definition of product attribute (domain and default unit)' for all attributes on the system. For more information on this privilege, refer to the Attributes section of the Setup Actions and Error Descriptions topic in the System Setup documentation here.
- Your STEP system must have at least 5 percent free space in the 'STEPSYSDATA' tablespace in order to start the migration. A warning is displayed if there is less than 10 percent free space.
- Tests have shown that having the full text index ('value_ctxix') being enabled has a negative impact on the migration performance. If the full text index functionality is not critical to your business functions, it is recommended to drop the index before starting the migration.
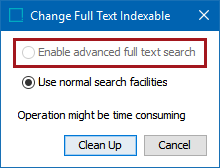
- It is possible, via the workbench, to tell if the full text index is enabled. To do this, navigate to an attribute in the System Setup. If you go to the 'Full text indexable field' and it is set to Yes, then full text index is enabled. If it is set to No, double-click the 'Full text indexable' field. If the 'Enable advanced full text search' option is disabled in the dialog that appears, the index is not enabled for your system. For information on enabling, refer to the 'Important' information in the Full Text Indexable Attributes topic here.
Important: If possible, it is advisable to perform the migration, at least partially, on a test system with the same hardware setup to validate the settings before starting the migration on a production system.
Technical Migration Details
The migration functionality will delete rows from the 'valuemap', 'valuemodel' and 'value7' database tables and will insert rows in the 'softvalue' table. Bulk deleting rows from Oracle tables, however, cause at least two issues:
- As data is deleted, blocks and segments will become sparsely populated. This may lead to Oracle selecting inefficient execution plans again causing an observable performance decrease.
- Tablespace is not released for 'reuse' automatically. This means that if nothing is done to prevent it, the migration will require as much additional tablespace as is required for the 'softvalue' table inserts.
To counter these issues, the migration functionality will not only delete and insert rows, but it will also compact tables and indexes during migration. Four different types of compaction are in play:
- 'valuemap', 'valuemodel' and 'value7' index compaction – This type of compaction can be performed while the migration is running and does not require any restrictions to be imposed on the system usage.
- Table compaction of 'valuemap' and 'valuemodel' – This type of compaction cannot be performed while the 'database mode importer' is running and therefore, when configuring the migration schedule, it is possible to specify windows where the database mode importer can be disabled. The 'database mode importer' is only available to super users with all data node dependent privileges. It allows import processes to batch insert unrevised data directly in the database and may provide performance benefits for very specific use cases. The database mode importer is not available on systems running In-Memory.
- Shrinking 'valuemap' and 'valuemodel' – This operation requires a short-lived Single-Update Mode (SUM) lock. Therefore, when configuring the migration schedule, it is possible to specify windows where a SUM lock can be taken. Refer to the Single-Update Mode section of the System Setup documentation here.
- Shrinking 'value7' – Due to the 'value7' table having a function-based index, the shrink space approach used for 'valuemap' and 'valuemodel' cannot be used while STEP is running. Thus, when all values have been migrated, it is possible to schedule the required 'value7' operations for next system restart. What will happen is that the function based index will be dropped, the table shrunk, and the index rebuilt. Refer to the next section, Completing Attribute Value Migration, for more information.
Configuring Attribute Value Migration
To start the value migration, add the desired attributes to be migrated to the queue, and then create a migration schedule.
Queuing Attribute Values for Migration
- After selecting Migrate Attribute Values from the Maintain menu, the 'Attribute Value Migration' dialog will appear. Ensure the Queue tab is selected from this dialog.
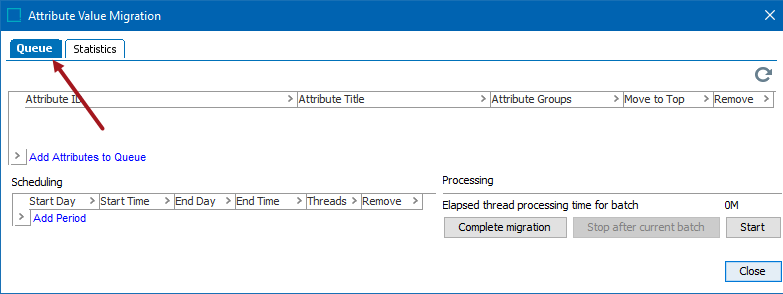
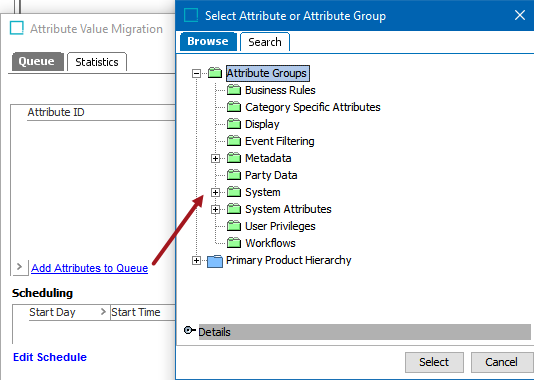
- Click the Add Attributes to Queue link. A list of the migratable attributes will appear. Select OK after choosing the desired attributes to add to the queue.
Note: If an attribute group is selected, all attributes belonging to that group will be added to the queue. In this example, 'Attribute Groups' is selected, therefore, all the groups below it, as well as all the attributes under each attribute group, will be included.
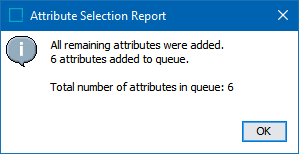
A report of the number of added attributes will appear.
The attributes will be added to the queue.
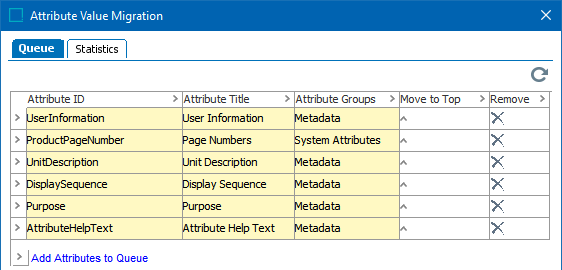
As described above, it is possible to only queue a subset of the attributes that can be migrated. It is also possible to remove attributes from the queue. The reasons for having these options are:
- The CSV model requires different SQL API views to be used for querying values meaning that for customers using the SQL API it must be possible to postpone the migration of values for certain attributes until the SQL has been updated. For details, refer to the SQL API documentation by clicking the STEP API Documentation button on the Start Page.
- It is not possible to perform schema maintenance actions like changing the validation base type or attribute dimension dependencies while values for an attribute are being migrated.
Scheduling the Attribute Value Migration
Before scheduling the migration and following the next steps, review the Scheduling Considerations section below.
Important: Consider the time zone of the application server compared to that of the workbench (the client) where the schedule is created or viewed. When scheduling a job, the local time zone is displayed in the workbench, but the time zone of the server is used to run the background process. Although displayed, the time zone of the client is not included in the instruction to the server to run the job. This can cause confusion about when the job will run since the scheduled time is not automatically converted to accommodate potential differences in time zones.
- From the scheduling section of the 'Attribute Value Migration' dialog, select Edit Schedule. The 'Edit Schedule' dialog will appear.
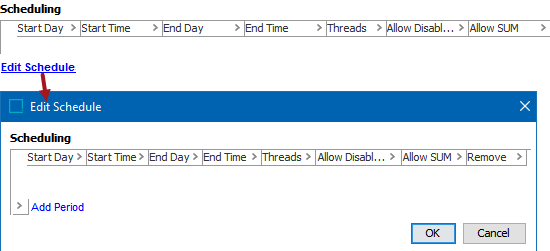
- Select Add Period, and a default time will be added. Configure by clicking on each option and selecting from the dropdown menu.

- Start Day - The day the scheduling period starts
- Start Time - The time on the starting day that the period starts
- End Day - The day the scheduling period ends
- End Time - The time on the ending day that the period ends
- Threads - How many threads the migration process may use during the period
- Allow Disable DB Mode Imports - Whether or not the process is allowed to disable the database mode importer within the period / window. In most cases, it is safe to set this value to 'Yes.' With In-Memory systems, it should always be set to yes since the database mode importer is disabled.
- Allow SUM - Whether or not the process is allowed to take a Single-Update Mode lock within the period / window. For more information about Single-Update Mode, refer to the Single-Update Mode topic here.
- Remove - Selecting the X will delete the selected period
Scheduling Considerations
- The schedule uses server times.
- If the End Day and End Time are identical to the Start Day and Start Time, then the period will be a full week.
- If overlapping schedule periods are defined, the period with the fewest restrictions and the highest number of threads will be used.
- A warning will be shown if no periods are defined where the process is allowed to disable the database mode importer and/or take a SUM lock. It is not possible to complete the migration without having defined these schedule periods.
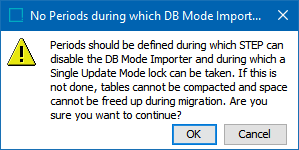
- The migration process will only run on a single application server in a clustered setup and this may be taken into account when specifying the number of threads for a processing period. How many threads to use depends on the system hardware and the system utilization. Typically one or two threads will be reasonable for periods where the system is heavily used while 16 threads is reasonable during off-peak hours. As mentioned earlier in this topic, it is advisable (if possible) to perform the migration, at least partially, on a test system with the same hardware setup to validate the settings before starting the migration on a production system.
Starting the Attribute Value Migration
- After configuring your migration schedule, select Start.
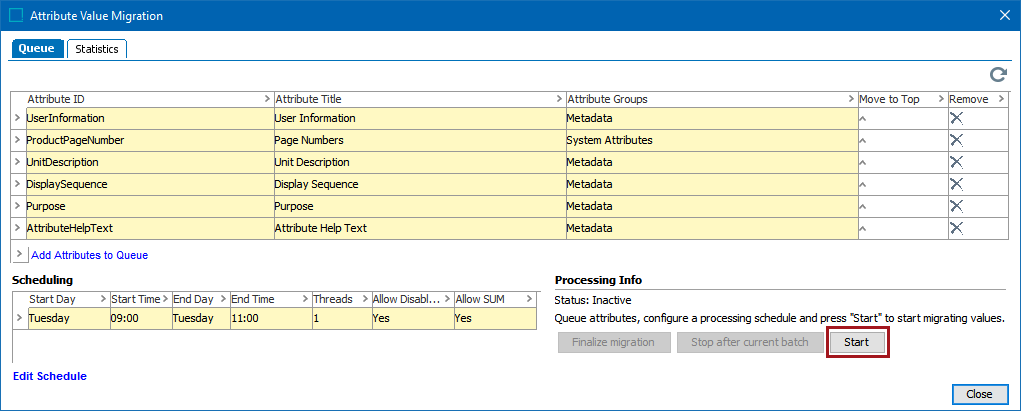
Your migration is now scheduled, and the process will begin at the earliest set period.

Statistics
The Statistics tab shows details about the migration. The following image shows how the Statistics tab looks before migration has begun.
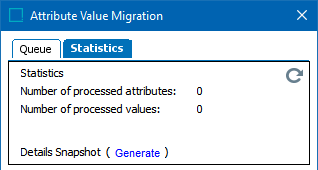
- Number of processed attributes - The number of attributes that have been migrated
- Number of processed values - The number of values that have been migrated
- Refresh icon - Refreshes the GUI, allowing for data updated values to display

- Details Snapshot - Selecting the 'Generate' link will create a snapshot report. This report has information about attributes / values that have been processed as well as queued attributes / values to be processed. Finally, it will also display the estimates for the remaining processing time.
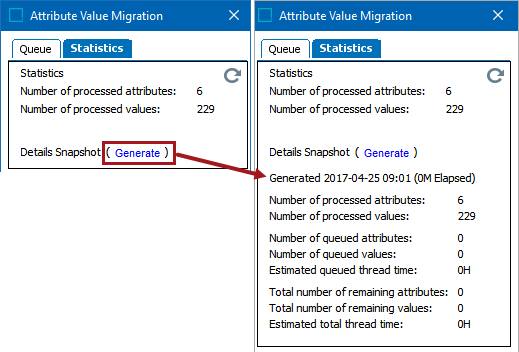
In the generated report, the 'Estimated queued thread time' and 'Estimated total thread time' are the estimated times to process all queued attributes and all migratable attributes, respectively. This does not take into account time spent doing other tasks such as the waiting period for the SUM lock.
Note: The estimates are based on processing using a single thread. Ideally, if the processing is run with two threads, the duration will be half of the estimate, and with four threads, it would be a quarter of the processing time, and so forth.
Completing the Migration
After the values for all migratable attributes on the system have been migrated, the final steps for the migration are ready to be initiated. This status can be noted on the 'Processing Info' section of the 'Attribute Value Migration' dialog.
When the button is pressed, a dialog will appear from where it is possible to schedule the “value7” operations for the next STEP system restart. To determine how long the offline operations will take, it is advisable to perform the migration on a test system (with similar data and hardware setup) prior to doing it on a production system.
If the full text index functionality is enabled on the system on which the migration is being performed, this index “value_ctxix” will be dropped and recreated during the system restart. The index will be populated asynchronously once the system has been started again and until this has happened users may experience that they get fewer search results for full text index searches.
Important: The final processes of the migration require that the STEP system is restarted.
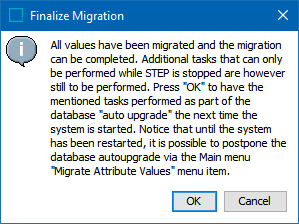
- Click Finalize migration to generate a prompt noting that the migration is ready to be completed.

- Press OK to schedule the final operations of the migration for the next system restart.
Important: The system may be offline for an extended period of time while the processes finish migrating. Plan for a period of downtime before restarting STEP.
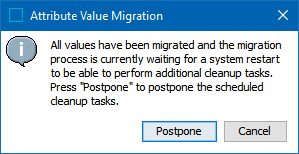
Should you need to postpone completing the migration for any reason, navigate to the Migrate Attribute Values option under the Maintain menu item. A dialog box will offer the option to postpone the final steps of this migration. Selecting this option will require you to finalize the migration again from the Attribute Value Migration tool.
- Restart the STEP system, and then navigate once more to the Migrate Attribute Values option under the Maintain menu item to confirm that the migration was a success. Select the Migrate Attribute Values option to display a successful migration prompt.
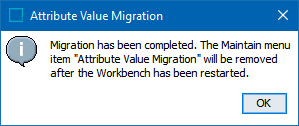
- Restart the STEP Workbench, and verify the Migrate Attribute Values option no longer displays in the Maintain menu.
