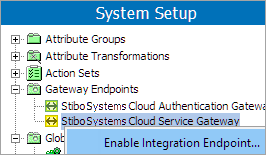
A REST authentication gateway and a service gateway are necessary for the machine learning matching agent (MLMA) to function. Configuration includes:
-
Stibo Systems Cloud Authentication Gateway and Authentication Business Function
To access the cloud, MLMA uses a token-based authentication on the authentication gateway.
-
Stibo Systems Cloud Service REST Gateway
Access to the machine learning cloud goes through this gateway. The security tokens needed to authenticate are provided by a business function as described in the Configure Authentication Business Function section in this topic.
Configure Stibo Systems Cloud Authentication Gateway
For general information on how to configure a REST gateway, refer to the Configuring a Gateway Integration Endpoint - REST topic in the Data Exchange documentation here.
-
In the sharedconfig.properties file on the STEP application server, add the case-sensitive property with the URL shown below:
RESTGateway.ServerURL=StiboCloudURL=https://app.stibosystems.com
Changes to the properties file, outlined above, are implemented when the server is restarted.
-
Create a gateway integration endpoint, as described in the Gateway Integration Endpoints topic in the Data Exchange documentation here.
-
Under the Configurations tab of the gateway integration endpoint, navigate to Gateway Configuration and click the Edit link.

-
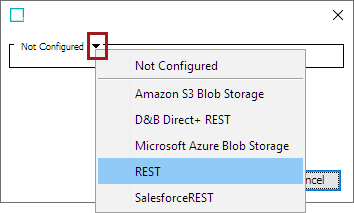
In the dialog, click the dropdown arrow and select 'REST.'
-
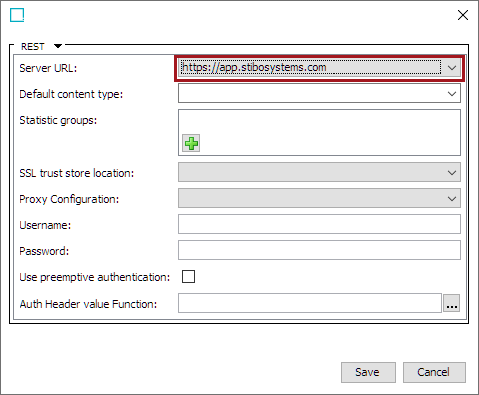
Under Server URL, select the URL you just created.
-
On this authentication gateway, leave the Auth Header value Function parameter empty.
-
Click Save.
-
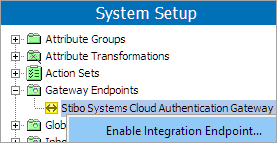
Right-click the gateway and select 'Enable Integration Endpoint.'
Configure Authentication Business Function
For general information about business functions, refer to the Business Functions topic in the Business Rules documentation here.
-
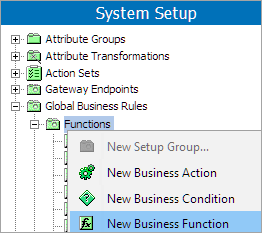
In System Setup, locate the node which houses business functions. Right-click and select 'New Business Function.'
-
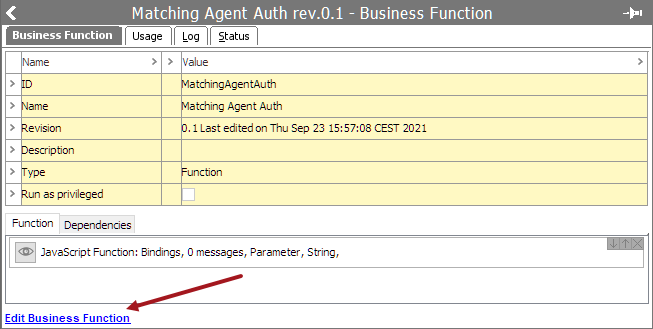
Navigate to the bottom of the screen and click Edit Business Function.
-
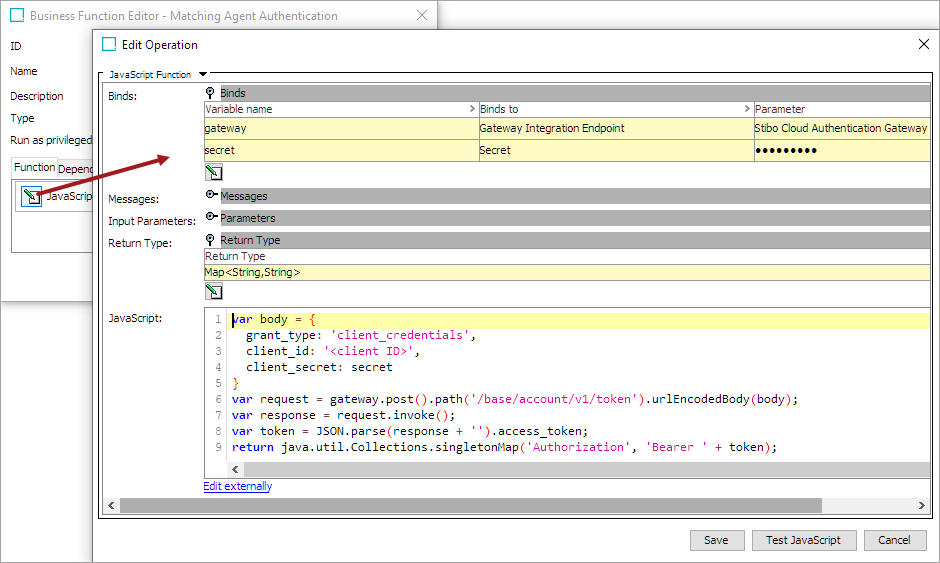
On the Business Function Editor dialog, click the Edit button on the JavaScript function to open the Edit Operation dialog.
-
Add a gateway bind using the authentication gateway you just created. For more information on gateway binds, refer to the JavaScript Binds topic in the Resource Materials documentation here.
-
Add a secret bind and type in the passphrase received as part of the early adopter program. For more information on secret binds, refer to the Other Binds topic in the Resource Materials documentation here.
-
On the Return Type parameter, click the Edit button and set Return Type to: Map<String, String>
-
Insert JavaScript below:
Copyvar body = {
grant_type: 'client_credentials',
client_id: '<client ID>',
client_secret: secret
}
try {
var request = gateway.post().path('/base/account/v1/token').urlEncodedBody(body);
var response = request.invoke();
var token = JSON.parse(response + '').access_token;
return java.util.Collections.singletonMap('Authorization', 'Bearer ' + token);
} catch (e) {
if (e.javaException instanceof com.stibo.gateway.rest.exception.RESTGatewayStatusCodeWithBodyException) {
var statusCode = e.javaException.getHttpStatusCode();
if (statusCode >= 502 && statusCode <= 504) {
throw new com.stibo.core.domain.integration.faulttolerance.FailAndRetryException("Response status " + statusCode + " (will retry failed operation after some time): " + e.javaException.toString(), e.javaException);
}
} else if (e.javaException instanceof com.stibo.gateway.rest.RESTGatewayIOException) {
throw new com.stibo.core.domain.integration.faulttolerance.FailAndRetryException("Connection issue (will retry failed operation after some time): " + e.javaException.toString(), e.javaException);
}
throw(e); // All other exceptions MUST be re-thrown
}Important: Ensure the correct ID is entered in the client_id: '<client ID>' line as received as part of the early adopter program
-
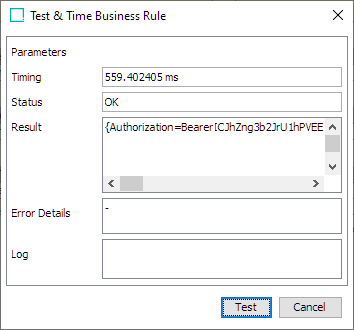
Click the Test JavaScript button to open the Test & Time Business Rule dialog and click the Test button. If the test returns Status 'OK,' the connection and your credentials work.
-
Click Save on the Edit Operation dialog.
-
Configure Stibo Systems Cloud Service REST Gateway
For general information on how to configure a REST gateway, refer to the Configuring a Gateway Integration Endpoint - REST topic in the Data Exchange documentation here.
-
Create a gateway integration endpoint, as described in the Gateway Integration Endpoints topic in the Data Exchange documentation here.
-
Under the Configurations tab of the gateway integration endpoint, navigate to Gateway Configuration and click the Edit link.

-
In the new dialog, click the dropdown arrow and select 'REST.'

-
Under Server URL, select the URL created in the first step of the Create Authentication Gateway section.
-
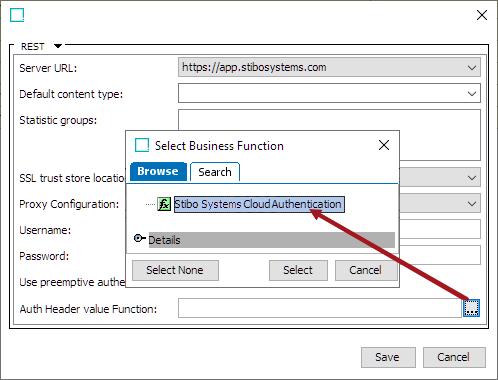
In the same dialog, click the ellipsis button (
 ) of Auth Header value Function and select the business function created in the Configure Authentication Business Function section.
-
Click Save.
-
Right-click the gateway and select 'Enable Integration Endpoint.'
