Before the data in a category / data profile can be viewed a profile must be generated. Generating a profile takes a snapshot of the data and does not actively monitor the profile for changes. Because of this limitation, a scheduled process must be configured, or profiles must be manually updated whenever changes to the data are made.
Note: Only users with the proper privileges can generate or update a category profile.
Generating / Updating a Data Profile
-
In the Tree, expand the applicable hierarchy, and then, select the relevant object group or object.
-
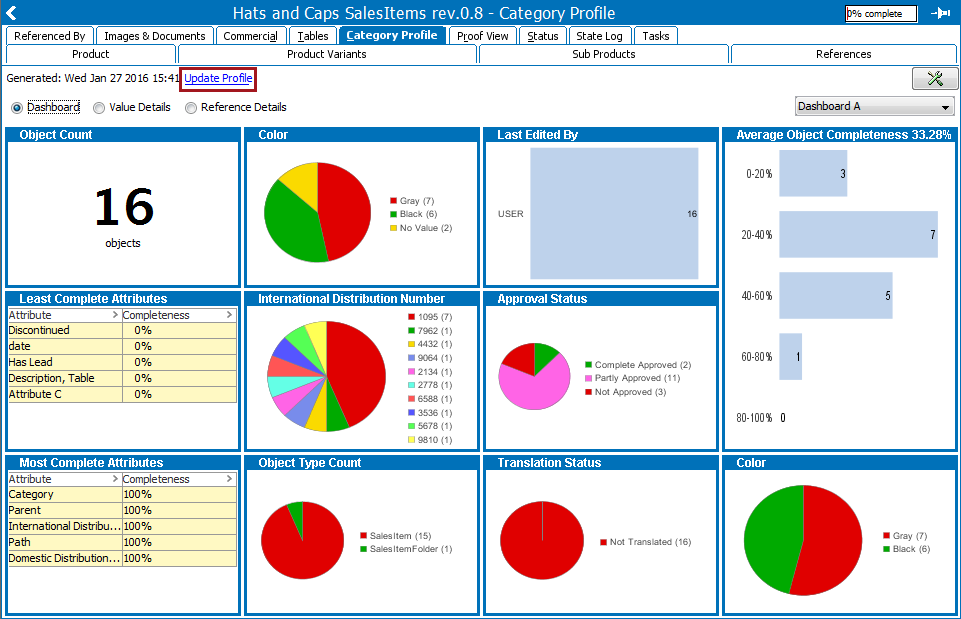
On the Category / Data Profile tab, click the Generate Profile link. The Start Profiling dialog appears.
If you update an existing profile, click the Update Profile link.
-
Click OK. A background process starts. Once finished, the profile is displayed.

Important: The background process runs using super user privileges and the profiles are identical regardless of who started the process. If a user has profile viewing privileges, all data is displayed in the profile no matter which view limitations otherwise apply to the user. By configuring the privileges, it is possible to control who can view, configure, and update profiles.
Scheduling Data Profiling
To schedule category / data profiles to update automatically, use the Schedule Category Profile Update wizard.
-
In the File menu, select Schedule Category Profiling to open the wizard.
-
On Select Root Object, browse or search for the preferred root object.
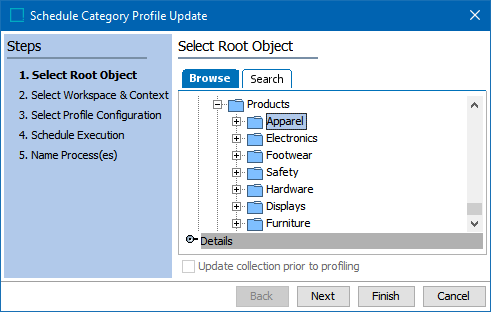
Note: All category / data profiles below the selected node are also updated.
-
Valid selections include products, entities, classifications, and collections. If a collection is selected, profiles are generated or updated for all objects in the collection for which profiling is enabled.
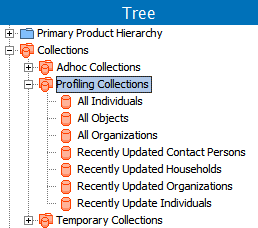
Important: Generating a profile via a scheduled event updates the objects within the collection (products, entities, etc.) not the collection itself. To generate profiles for collection objects as well as the data within the collection, the collection object must be included in a collection, such as the 'Profiling Collections' node in the following image.
-
Check the Update collection prior to profiling checkbox if the collection is search-based, and you want the collection to be refreshed as part of the processing.
-
-
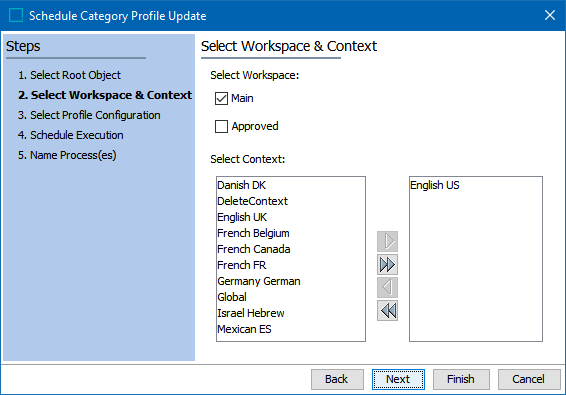
On Select Workspace & Context, select the workspaces and contexts that the profile applies to. This allows the scheduled update to apply to all relevant context and workspace combinations.
-
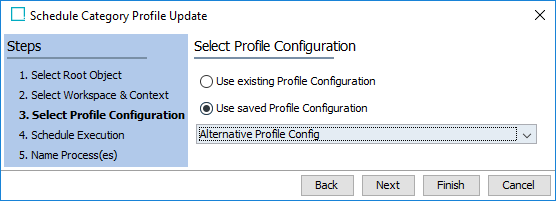
On Select Profile Configuration, specify the profile configuration to apply to the data profiles.
-
Click Use existing Profile Configuration for all data profiles to use the configuration set on the node.
-
Click Use saved Profile Configuration to override the configuration set on the node. From the dropdown, specify the saved profile configuration to apply to all data profiles.
-
-
On Schedule Execution, specify whether to run the process immediately, at a later point in time, or as a recurring weekly or monthly process.
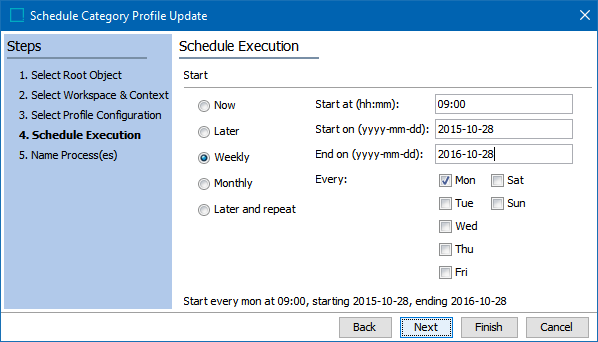
Important: Consider the time zone of the application server compared to that of the workbench (the client) where the schedule is created or viewed. When scheduling a job, the local time zone is displayed in the workbench, but the time zone of the server is used to run the background process. Although displayed, the time zone of the client is not included in the instruction to the server to run the job. This can cause confusion about when the job will run since the scheduled time is not automatically converted to accommodate potential differences in time zones.
Note: If profiling a collection, selecting 'Now' will execute the profile immediately and a profile will be generated for the collection and all of the objects in the collection.
-
On Name Process(es), add a process name and click Finish to start a background process.

Access the Schedule Category Profile Update Wizard from the Background Process
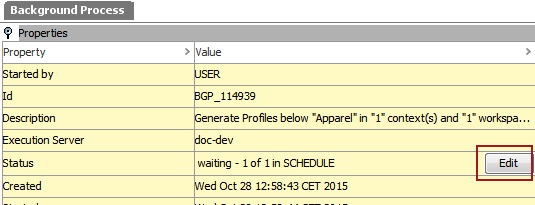
You can edit the profiling schedule from the Background Process as follows:
-
On the Background Process tab, locate and select the relevant background process.
-
In the Status property Value field, click the Edit button to open the Schedule Category Profile Update wizard.
