Using the MLAC service requires manually exporting hierarchies from STEP as Excel or CSV files that can be handled by the service.
For general information about manual exports, refer to the Export Manager topic in the Data Exchange documentation here.
Prerequisites
Ensure that the hierarchies being exported comply with the following standards:
- The hierarchy must not classify the same product more than once. This includes the primary product hierarchy (PPH, or the 'blue hierarchy') and classification hierarchies (the 'yellow hierarchies').
Important: Classification hierarchies where the same product can be present in multiple classifications (such as website) are not allowed.
- Dimension dependent classifications are not supported.
- The hierarchy must have only one root node.
- The hierarchy must be constructed using object types different from those object types used for modeling the products already classified in the hierarchy.
Export a Hierarchy
Confirm that the Prerequisites above are met and use the following steps to export a hierarchy:
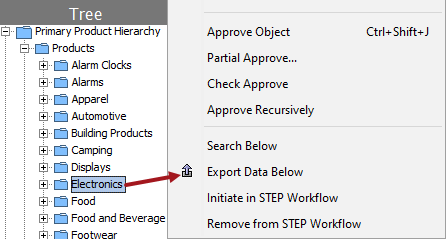
- In workbench on the Tree tab, select a hierarchy root node, right-click and select the 'Export Data Below' option to display the Export Manager with the selected objects.
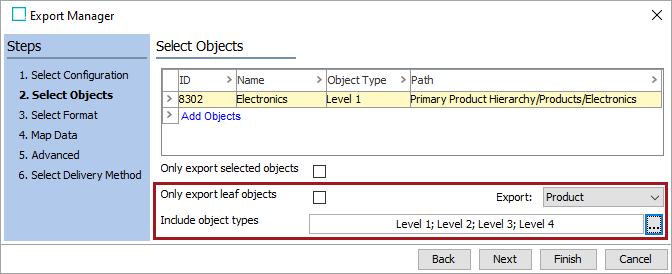
- On the 'Select Objects' step:
- Uncheck the 'Only export leaf object' option.
- In the 'Export' dropdown, select 'Product' or 'Classification' based on the type of hierarchy being exported.
- In the 'Include object types' parameter, click the ellipsis button (
 ) to display the 'Select Object Types for Export' dialog. Select the object types that constitute the hierarchy and press the OK button.
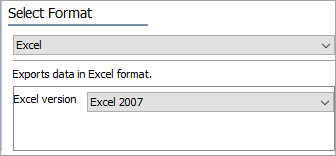
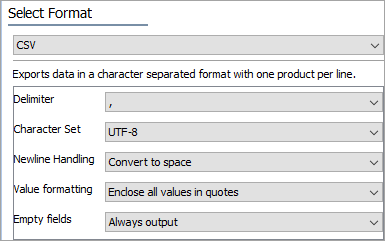
- Click the Next button, and on the 'Select Format' step, choose one of the following file formats from the dropdown:
- Excel
- For the 'Excel version' parameter, select Excel 2007.
- CSV
- For the 'Delimiter' parameter, select the comma (,).
- For the 'Character Set' parameter, select UTF-8.
- For the 'Newline Handling' parameter, select Convert to space.
- For the 'Value formatting' parameter, select Enclose all values in quotes.
- For the 'Empty fields' parameter, select Always output.
- Click the Next button to display the 'Map Data' step.
- Map the <ID> data source.
- Open the '<ID> ID' flipper and map 'Constant Value' as a Header row. On the 'Enter Value' dialog enter id (without quotes) and click the Save button.
- Click the delete button (
 ) for the original header so the Header mapping matches the image below.

- Map the <Name> data source.
- Open the '<Name>' flipper and map 'Constant Value' as a Header row. On the 'Enter Value' dialog enter name (without quotes) and click the Save button.
- Click the delete button (
 ) for the original header so the Header mapping matches the image below.
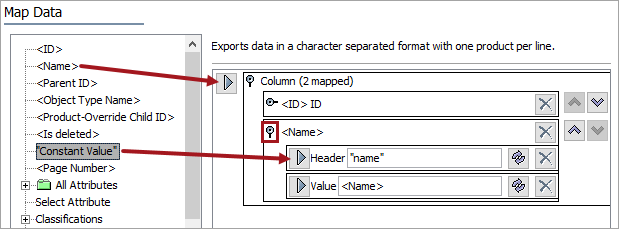
- Map the <Parent ID> data source.
- Open the '<Parent ID> ID' flipper and map 'Constant Value' as a Header row. On the 'Enter Value' dialog enter parentId (without quotes) and click the Save button.
- Click the delete button (
 ) for the original header so the Header mapping matches the image below.
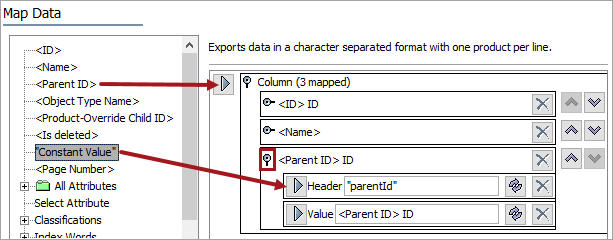
- Transform the Parent ID Value as follows:
- Click the transform button (
 ) for the value part of the mapped Parent ID.
 - On the Transformations dialog, click the 'Add Transformation' link.
- On the Select Transformation dialog, select the Replace whole value option and click the OK button to update the Transformations dialog.
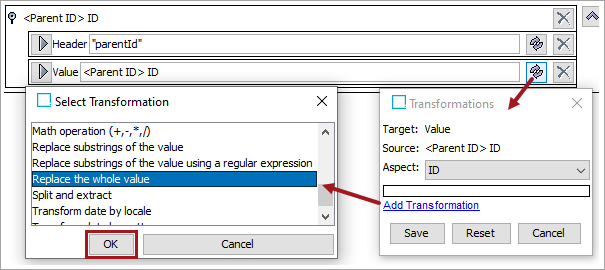
- On the updated Transformations dialog, in the 'Replace' parameter type ID of the hierarchy root and in the 'with' parameter, remove the value. Click the Save button.
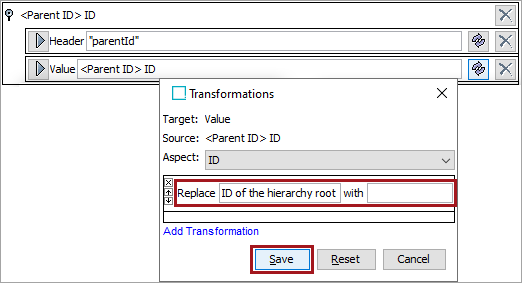
As shown in the image below, the final '<Parent ID> ID' mapping is in parentheses, like (<Parent ID> ID), to indicate a transformation is applied for the Value element.

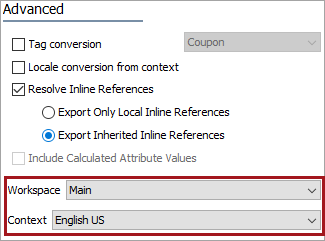
- Click the Next button to display the 'Advanced' step.
- For the Workspace parameter, choose the workspace to be used for the export. This is typically the 'Approved' workspace.
- For the Context parameter, choose the context for export.
- Click the Next button to display the 'Select Delivery Method' step and click the Finish button.
- On the 'Save Export Configuration' dialog, optionally save the configuration. For more information, refer to the Running a Data Export topic in the Data Exchange documentation here.
- Click the OK button to start the Export Manager Pipeline background process. For more information, refer to Monitoring a Data Export topic in the Data Exchange documentation here.
Output Examples
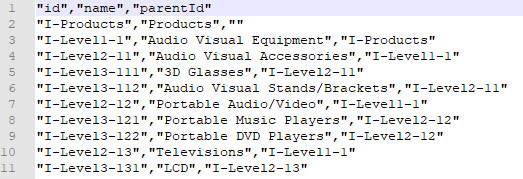
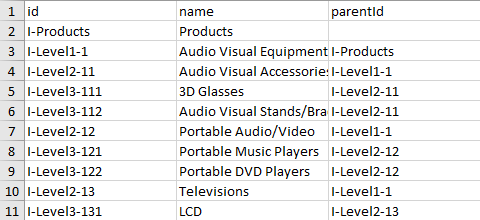
The generated file should look similar to the examples below.
Excel
CSV
