The Vendor Portal widget is in the Channel Portal and gives retailer admins access to activate and design the Vendor Portals used by supplier to enter data. It displays the status and name of the Vendor Portal for a selected channel.
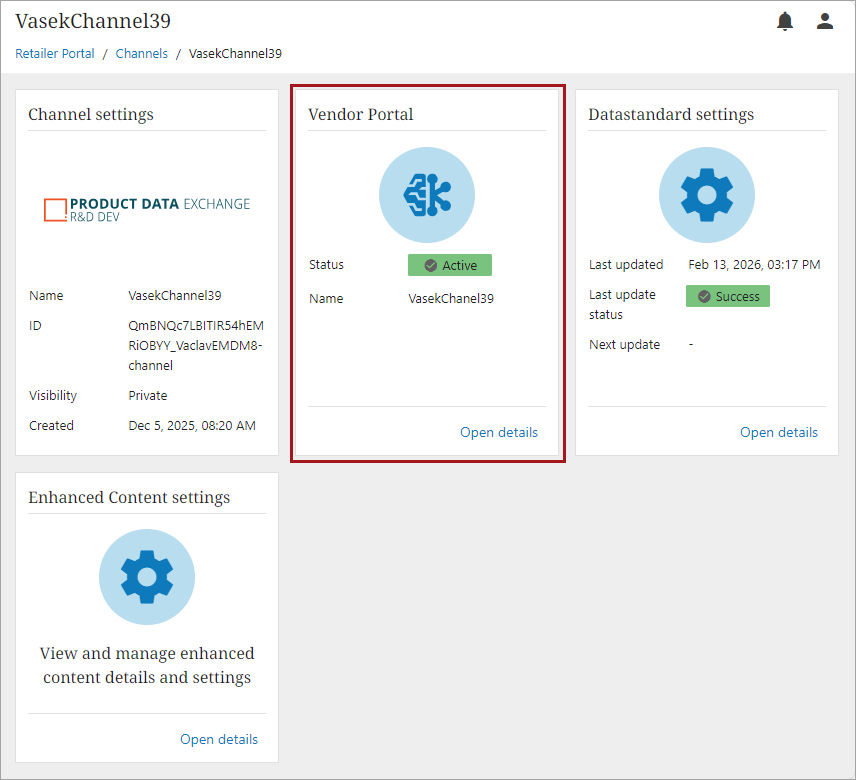
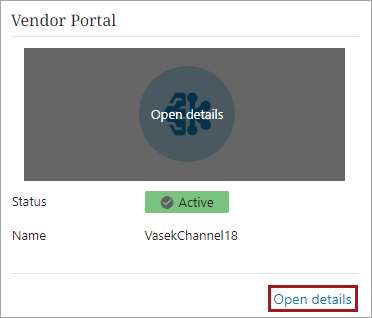
You can hover over the icon and click the 'Open details' button to navigate to the Vendor Portal. Alternatively, you can click the 'Open details' button on the bottom right of the widget.
The following widgets are used for configuration:
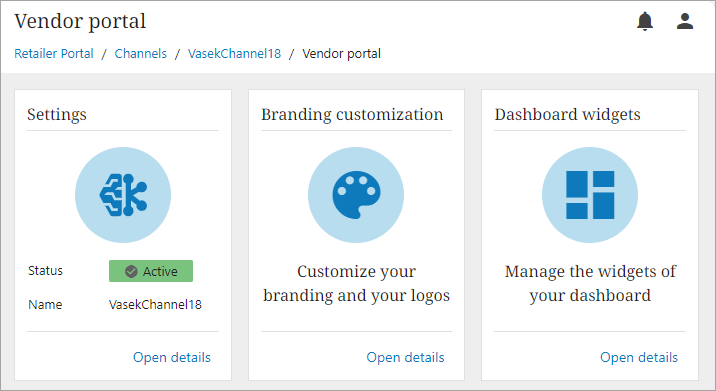
Settings
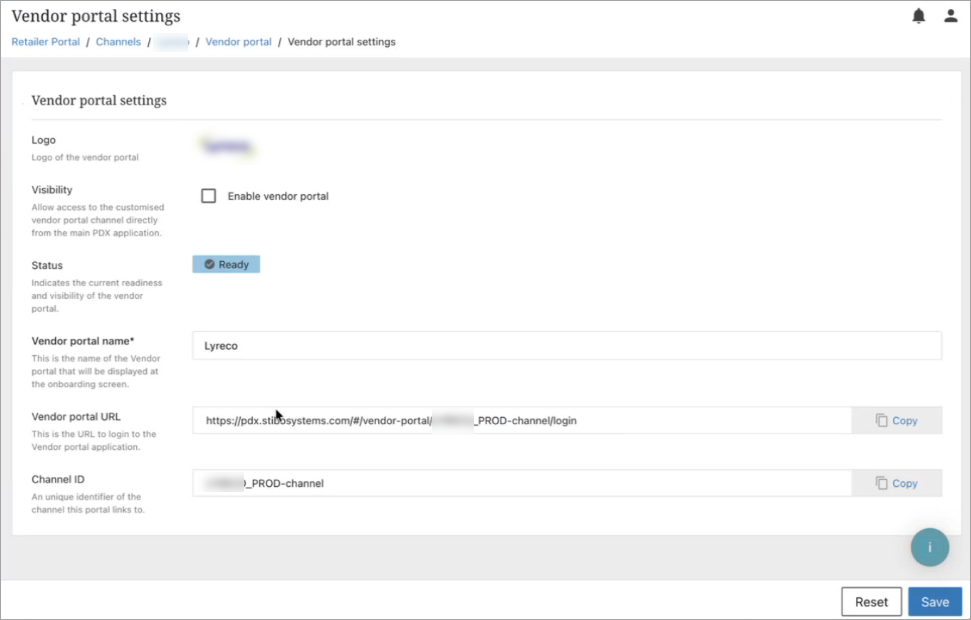
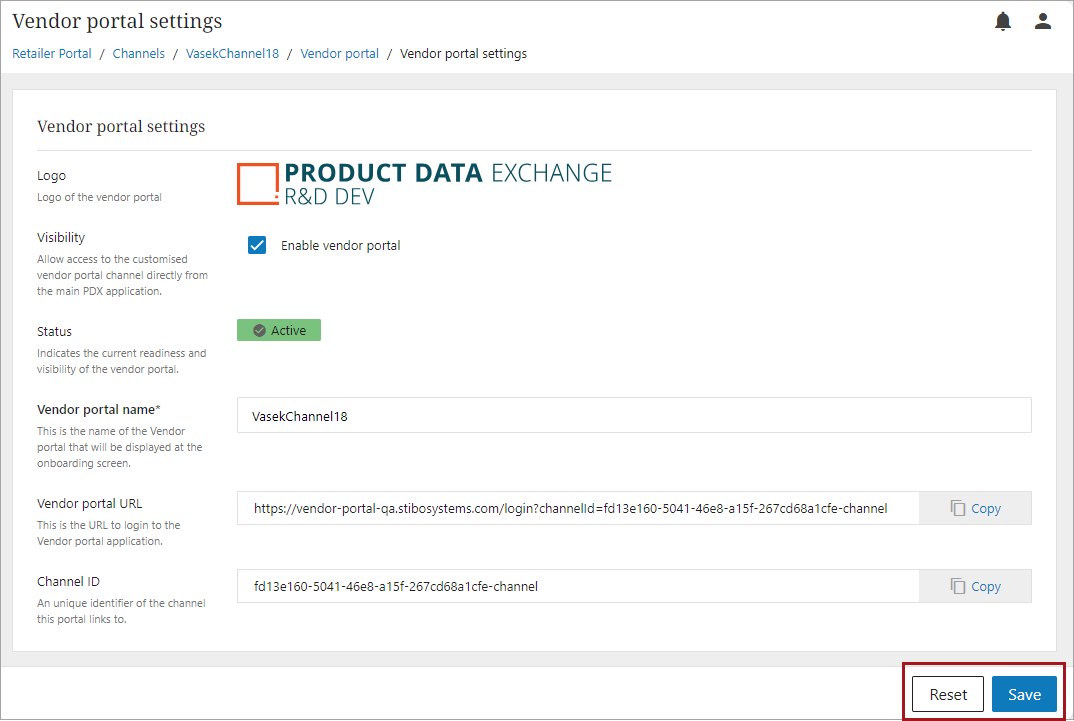
The Settings widget for a Vendor Portal in the Channels Portal, allows retailer admins to enable a Vendor Portal, check the status, manage the portal name, and view the URL and Channel ID. Follow these steps to review and update the Vendor Portal settings:
-
From the Vendor Portal settings page, navigate to the Settings widget by hovering over the icon and clicking the 'Open details' button or by clicking the 'Open details' button on the bottom right of the widget.
-
Fill out or update vendor portal settings:
-
Logo - displays the logo selected for the channel. This setting is not configurable from this location.
-
Visibility - select this option to enable Vendor Portal for the channel.
-
Status: displays the status of the Vendor Portal.
-
Active – Vendor Portal is enabled for a channel.
-
Ready – Vendor Portal is not enabled but is ready to be enabled for a channel.
-
Incomplete – Vendor Portal cannot be used until Datastandard has been completed.
-
-
Vendor portal name - name of the Vendor Portal name. By default, the name will auto-populate to the channel name but is configurable.
-
Vendor portal URL - URL suppliers use to login to the Vendor portal application. This is auto-populated and should not be changed.
-
Channel ID - Unique identifier of the channel. This is auto-populated and should not be changed.
-
-
Click the Save button to save any changes.
-
Click the Reset button to discard any changes and restore the last saved settings.
-
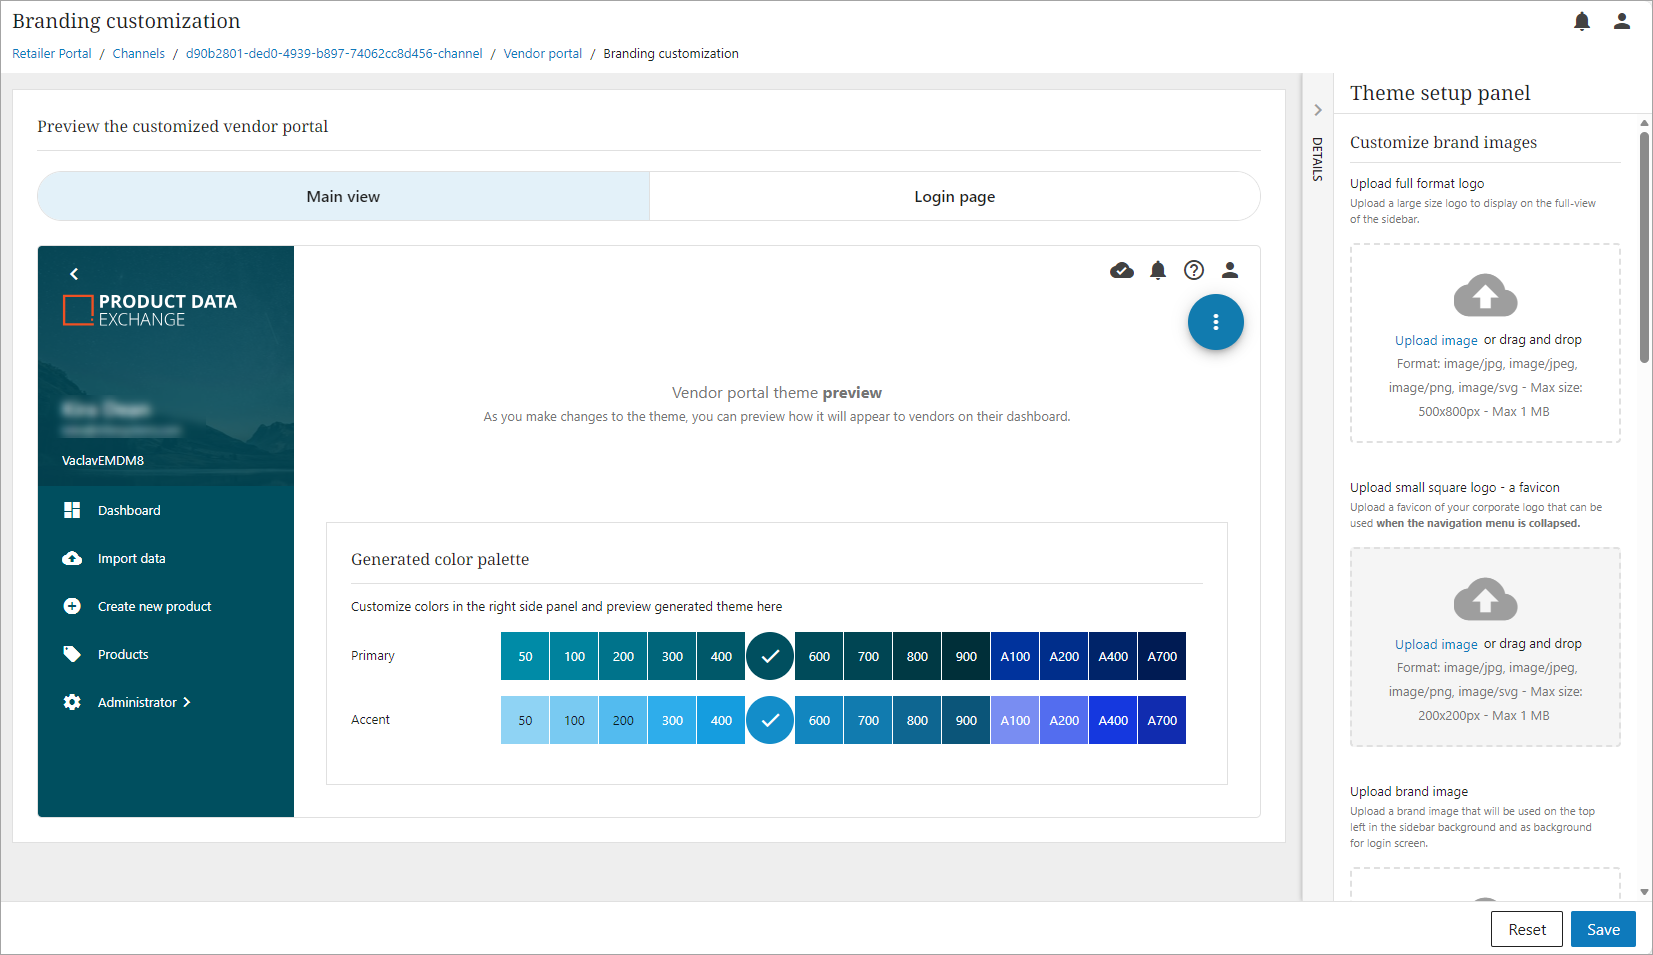
Branding customization
The Branding customizations widget for a Vendor Portal in the Channels Portal, allows retailer admins to customize the appearance of the Vendor portal UI by uploading company logos and images, defining a color scheme, and previewing the result in real time.
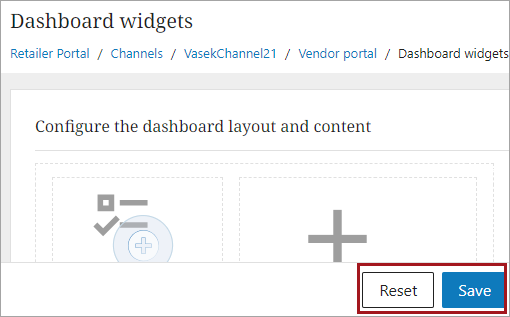
Dashboard widgets
The Dashboard Widgets widget for the Vendor Portal settings allows retailer admins to control which widgets appear on the Vendor Portal dashboard and the order in which they are displayed.
To add or update a widget:
-
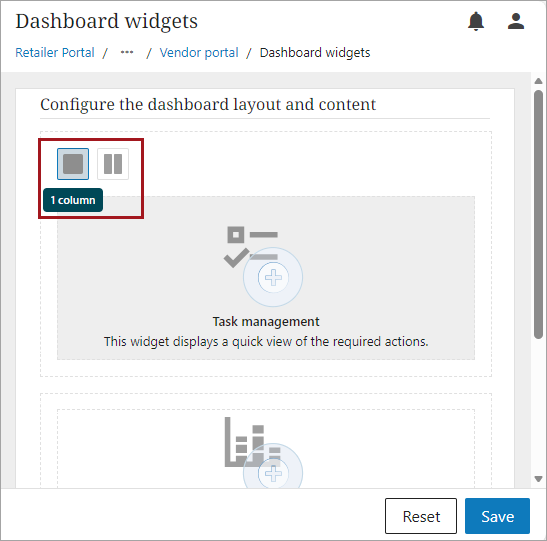
Navigate to one of the sections on the screen you would like to add or update a widget.
-
Select the number of columns from the top left corner of the section.
-
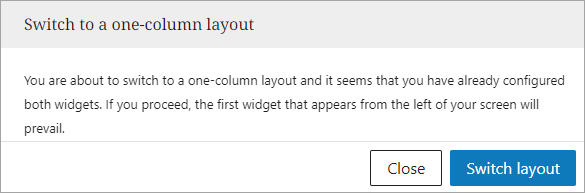
When switching a section from one to two columns, click on the new location to add a widget.
-
When switching a section from two columns to one column, and two widgets are configured for each column, a message will display letting you know that the widget in the left will be kept and the one in the right will be removed.
-
-
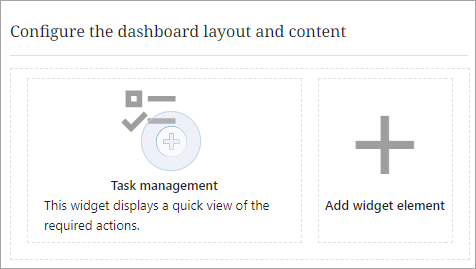
Add or edit a widget element. The dashboard layout configuration is automatically preconfigured with at least one widget per section.
-
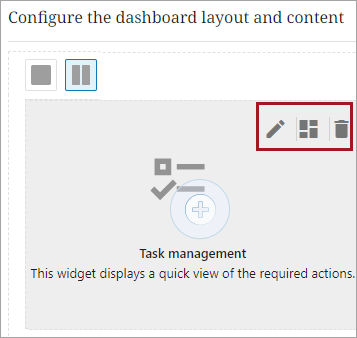
Select an option from the top right menu of each section.
-
Edit (
 ) - allows you to update any settings for a widget.
 -
Remove (
 ) = allows you to remove a widget.
 -
Select (
 ) = allows you to select a widget element for that section. This will allow you to change widget elements if a widget already exists for that section.
-
-
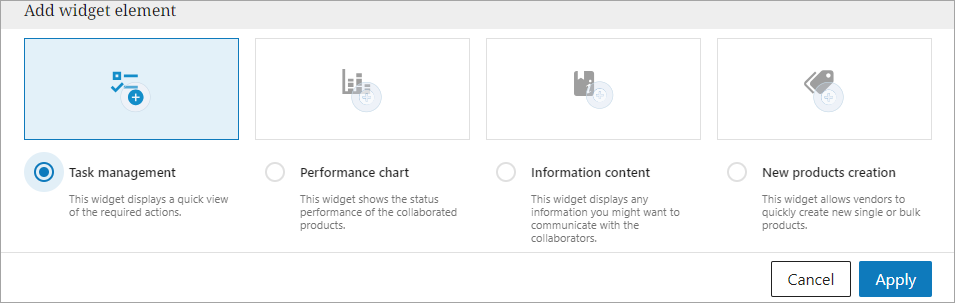
Add - Allows you to select a widget element to add.
-
Add and Select display a window that allows you to select the widget element.
-
Task management – displays a quick view of the required actions.
-
Performance chart – shows the status performance of the collaborated products.
-
Information content – displays information you might want to communicate with the collaborators.
-
New products creation – allows vendors to quickly create new single or bulk products.
-
-
Click the Apply button to save the selection.
-
-
Click the Save button to save all changes made.
-
Click the Reset button to discard any changes and restore the last saved settings.
-