Products and their data can be imported into PDX in the following ways:
-
Imports from Stibo Systems PMDM or PIM Application: To learn more about these imports, refer to STEP online help.
-
Uploaded files in the following formats: .xls, .xlsx, .xlsm, .csv, .json, . zip.
Importing JSON files
PDX supports the import of JSON-formatted files provided the following are true:
-
The file contains a list of objects.
-
Each object consists of a set of key-value pairs representing attribute name and attribute value.
Refer to the example below:
[
{
"Id": "Product1",
"Name": "Product number 1",
"Color": "Red",
"Size": "Small",
"Price": 10.0,
"Category": "General"
},
{
"Id": "Product2",
"Name": "Product number 2",
"Color": "Blue",
"Size": "Medium",
"Price": 20.0,
"Category": "General"
},
{
"Id": "Product3",
"Name": "Product number 3",
"Color": "Green",
"Size": "Large",
"Price": 30.0,
"Category": "General"
}
] Note: JSON files are imported to a single user-determined language layer in PDX.
Importing ZIP files
PDX supports the import of zip files, provided that:
-
The zip file only contains one file.
-
The zipped file must be eligible for import according to the requirements previously described.
-
The zipped file does not contain spreadsheets exported from a PDX channel (channel data enrichments).
-
The uncompressed file does not exceed 1 Gb.
The maximum file size allowed when uploading files as part of product import to PDX is 300 Mb, making file compression mandatory between 300 Mb and 1 Gb.
Import With Spreadsheets
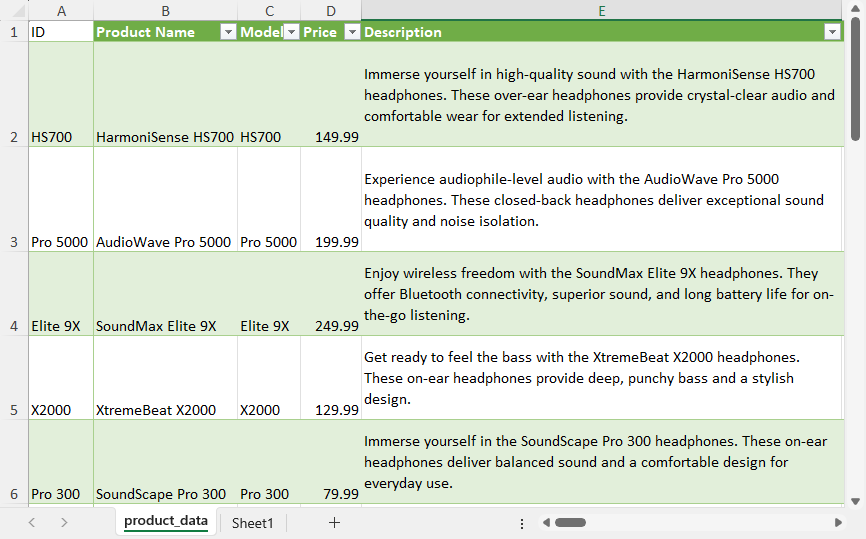
The most commonly used format are spreadsheets, which are talked about and used as an example throughout this document.
- Spreadsheets: An Excel spreadsheet can be used for the initial import of products. The product and its data will appear in the master data. Spreadsheets can also be used to update existing master data previously imported. The spreadsheet import process can import products and their data through:
Key-based import - This import type will update all products with the same ID.
Match-based import - This import type will update all products based on a matching value in an attribute of choice.
Note: When updating existing master data through the regular product import, a common 'ID' must be identified in all spreadsheets so that PDX can connect the new data to existing products. If you are using data from both STEP and external sources using spreadsheets, the common 'ID' must be the STEP ID.
Organizing Data For Import With Spreadsheets
Before importing product data into PDX with a spreadsheet, it is important to properly organize the data. Listed below are requirements and suggestions to enable this method:
-
Include a product 'ID' column with unique IDs for each product being imported.
-
Ensure the first row includes the attributes being imported, also known as column titles.
-
Use GTIN for the unique ID(recommended).
-
Use XLS files (recommended).
-
Ensure data does not span multiple cells in the spreadsheet.
-
Remove all macros and hidden columns.
-
Add more tab sheets to the spreadsheet file if the products data is in multiple languages. Add the same product IDs to all of the sheets, and populate the language specific data in each sheet.

Once the data for import is organized, import the data into PDX Syndication either by Key-based import or Match-based import.
Importing Data
To import data:
-
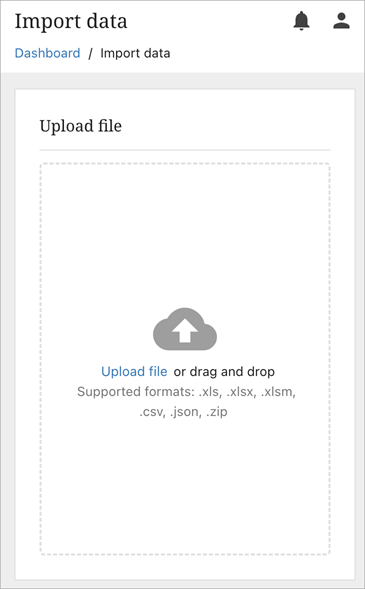
Select 'Import data' from the left-hand menu.

-
Upload the file or drag and drop the file into the window.
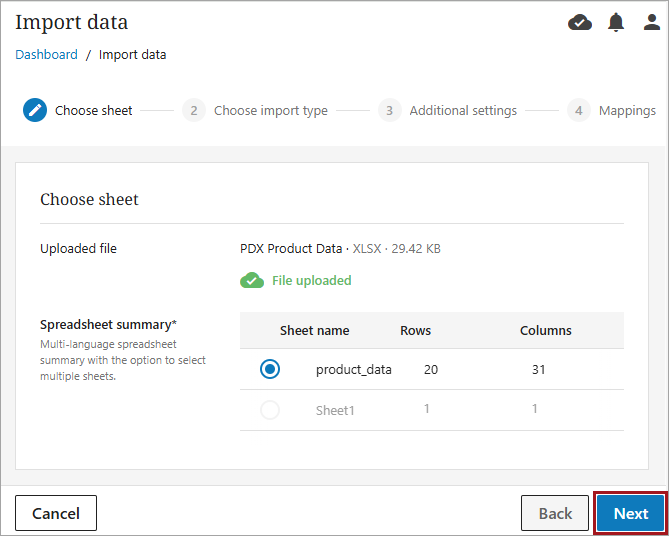
-
The spreadsheet title, file type, and file size will display as the uploaded file, with summary information below. If there is more than one sheet available to import, select the desired sheet, and click the 'Next' button.
-
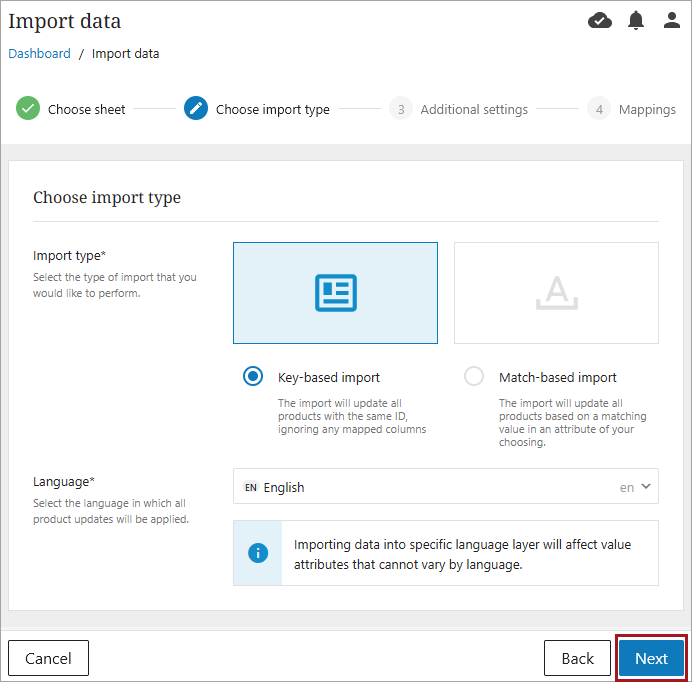
On the 'Choose import type' step, select either Key-based import or Match-based import and proceed.
Key-based Import
The Key-based import can be used to upload new products and their data and/or modifications to existing products.
-
Ensure that Key-based import is selected, and choose the language in which all product updates will be applied. Click the 'Next' button.
-
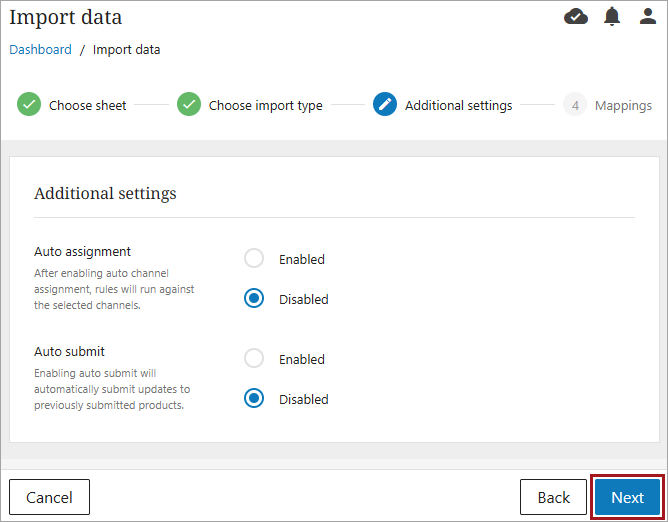
Additional settings for Auto assignment and Auto submit are defaulted to 'Disabled.'
-
Auto assignment: After enabling auto channel assignment, rules will run against the selected channels. For more information, refer to the Adding Products Using Auto-categorization topic.
-
Auto Submit: Enabling auto submit will automatically submit updates to previously submitted products.
Enable if those options are desired. Click the 'Next' button to continue.
-
-
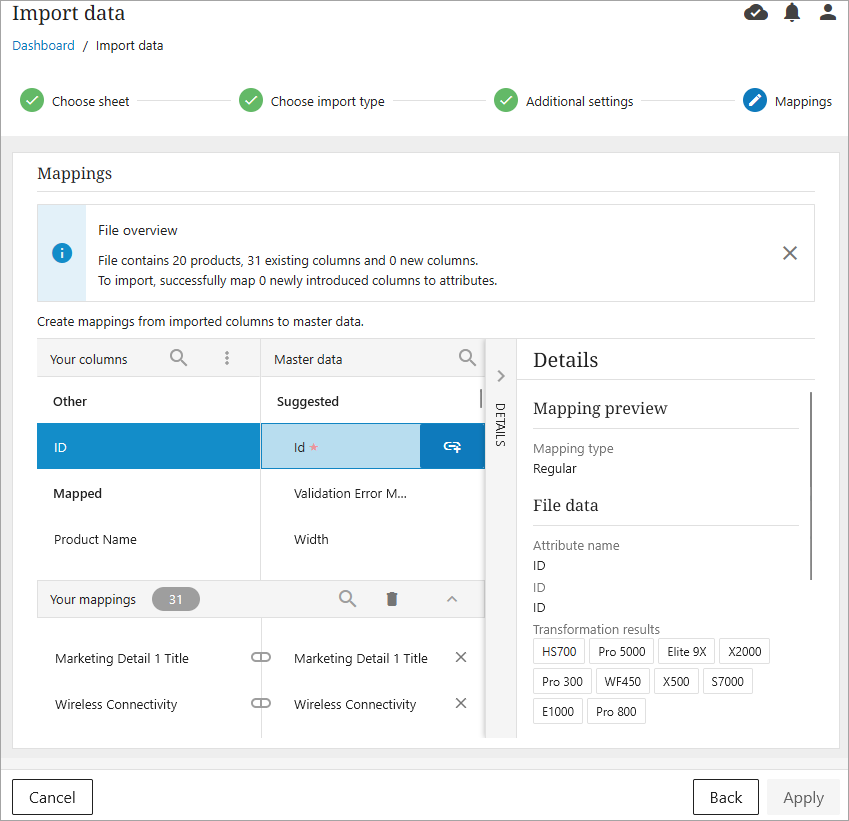
The process will automatically progress to the Mappings step of the import flow. Verify or update mapping information and click the 'Apply' button. For more information on mapping attributes, refer to the Mapping Attributes topic.
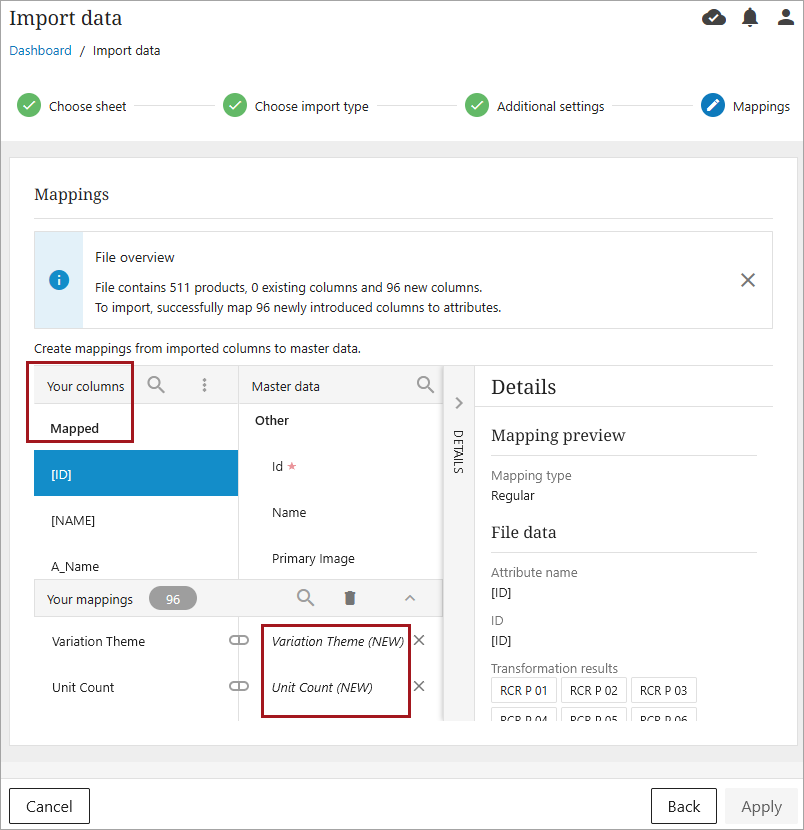
If this is the first import to PDX, all of the attributes will be auto-mapped. Under 'Your columns,' all attributes should be listed under Mapped. In the lower pane called 'Your mappings,' all attribute names should display with (NEW) appended to them since they are all new attributes. Additionally, for initial imports, one column must be mapped to the master ID attribute.
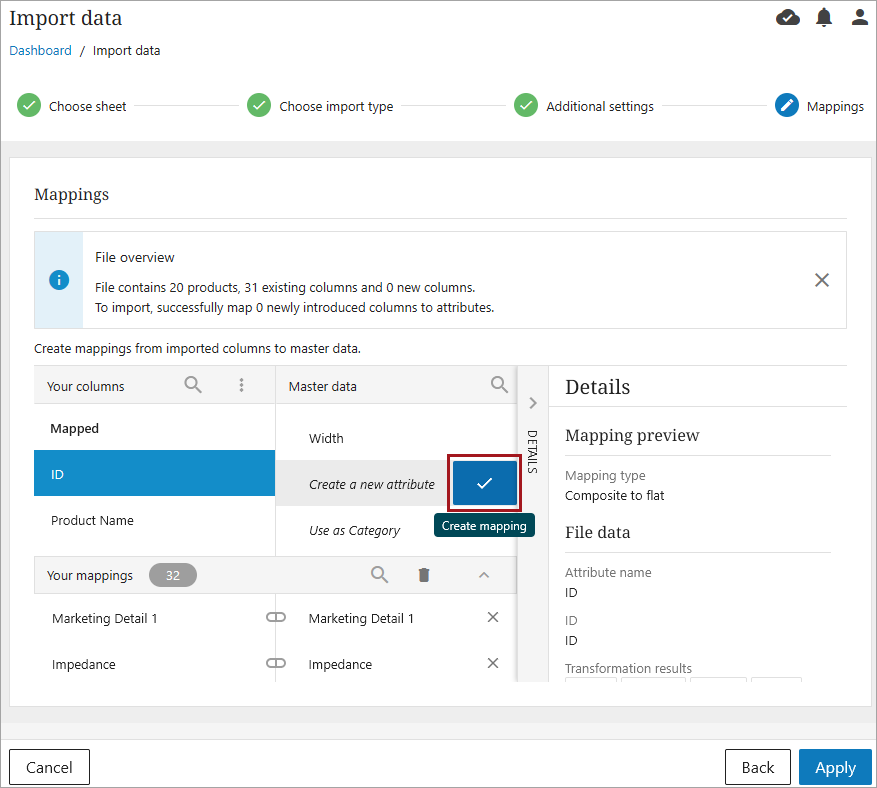
If this is not the first import but new attributes are being adding, they will need to be mapped on the Import Mapping screen or they will not be imported. Select the new attribute under 'Your Columns' and then click the checkmark on 'Create a new attribute' in the Master data column.
-
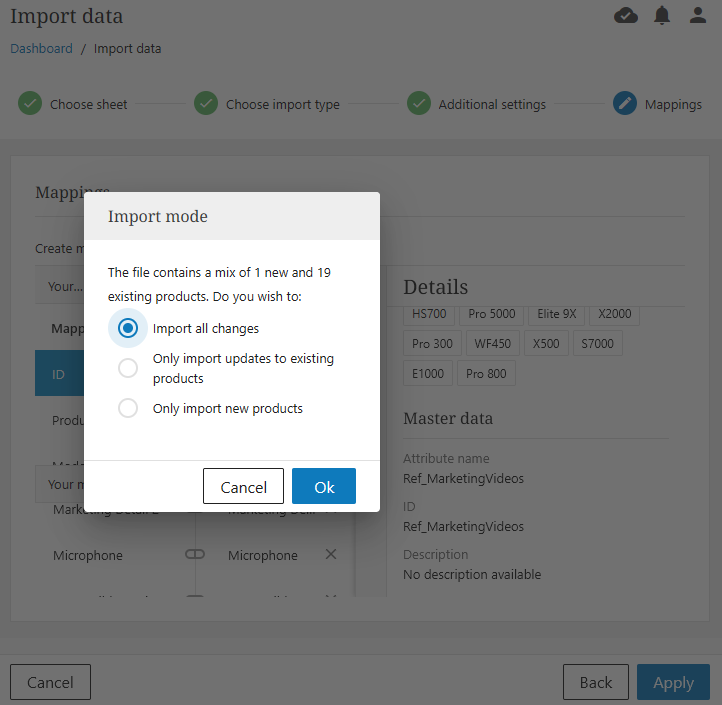
The final screen will ask you to confirm the data import. If import information is correct, click 'Ok.' Once the import has been completed, you will be returned to the landing page. Uploaded products can be viewed in Master data.
Once the import has been completed, you will be returned to the landing page. Uploaded products can be viewed in Master data.
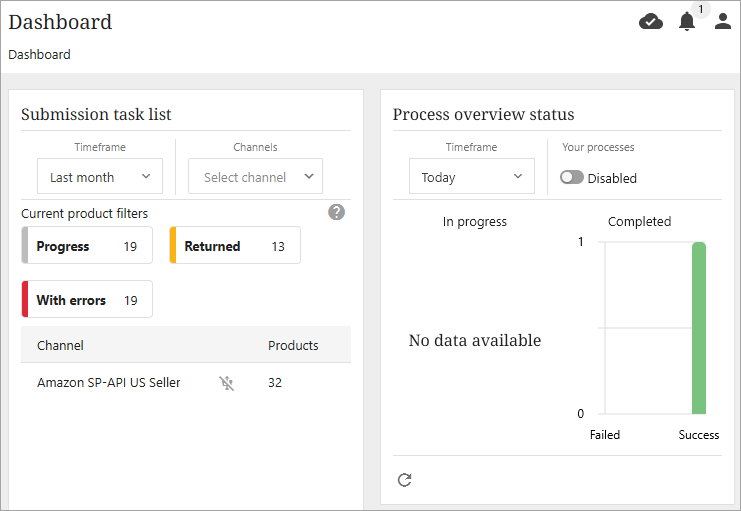
Filtering in master data to the 'Today' timeframe will make it possible to find the products that were updated that day.
Match-based Import
Match-based import allows users to augment additional data to existing items that are already in PDX based on matching values for a single attribute that already exists in PDX. This process will not import new products.
-
After choosing and importing the desired data, choose the Match-based import option and select the identifier. Click 'Next' when done.
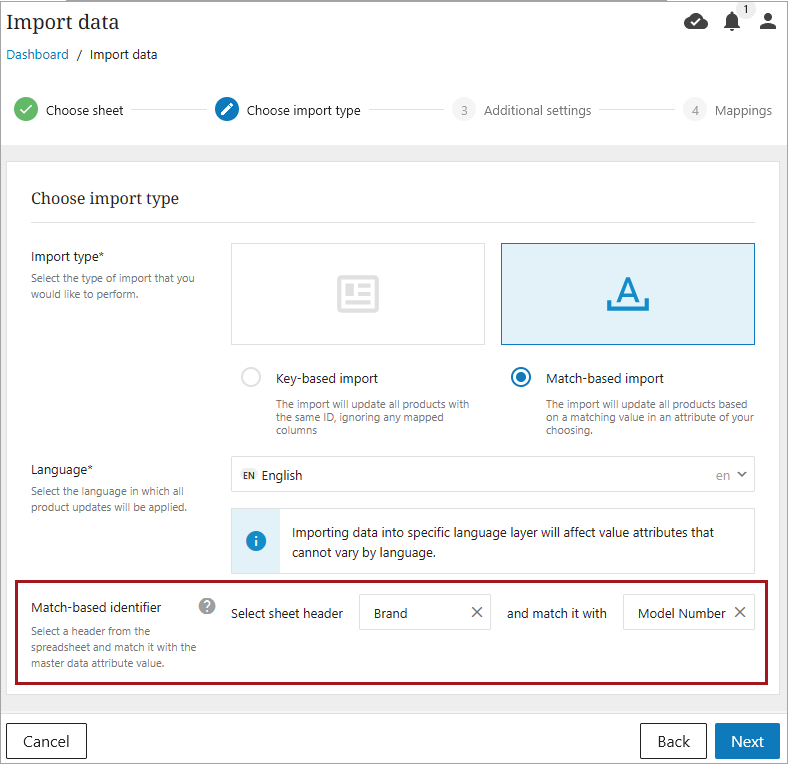
-
Additional settings for Auto assignment and Auto submit are defaulted to 'Disabled.'
-
Auto assignment: After enabling auto channel assignment, rules will run against the selected channels. For more information, refer to the Adding Products Using Auto-categorization topic.
-
Auto Submit: Enabling auto submit will automatically submit updates to previously submitted products.
Enable if those options are desired. Click the 'Next' button to continue.
-
-
The Mappings screen displays, with the 'File overview' notification at the top. This notification reports the number of products affected by the match-based import. If desired, this window can be closed to provide more space on the Mappings screen.
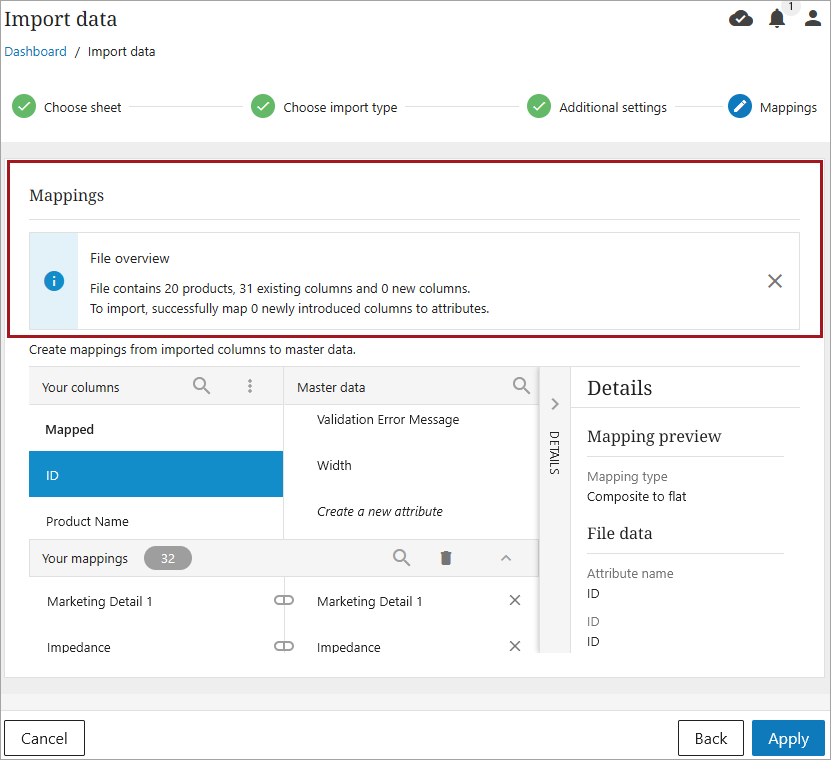
The Import Mapping screen will show how the attributes in the Excel file will be imported and mapped into the master data. If this is the first import to PDX, all of the attributes will be auto-mapped. Under 'Your columns,' all attributes should be listed under Mapped. In the lower pane called 'Your mappings,' all attribute names should display with (NEW) appended to them since they are all new attributes.
If this is not the first import but new attributes are being adding, they will need to be mapped on the Import Mapping screen or they will not be imported. Select the new attribute under 'Your Columns' and then click the checkmark on 'Create a new attribute' in the Master data column. For more on mapping, refer to the Mapping Attributes topic in the PDX documentation.
-
Click 'Apply' when finished.