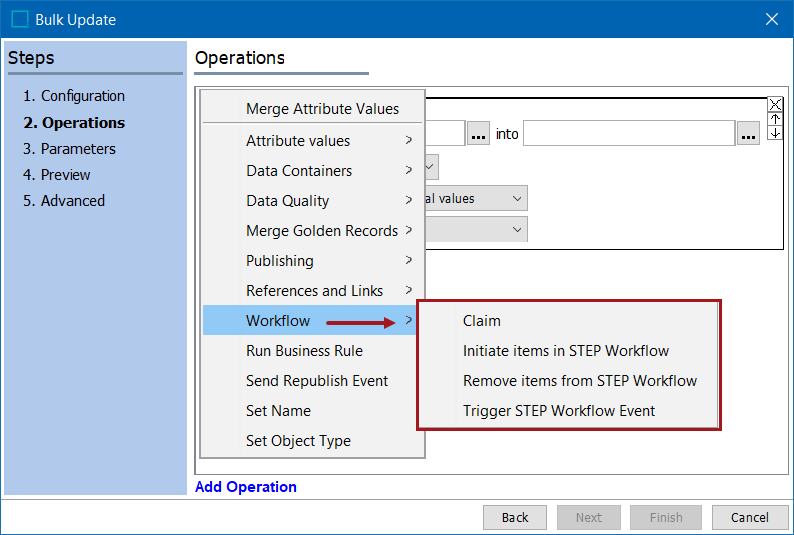
The STEP Bulk Update operations is an efficient way of updating multiple objects in a single operation. For workflows it can be used to claim multiple objects in a specific state in a specific workflow, initiate multiple objects into a specific workflow, remove multiple objects from a specific workflow, or trigger a specific event for multiple objects in a specific workflow.
For more on bulk updates refer to the Bulk Updates documentation.
The table below defines how each operation is expected to perform. Additionally, the next proceeding sections of this document will explain how each operation works more precisely.
|
Operation |
Description |
|---|---|
|
Claim |
Assigning a workflow task to a specific user |
|
Initiate items in STEP Workflow |
Bulk update is performed on the objects to initiate them into a selected Workflow. |
|
Remove items from STEP Workflow |
Removes all objects from the selected workflow. |
|
Trigger STEP Workflow Event |
Triggers a selected workflow event. |
Claiming a Task in a Workflow
The 'Claim' bulk update operation allows the user to claim multiple tasks in a state at one time. For example, if there are 10 tasks in one state, instead of a user having navigate to the STEP Workflow tab, opening up the desired workflow and clicking each individual task using the claim button,  , in the STEP Workflow Items tab, a user can claim all the tasks at once using bulk updates.
Claiming a Task
To claim tasks, the following steps need to be followed by the user who wishes to claim the tasks. In this case it is User J.
- Ensure that the tasks are initially unassigned to any user in a state.
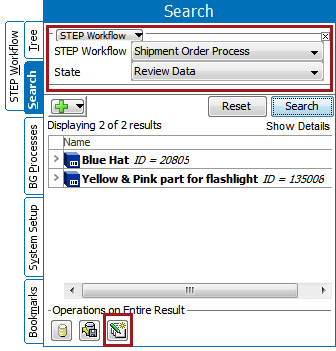
- Go to the Advanced Search tab, select STEP Workflow from the dropdown and select the desired workflow and state to display the objects present in that particular state. Click the bulk update button
 to open the Bulk Update wizard.
This will create a bulk update for all of the objects in that particular state. Additionally, it is also possible to save the search results as a collection, and schedule a bulk update by selecting the saved configurations. This also saves all tasks that show up in the sate in the collection.
Note: If a user wishes to only claim certain tasks that show up in the search, use the Ctrl key and select the desired tasks, then from the File menu, select Bulk Update and Run Bulk Update.
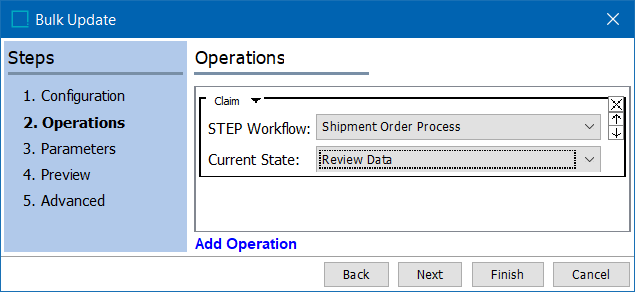
- Select the workflow and the state from the dropdown.
- Navigate through the succeeding windows, and click on Finish.
- A background process, BGP, will run and when clicked upon, will display the report of the bulk update process.
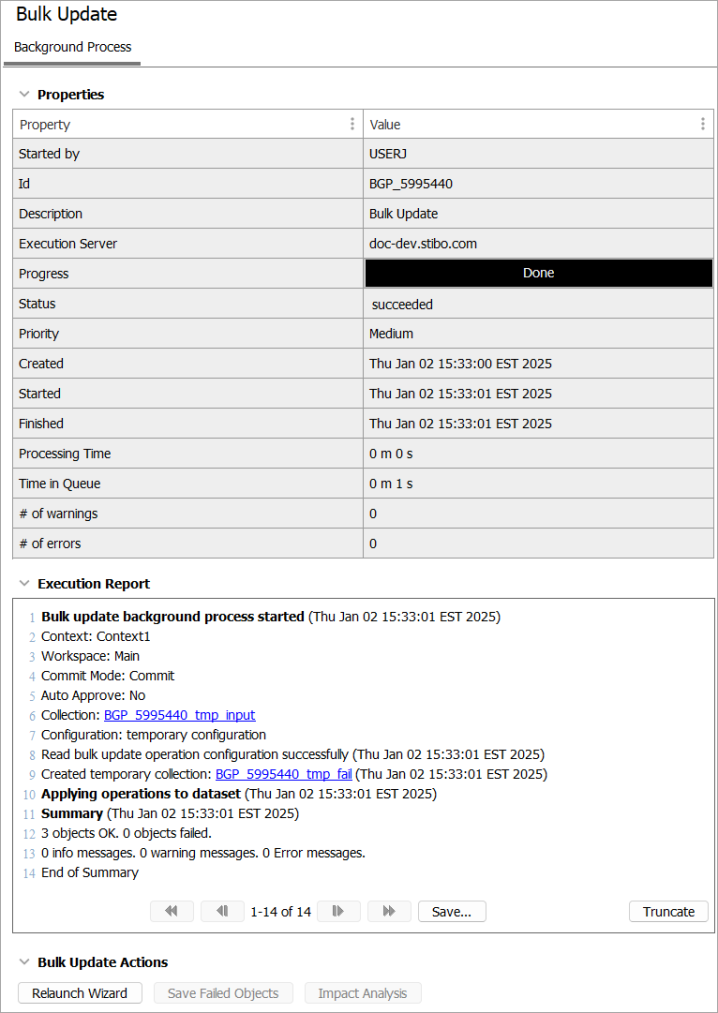
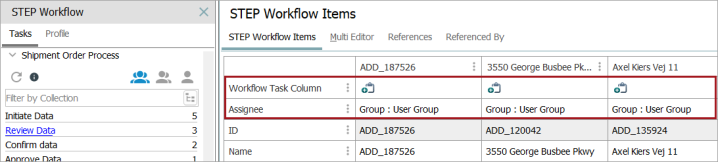
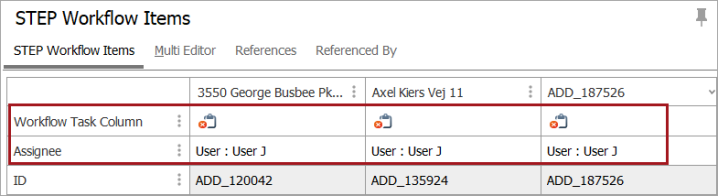
- If the BGP was successful, navigate to the STEP Workflows tab again and check to if the items are now claimed and assigned to the appropriate user, in this case User J.
Initiate Items in STEP Workflows
Whenever new objects / products / items / or tasks are created or on-boarded, it has to be processed via the workflow. Instead of initiating each item individually, a user can save time by initiating them all at once in a bulk update.
Use the following steps to initiate tasks in a STEP Workflow.
Note: A workflow must be valid for the objects being initiated into it.
- Search for the objects that are to be initiated into the desired workflow and select the bulk update button .
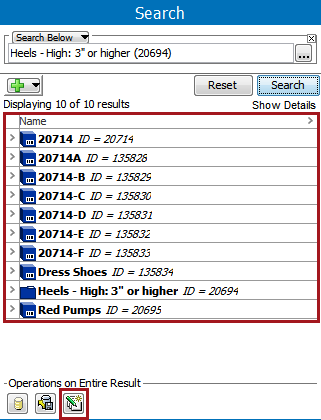
Alternatively, you could click on the objects in tree and go up to File > Bulk Update > Run Bulk Update.
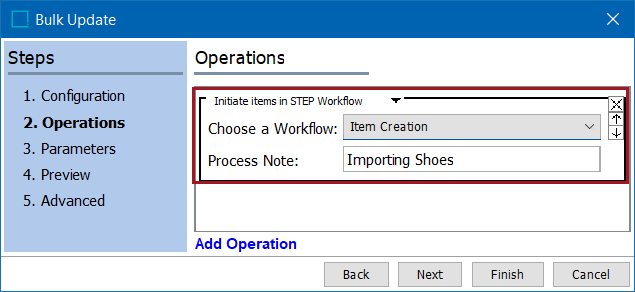
- In the Bulk Update wizard that appears, navigate to the Operations window and select Workflow > Initiate items in STEP Workflow. Select the correct workflow from the dropdown, and add a process note if desired.
- Navigate through the succeeding steps, and click on Finish.
- A background process runs and when reviewed, displays the report of the bulk update process.
- If the BGP was successful, navigate to the STEP Workflows tab again and view the items that were initiated in the workflow. The assignee of all of these items will be the user who is logged in and performed the bulk update.

Removing Items from STEP Workflow
A bulk update can be used to remove all objects from one state in a workflow if the user has the ability to search the STEP workflow tab, and have the 'Perform Bulk Update' privilege.
For complete directions on how to use bulk updates to remove items from STEP Workflows, refer to the Remove Objects from Workflows topic in the Workflows documentation.
Trigger STEP Workflow Event
This function is useful when a user completes multiple tasks and needs to trigger multiple tasks from one state to another at one time
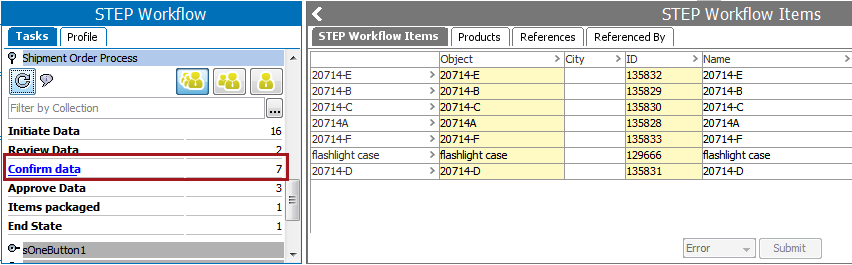
For example, if a workflow has a state called Confirm Data with 2 tasks that need to be moved to the next state, called Approve Data, the user would follow the steps below to perform this action.
Use the following steps to trigger a STEP Workflow event.
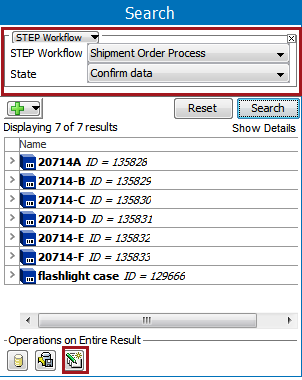
- On the Advanced Search tab, and select STEP Workflow from the dropdown. Next select the desired workflow and state to display the products present in that particular state, and click the bulk update button,.
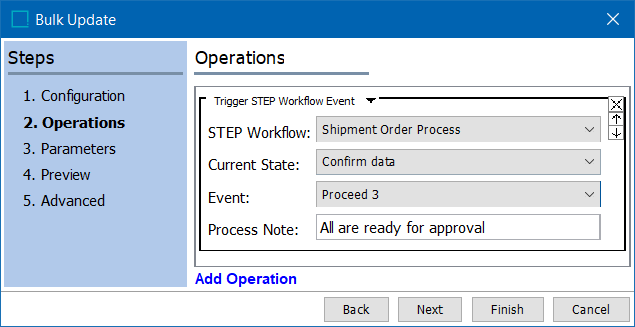
- In the Bulk Update wizard that appears, navigate to the Operations window and select Workflow > Trigger STEP Workflow Event. Select the correct workflow, state, and event to be performed. Add a process note if needed (process notes are the information for the users in the next state.).
- Navigate through the succeeding windows, and click on Finish.
- Click 'Go to process' to display the results of the background process.
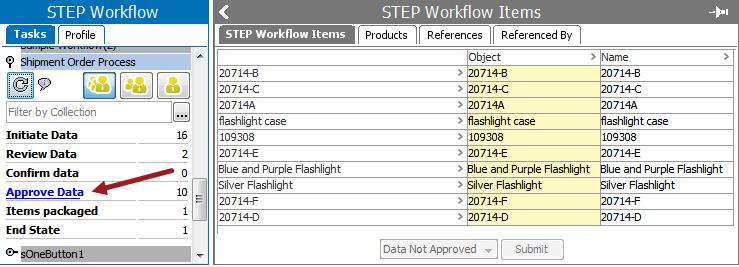
- If the BGP succeeded, navigate to the STEP Workflows tab and view the items that were moved from one state to the next in the workflow.
Note: If the Bulk Update is run on objects not in the specified state in the specified workflow, warnings are generated in the Bulk Update Background Process and the objects are left unchanged.