Though Guided Data Entry is used exclusively in the Web UI, configuration of the screen-by-screen progression, or 'stepper,' is configured primarily in the workbench (with a small amount of setup required to enable this feature in the Web UI). The benefit of configuring in the workbench is that the stepper can easily be added into multiple Web UIs, rather than having to configure the same stepper for each Web UI in which it is required. Following the steps described below, an admin user can design a stepper that will take a Web UI end user, step-by-step, through a required set of screens for the purpose of structured data enrichment.
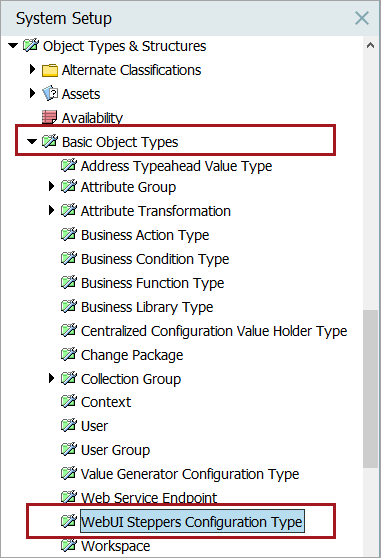
- In the workbench, in the System Setup tab, under Basic Object Types, find 'Web UI Steppers Configuration Type' object type.
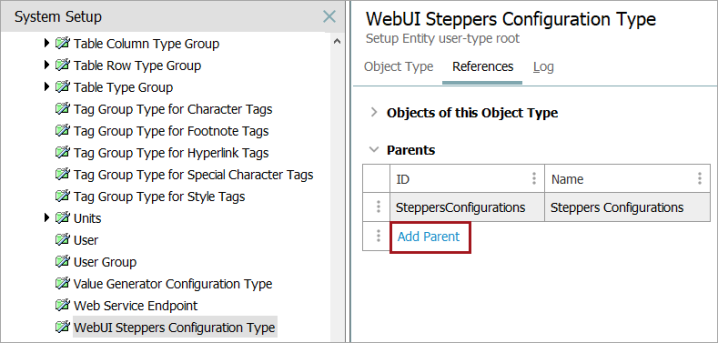
- Once this object type has been highlighted, click on the 'References' tab in the Main Window, and then click 'Add parent.'
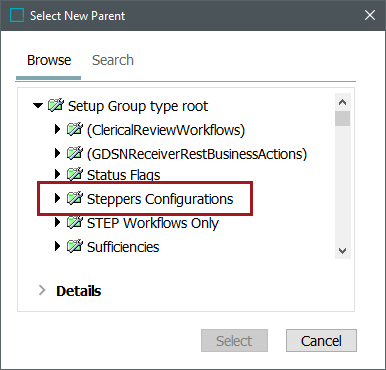
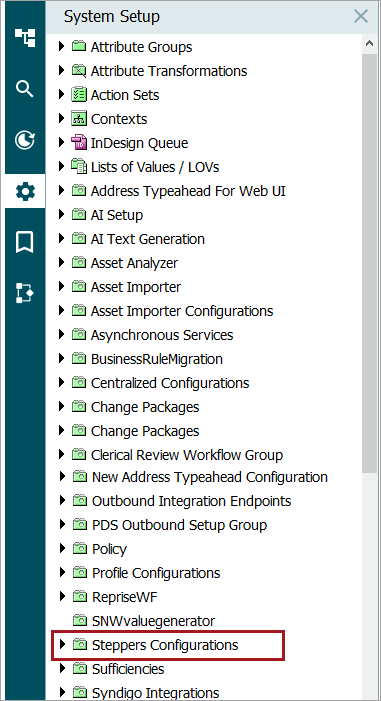
- In the 'Select New Parent' dialog that displays, select where in STEP this and any other stepper configuration should reside. Users can select either an existing Setup Group Type root or create a new one. In the screenshot below, a new Setup Group Type root called 'Steppers Configurations' has been created and added as the parent. This is where the 'Web UI Steppers Configuration Type' object type will reside.
For more information on creating object types, refer to the Creating an Object Type topic in the System Setup documentation.
- Now the 'Steppers Configurations' will appear as an object type root node in the 'System Setup' tab, allowing users to create stepper objects.
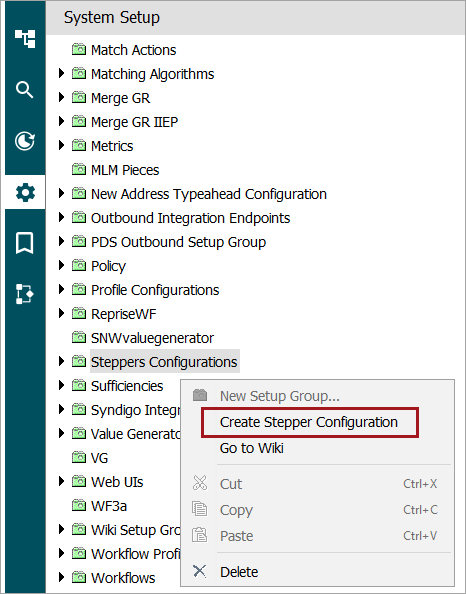
- Right-click on your stepper object type and select 'Create Stepper Configuration.'
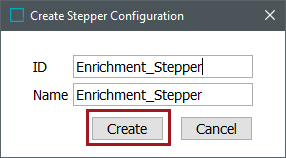
- In the 'Create Stepper Configuration' dialog that displays, add an ID and a name and click 'Create.'
The newly created stepper configuration will display in the Main Window. An unconfigured or blank stepper will look like the screenshot below:
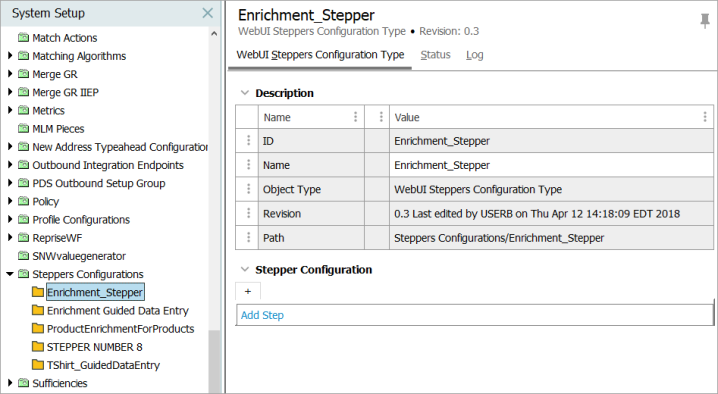
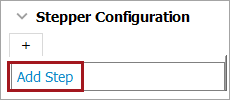
- To configure a stepper, click 'Add Step.'
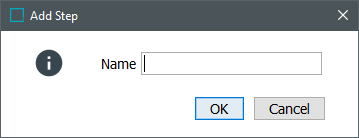
- Name the step based on what kinds of attributes or references users will be expected to enrich.
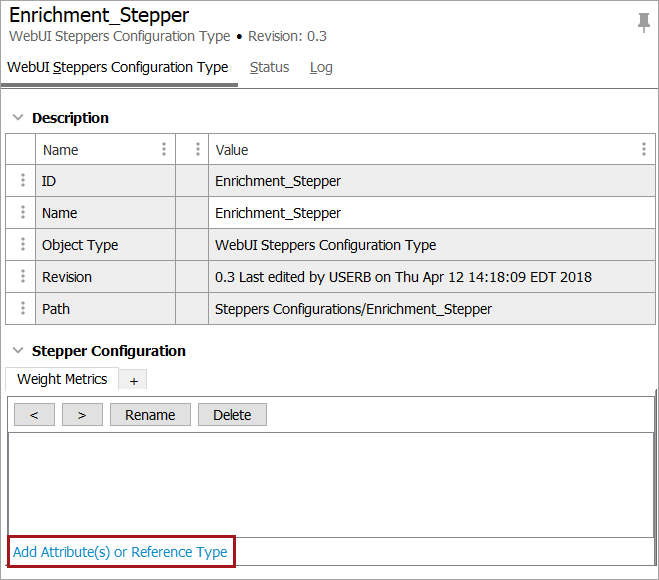
- To add attributes, attribute groups, or reference types to be enriched in the first step, click 'Add Attribute(s) or Reference Type.'
- A new field parameter displays. There are three important aspects to this new field, all of which are numbered in the screenshot below and then described in a numbered list below the screenshot.
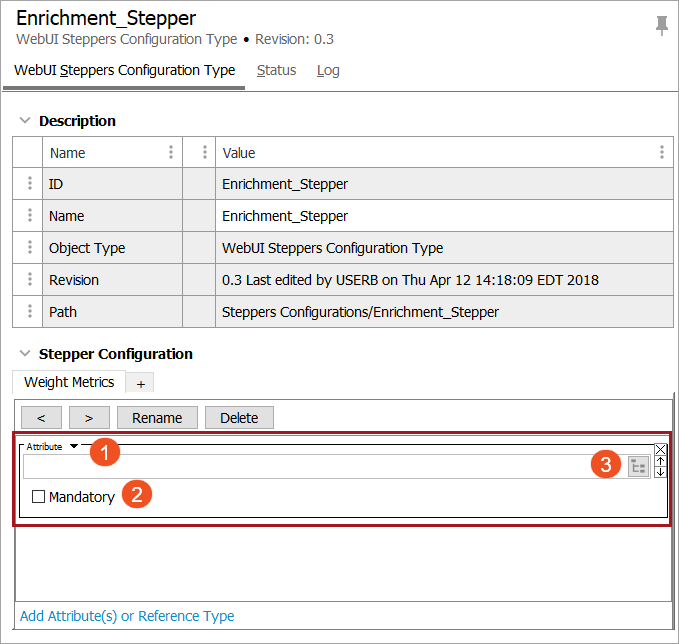
- The object type selector: By clicking this dropdown, users may select whether the field to be added is an attribute, attribute group, or a reference type.
- Mandatory: Users determine whether the added data type is mandatory for completion of the stepper, or optional.
- Node Picker: Click the button (
 ) to display an object selector window that allows users to select, using either the 'Browse' or 'Search' tabs, the attribute, attribute group, or reference type to add to the step.
When you have finished selecting which attribute, attribute group, or reference (or link) type will be included in the step, click 'Add Attribute(s) or Reference Type' again to add another data field to be enriched.
- When all required data fields have been added for the first step, click the '+' button to create a second step.
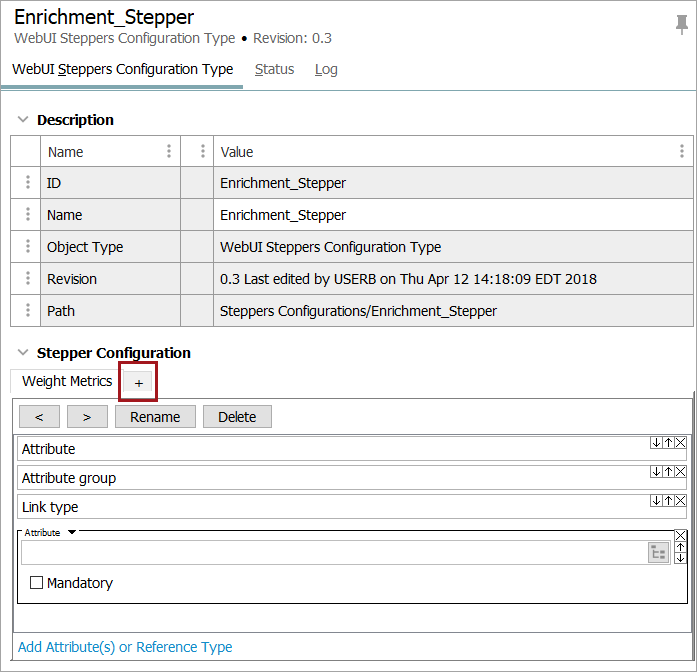
Repeat steps 8-10 for each desired stepper step.
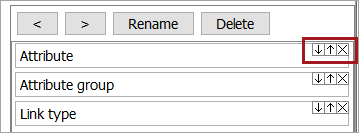
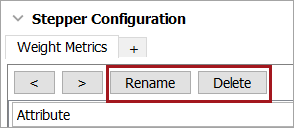
If a step must be renamed or deleted, use the 'Rename' and 'Delete' buttons just beneath the title of the stepper.
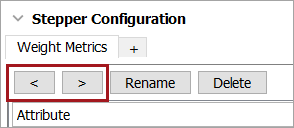
If the steps must be re-ordered, use the '<' and '>' buttons to shift the selected step left or right in the established sequence.
If the various data fields within the step need to be reordered or deleted, users may click the buttons located at the far left of each data field parameter. The up arrow button moves the selected data field up in the established sequence, the down arrow moves the data field down, and the 'X' button deletes the data field from the step.
